Kingchamptwitch (talk | contribs) (Added picture) Tag: Visual edit |
No edit summary Tag: Source edit |
||
| (12 intermediate revisions by 9 users not shown) | |||
| Line 14: | Line 14: | ||
| boss = [[Hashr]] lv. 40 |
| boss = [[Hashr]] lv. 40 |
||
| battlepercent = 85% |
| battlepercent = 85% |
||
| − | | puzzlepercent = 0 |
+ | | puzzlepercent = 0% |
| parkourpercent = 15% |
| parkourpercent = 15% |
||
| ⚫ | |||
| ⚫ | |||
''This dungeon has a corrupted variant; see [[Corrupted Sand-Swept Tomb]].'' |
''This dungeon has a corrupted variant; see [[Corrupted Sand-Swept Tomb]].'' |
||
| Line 24: | Line 24: | ||
==Overview== |
==Overview== |
||
| − | The '''Sand-Swept Tomb''' is a level 36 [[Dungeons|Dungeon]] located northeast of [[Almuj]], in the [[Desert of Almuj|Desert]]. The boss of the dungeon is [[Hashr]], a mighty emperor who once ruled over the |
+ | The '''Sand-Swept Tomb,''' subtitled "''Right Into The Lion's Den..."'' is a level 36 [[Dungeons|Dungeon]] located northeast of [[Almuj]], in the [[Desert of Almuj|Desert]]. The boss of the dungeon is [[Hashr]], the son of a mighty [[The Emperor|emperor]] who once ruled over the Desert. |
The entrance to the dungeon is a large temple-like structure made of sandstone, protected by a magical barrier. To gain access to the dungeon the player has to complete the level 33 [[Quests#Dungeon Quests|Dungeon Quest]] [[Kingdom of Sand]], which is begun by talking to [[Lanu]], a mage trying to break said barrier. |
The entrance to the dungeon is a large temple-like structure made of sandstone, protected by a magical barrier. To gain access to the dungeon the player has to complete the level 33 [[Quests#Dungeon Quests|Dungeon Quest]] [[Kingdom of Sand]], which is begun by talking to [[Lanu]], a mage trying to break said barrier. |
||
| − | A list of the items you |
+ | A list of the items you can purchase with the rewards from this [[Dungeons|Dungeon]] can be found on the [[Dungeon Merchant#Sand-Swept Tomb|Dungeon Merchant]] page. |
==Room 1== |
==Room 1== |
||
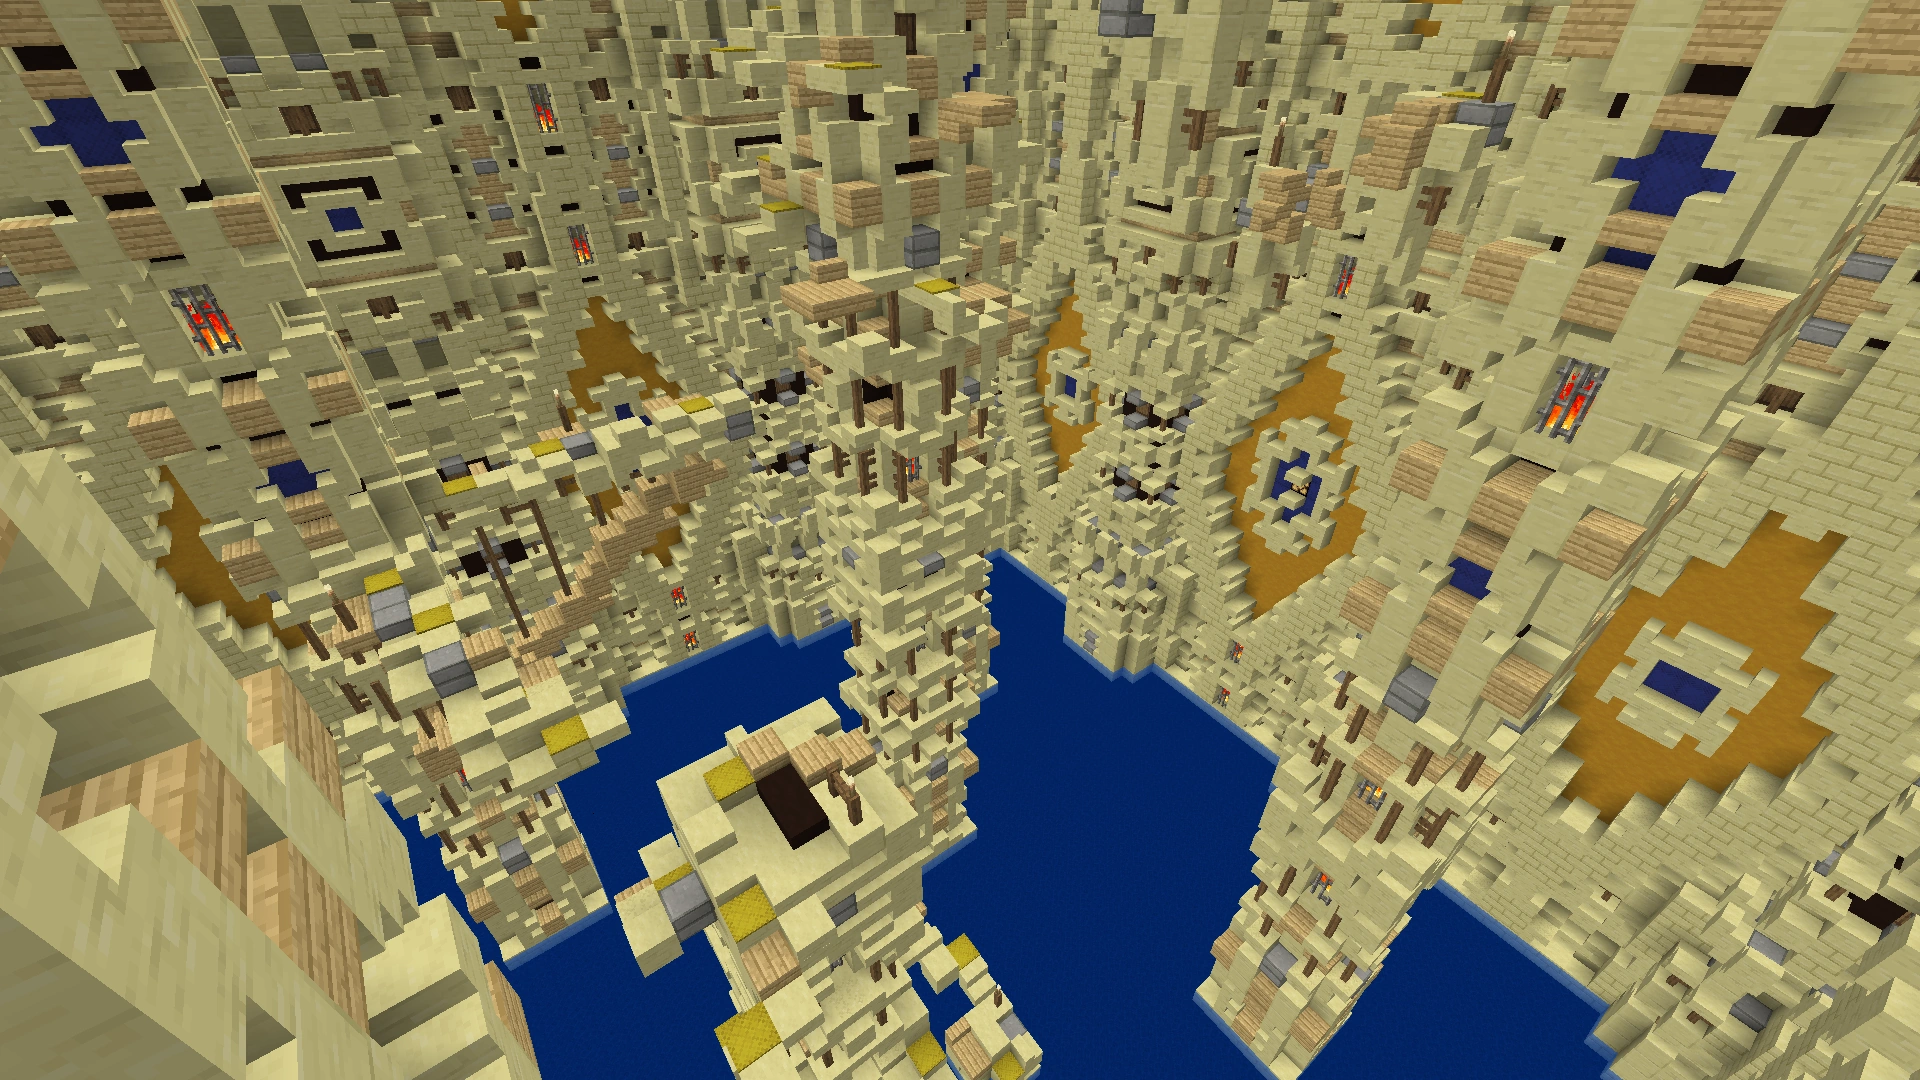
| + | [[File:Sand-SweptTombRoom1.png|600px]]<br> |
||
| ⚫ | The first |
||
| − | |||
'''Dialogue:''' |
'''Dialogue:''' |
||
| − | * |
+ | *'''???:''' Who is the fool that has opened this accursed cage? |
| ⚫ | The first room consists of a fighting challenge. When you stand on the pressure plate in the middle of the room, you will activate three waves of mobs that spawn once every fifteen seconds. The final wave consists only of one miniboss, which drops a token that can be used to enter the next room. However, in some cases the boss will drop a hammer instead of the token. If this happens, you must redo the fight. |
||
| − | |||
| − | {{MobTable |
+ | {{MobTable}} |
| − | | |
+ | |[[File:FleshEater(Appearance1).png|100px]] |
| − | | |
+ | |Flesh Eater |
| − | | |
+ | |36 |
| − | | |
+ | |325 |
| − | | |
+ | |Melee |
| - |
| - |
||
| − | | |
+ | |{{Element|earth}}: Weakness <br> {{Element|air}}: Defence |
| - |
| - |
||
| + | |First Room <br> First Wave |
||
| ⚫ | |||
|- |
|- |
||
| − | | |
+ | |[[File:DartFlinger(Appearance1).png|100px]] |
| − | | |
+ | |Dart Flinger |
| − | | |
+ | |38 |
| − | | |
+ | |452 |
| − | | |
+ | |Ranged |
| - |
| - |
||
| − | | |
+ | |{{Element|earth}}: Damage |
| - |
| - |
||
| + | |First Room <br> Second Wave |
||
| ⚫ | |||
|- |
|- |
||
| − | | |
+ | |[[File:DuneBeast.png|100px]] |
| − | | |
+ | |Dune Beast |
| − | | |
+ | |42 |
| − | | |
+ | |2200 |
| − | | |
+ | |Melee |
| − | | |
+ | |Pull |
| − | | |
+ | |{{Element|earth}}: Damage, Defence |
| − | | |
+ | |Sand-Swept Tomb Token |
| + | |First Room <br> Third Wave |
||
| − | | Sand-Swept Tomb |
||
|- |
|- |
||
|} |
|} |
||
| − | |||
| ⚫ | |||
| − | * '''Hashr:''' I am Emperor Hashr. I once ruled this land with pride and prosperity. But a betrayal from my own kind sealed my fate. |
||
==Room 2== |
==Room 2== |
||
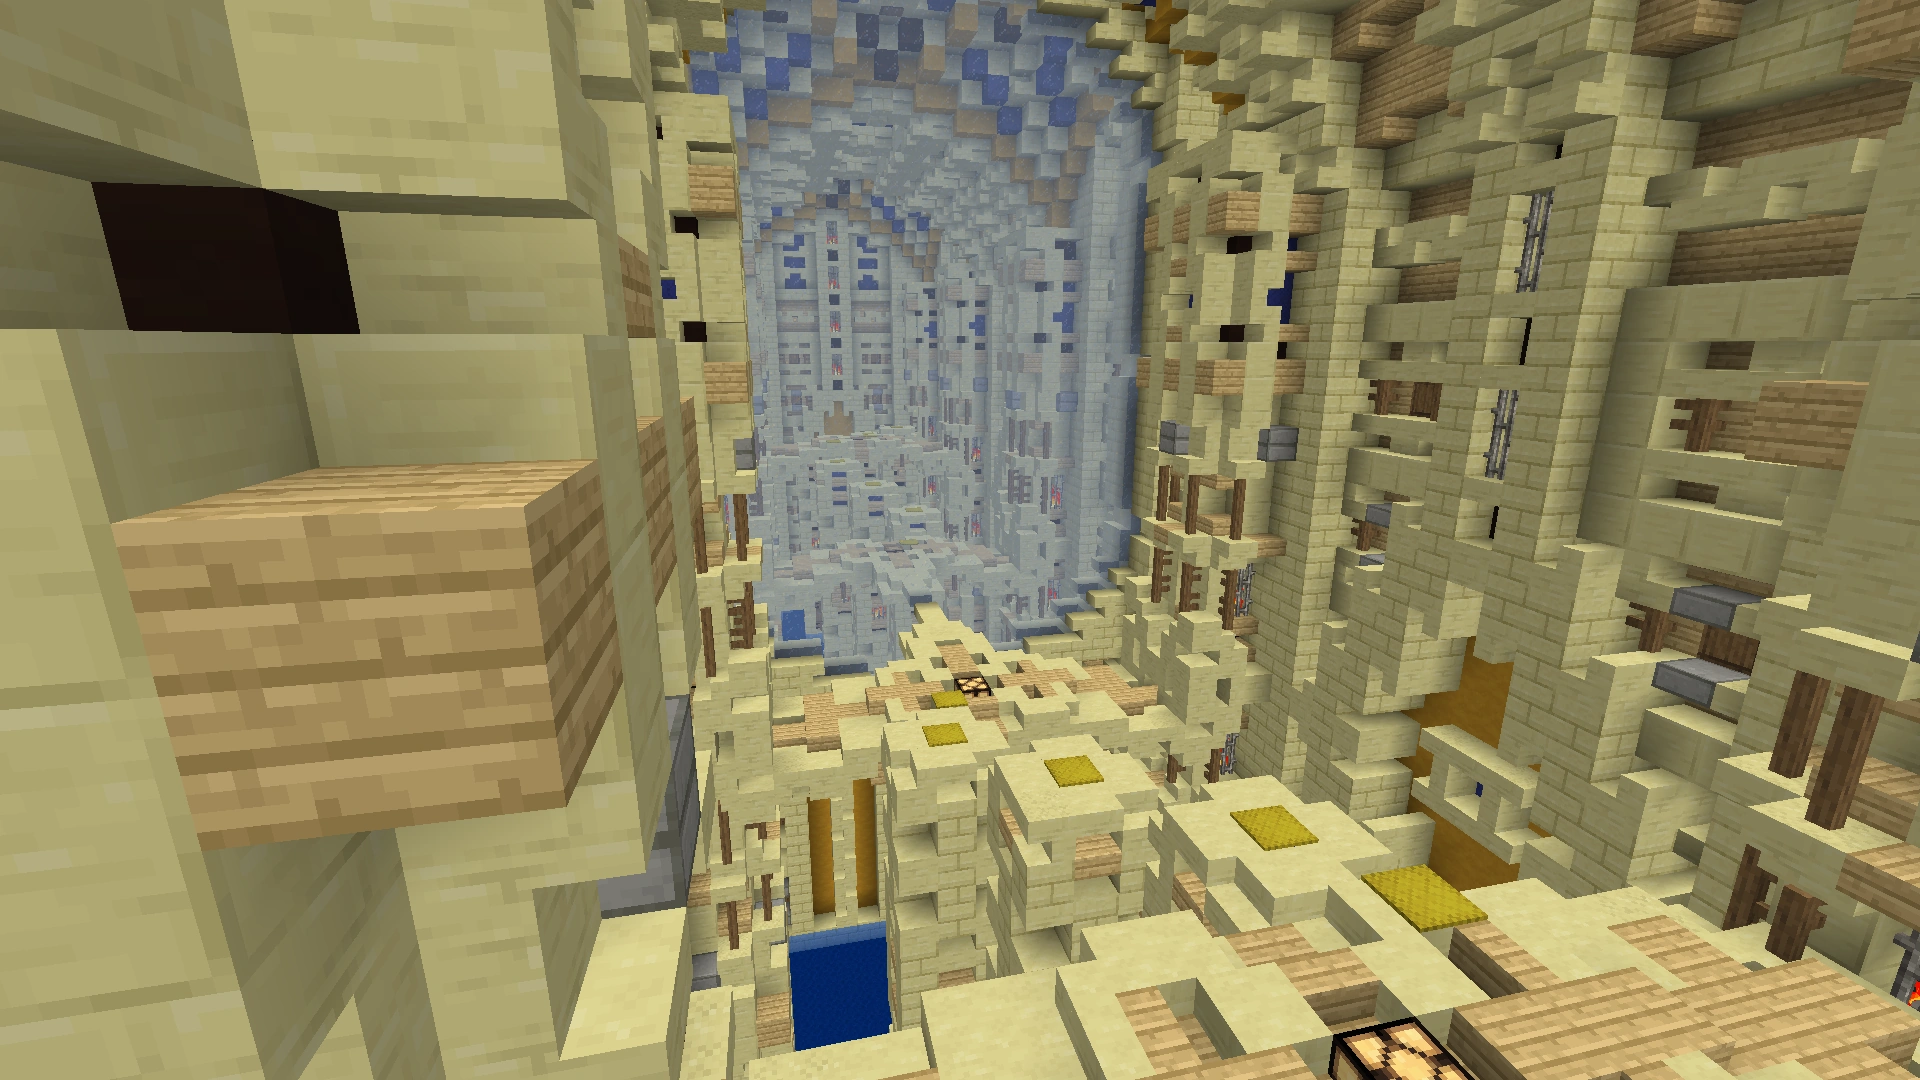
| + | [[File:Sand-SweptTombRoom2.png|600px]]<br> |
||
In the second phase, you walk through a hallway while 'Hidden Wall Traps' pop out of the walls, shooting arrows at you. Press the button at the end of the room, which opens a pitfall in the centre of the room. Run back to the centre of the room and jump down into the water. If you just keep sprinting or use a horse you will not get hit by any of the arrows. |
In the second phase, you walk through a hallway while 'Hidden Wall Traps' pop out of the walls, shooting arrows at you. Press the button at the end of the room, which opens a pitfall in the centre of the room. Run back to the centre of the room and jump down into the water. If you just keep sprinting or use a horse you will not get hit by any of the arrows. |
||
| ⚫ | |||
| − | |||
| ⚫ | |||
| ⚫ | |||
| ⚫ | |||
| ⚫ | |||
| ⚫ | |||
| ⚫ | |||
| + | |Invincible |
||
| ⚫ | |||
| ⚫ | |||
| - |
| - |
||
| ⚫ | |||
| - |
| - |
||
| - |
| - |
||
| + | |Second Room <br> Upper Area |
||
| ⚫ | |||
| − | | Sand-Swept Tomb |
||
|- |
|- |
||
| − | | |
+ | |[[File:HiddenWallTrap(Appearance2).png|100px]] |
| − | | |
+ | |Hidden Wall Trap |
| − | | |
+ | |36 |
| + | |Invincible |
||
| ⚫ | |||
| − | | |
+ | |Ranged |
| - |
| - |
||
| - |
| - |
||
| - |
| - |
||
| + | |Second Room <br> Lower Area |
||
| − | | Sand-Swept Tomb |
||
|- |
|- |
||
|} |
|} |
||
==Room 3== |
==Room 3== |
||
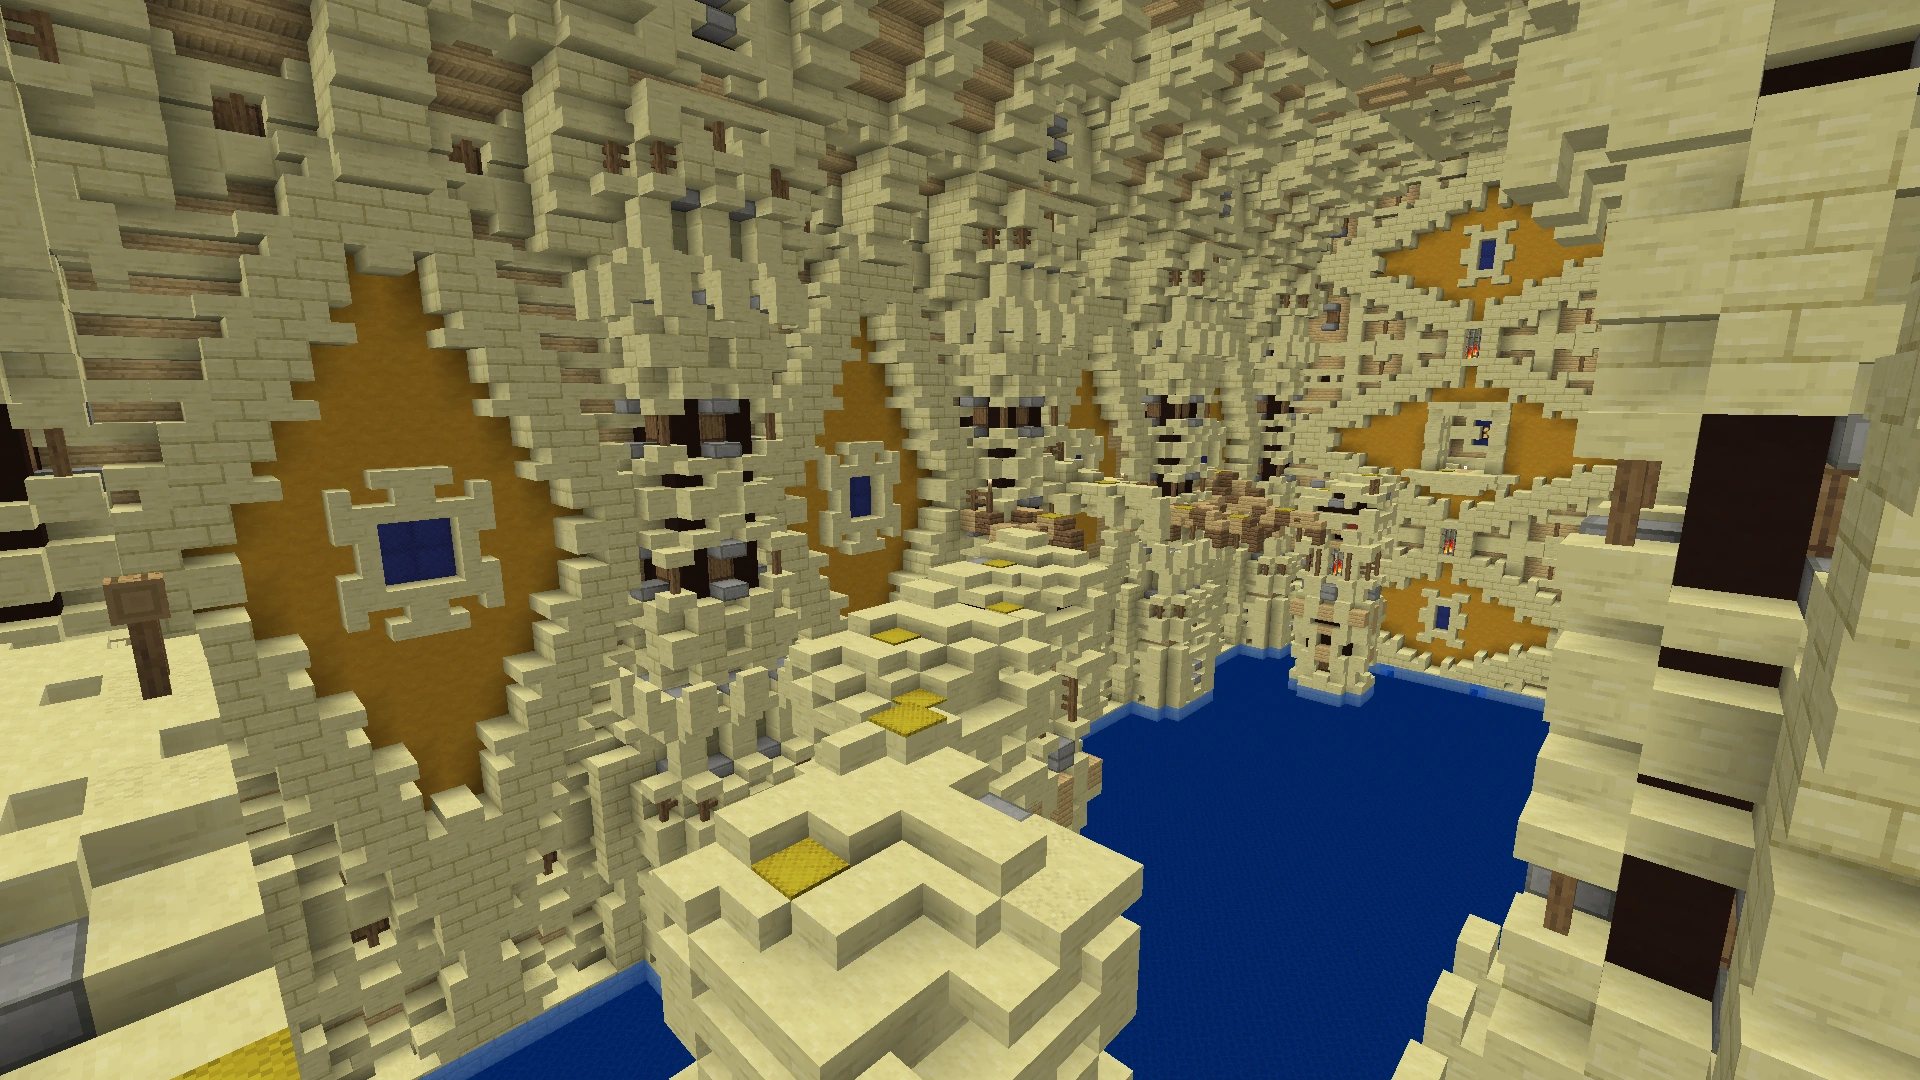
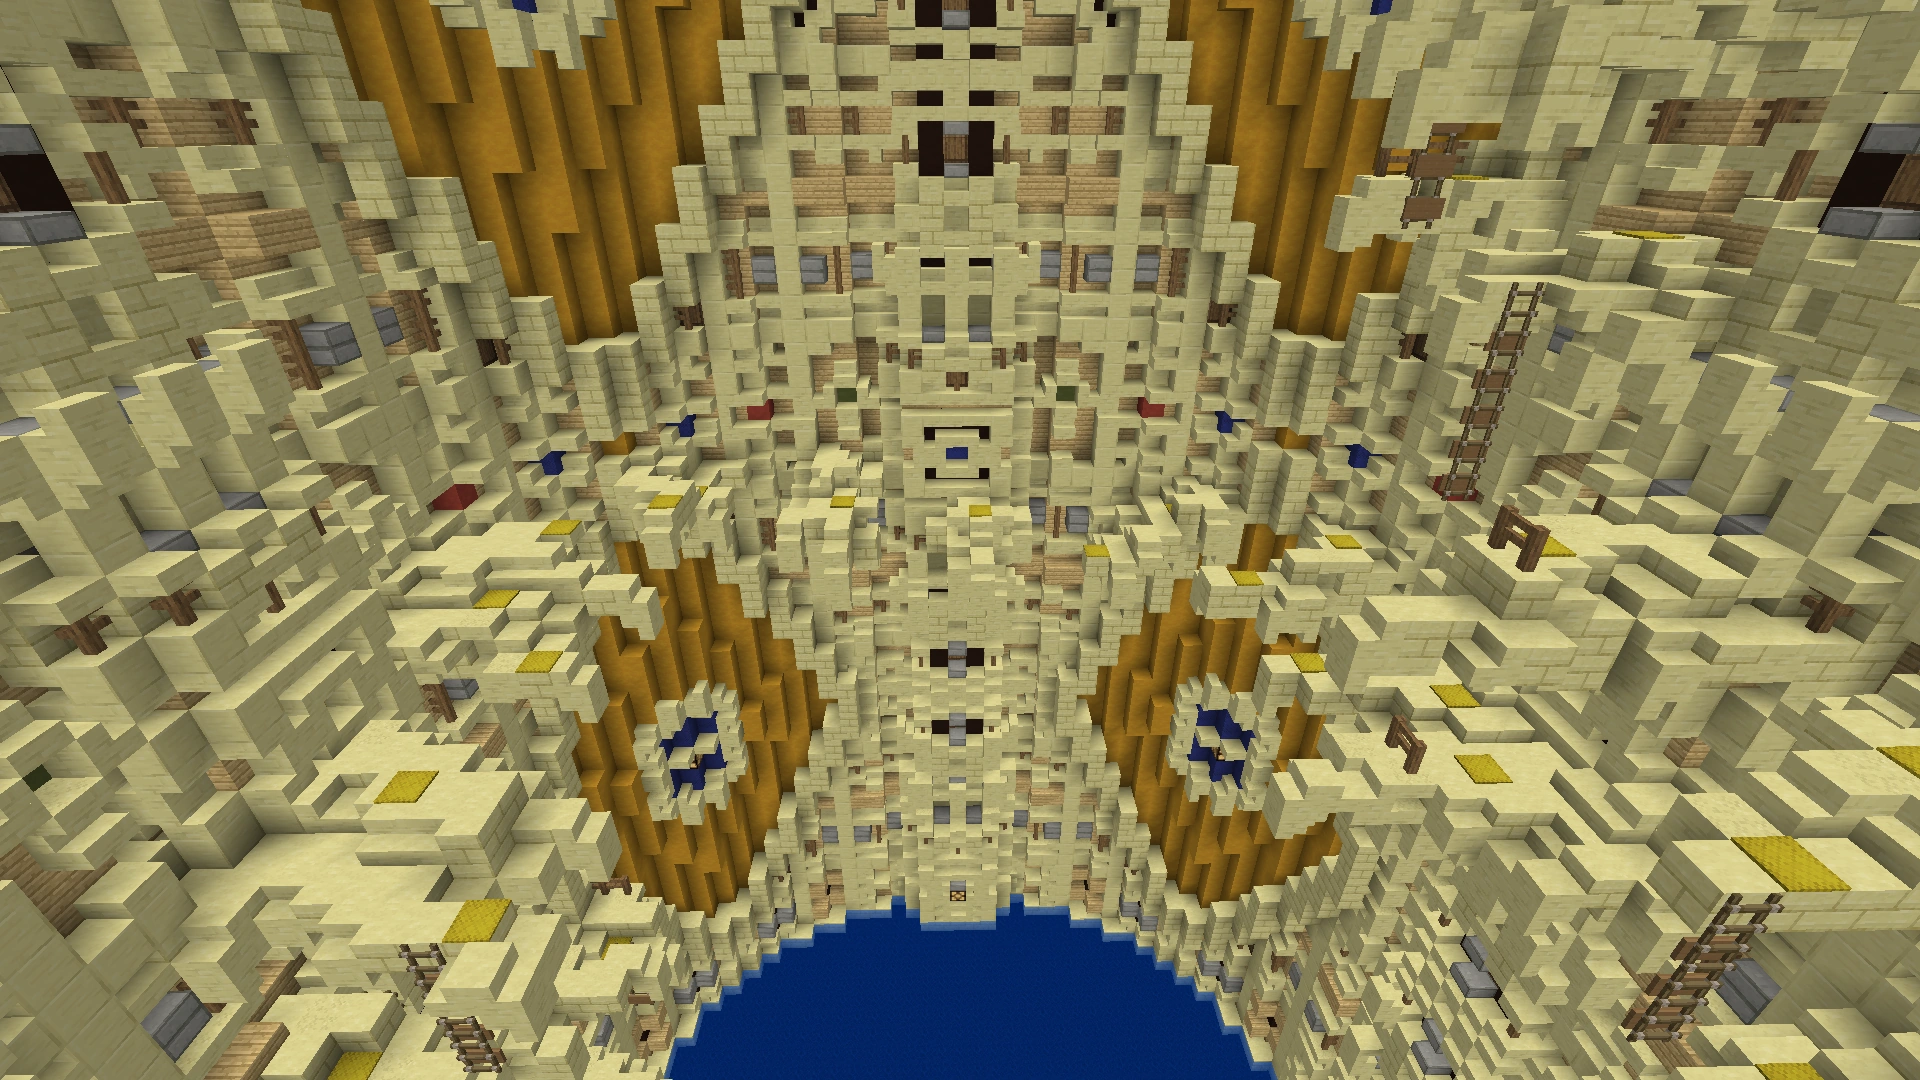
| + | [[File:Sand-SweptTombRoom3.png|600px]]<br> |
||
| − | The third phase is another fighting challenge. You will be teleported to a random location where you will fight monsters to get tokens to move on. The locations you can get teleported to vary in the mobs you will fight and the tokens needed to move on. |
+ | The third phase is another fighting challenge. You will be teleported to a random location where you will fight monsters to get tokens to move on. The locations you can get teleported to vary in the mobs you will fight and the number of tokens needed to move on. |
| + | <tabber> |
||
| − | + | 1 Token Room = |
|
| ⚫ | |||
| + | In this room, you will have to survive three waves of mobs, spawning every 15 seconds, and kill a miniboss in the last wave to move on. |
||
| ⚫ | |||
| ⚫ | |||
| ⚫ | |||
| ⚫ | |||
| ⚫ | |||
| ⚫ | |||
| ⚫ | |||
| ⚫ | |||
| ⚫ | |||
| ⚫ | |||
| ⚫ | |||
| - |
| - |
||
| − | | |
+ | |{{Element|earth}}: Weakness <br> {{Element|air}}: Defence |
| - |
| - |
||
| + | |1 Token Room <br> First Wave |
||
| − | | Sand-Swept Tomb |
||
|- |
|- |
||
| − | | |
+ | |[[File:WhirlwindBeast.png|100px]] |
| − | | |
+ | |Whirlwind Beast |
| − | | |
+ | |40 |
| − | | |
+ | |1650 |
| − | | |
+ | |Melee |
| − | | |
+ | |Charge |
| − | | |
+ | |{{Element|fire}}: Weakness <br> {{Element|air}}: Damage, Defence |
| - |
| - |
||
| + | |1 Token Room <br> First Wave, Third Wave |
||
| − | | Sand-Swept Tomb |
||
|- |
|- |
||
| − | | |
+ | |[[File:Shambler(Appearance1).png|100px]] |
| − | | |
+ | |Shambler |
| − | | |
+ | |38 |
| − | | |
+ | |800 |
| − | | |
+ | |Melee |
| - |
| - |
||
| - |
| - |
||
| - |
| - |
||
| + | |1 Token Room <br> Second Wave |
||
| − | | Sand-Swept Tomb |
||
|- |
|- |
||
| − | | |
+ | |[[File:SaltrotSlavedriver.png|100px]] |
| − | | |
+ | |Saltrot Slavedriver |
| − | | |
+ | |41 |
| − | | |
+ | |2175 |
| − | | |
+ | |Ranged |
| − | | |
+ | |Weakness II |
| − | | |
+ | |{{Element|water}}: Weakness <br> {{Element|earth}}: Defence |
| - |
| - |
||
| + | |1 Token Room <br> Second Wave |
||
| − | | Sand-Swept Tomb |
||
|- |
|- |
||
| − | | |
+ | |[[File:Dustlion.png|100px]] |
| − | | |
+ | |Dustlion |
| − | | |
+ | |42 |
| − | | |
+ | |2125 |
| − | | |
+ | |Ranged |
| − | | |
+ | |Teleport, Pull |
| − | | |
+ | |{{Element|air}}: Weakness, Damage <br> {{Element|earth}}: Damage, Defence |
| − | | |
+ | |Sand-Swept Tomb Token |
| + | |1 Token Room <br> Third Wave |
||
| − | | Sand-Swept Tomb |
||
|- |
|- |
||
|} |
|} |
||
| + | |-| |
||
| − | |||
| − | + | 6 Tokens Room = |
|
| + | In this room, you will have to kill 6 of the large mobs while being swarmed by the other mobs in the room to progress. |
||
| − | {{MobTable |
+ | {{MobTable}} |
| ⚫ | |||
| − | | |
+ | |[[File:Dustling.png|100px]] |
| + | |Dustling |
||
| − | | |
+ | |38 |
| − | | |
+ | |475 |
| − | | |
+ | |Melee |
| - |
| - |
||
| − | | |
+ | |{{Element|air}}: Weakness, Damage <br> {{Element|earth}}: Damage |
| - |
| - |
||
| + | |6 Tokens Room, <br> Dust Devil |
||
| − | | Sand-Swept Tomb |
||
|- |
|- |
||
| − | | |
+ | |[[File:DustDevil.png|100px]] |
| − | | |
+ | |Dust Devil |
| − | | |
+ | |40 |
| − | | |
+ | |975 |
| − | | |
+ | |Melee |
| − | | |
+ | |Vanish |
| − | | |
+ | |{{Element|air}}: Weakness, Damage <br> {{Element|earth}}: Damage, Defence |
| − | | |
+ | |Sand-Swept Tomb Token, <br> 4 Dustlings |
| + | |6 Tokens Room |
||
| − | | Sand-Swept Tomb |
||
|- |
|- |
||
|} |
|} |
||
| + | |-| |
||
| − | |||
| − | + | 15 Tokens Room = |
|
| + | In this room, you have to kill 15 slowly spawning token mobs while being peppered with arrows by ranged mobs in the walls of the room. |
||
| − | {{MobTable |
+ | {{MobTable}} |
| − | | |
+ | |[[File:HiddenWallTrap(Appearance3).png|100px]] |
| − | | |
+ | |Hidden Wall Trap |
| ⚫ | |||
| − | | |
+ | |36 |
| + | |Invincible |
||
| − | | |
+ | |Ranged |
| - |
| - |
||
| - |
| - |
||
| - |
| - |
||
| + | |15 Tokens Room |
||
| − | | Sand-Swept Tomb |
||
|- |
|- |
||
| − | | |
+ | |[[File:LimestoneJackal.png|100px]] |
| − | | |
+ | |Limestone Jackal |
| − | | |
+ | |39 |
| − | | |
+ | |575 |
| − | | |
+ | |Melee |
| − | | |
+ | |Charge |
| - |
| - |
||
| − | | |
+ | |Sand-Swept Tomb Token |
| + | |15 Tokens Room |
||
| − | | Sand-Swept Tomb |
||
|- |
|- |
||
|} |
|} |
||
| + | |-| |
||
| − | |||
| − | + | 30 Tokens Room = |
|
| − | {{MobTable |
+ | {{MobTable}} |
| − | | |
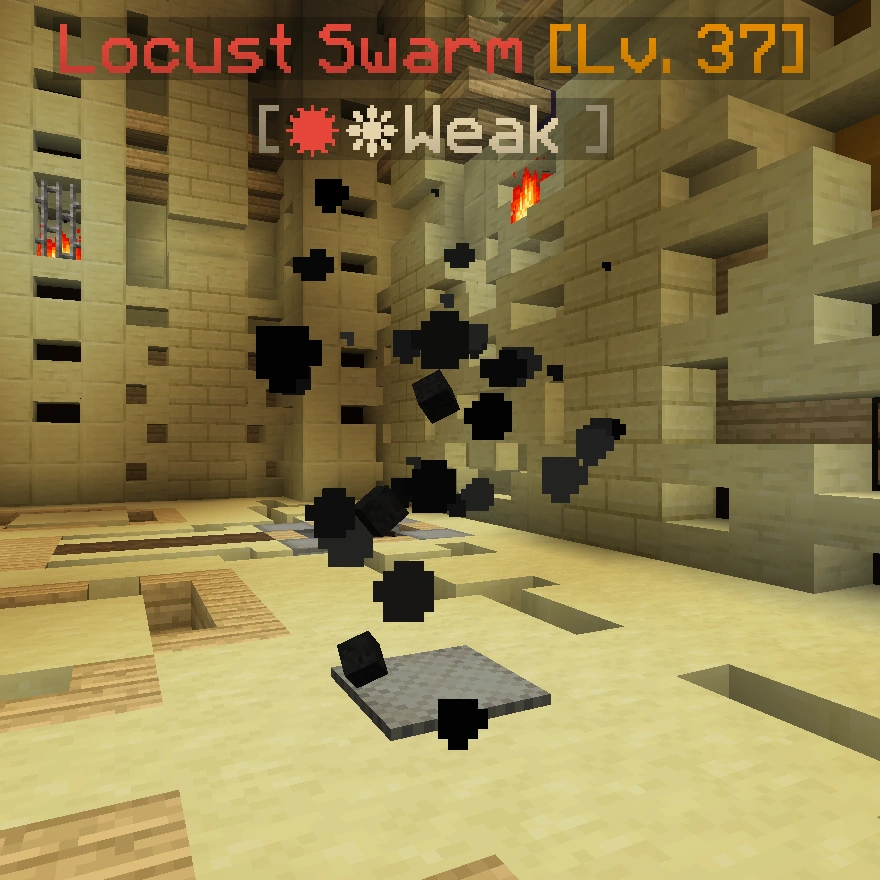
+ | |[[File:LocustSwarm.png|100px]] |
| − | | |
+ | |Locust Swarm |
| − | | |
+ | |37 |
| − | | |
+ | |360 |
| − | | |
+ | |Melee |
| - |
| - |
||
| − | | |
+ | |{{Element|fire}}: Weakness <br> {{Element|air}}: Weakness |
| − | | |
+ | |Sand-Swept Tomb Token |
| + | |30 Tokens Room |
||
| − | | Sand-Swept Tomb |
||
|- |
|- |
||
| − | | |
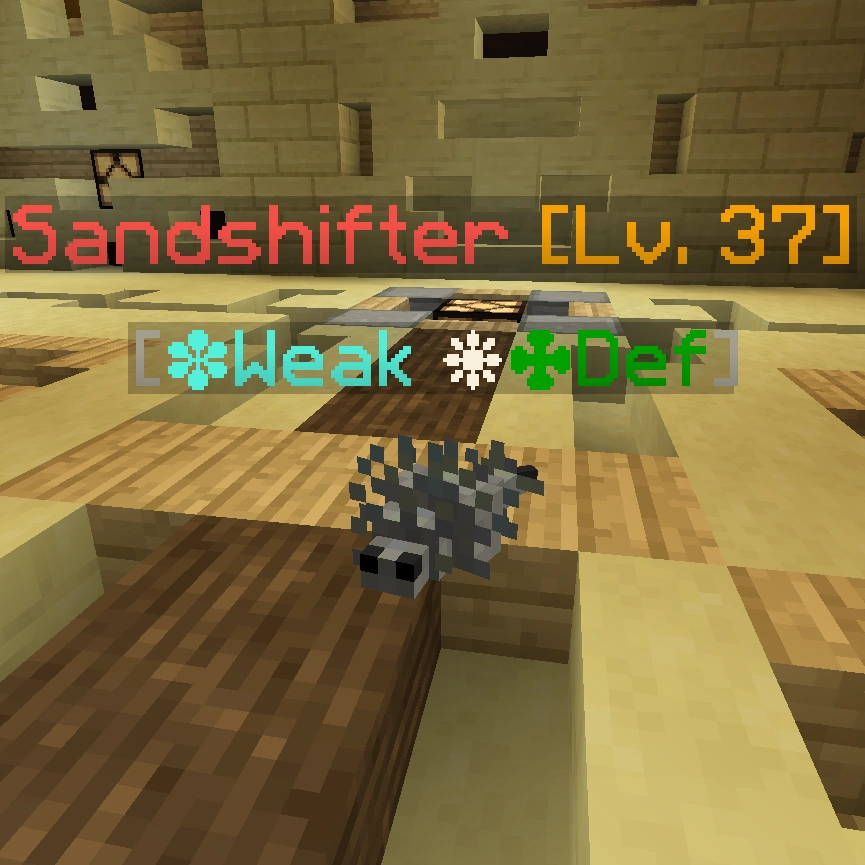
+ | |[[File:Sandshifter.png|100px]] |
| − | | |
+ | |Sandshifter |
| − | | |
+ | |37 |
| − | | |
+ | |500 |
| − | | |
+ | |Melee |
| - |
| - |
||
| − | | |
+ | |{{Element|water}}: Weakness <br> {{Element|air}}: Defence <br> {{Element|earth}}: Defence |
| − | | |
+ | |Sand-Swept Tomb Token |
| + | |30 Tokens Room |
||
| − | | Sand-Swept Tomb |
||
|- |
|- |
||
|} |
|} |
||
| + | </tabber> |
||
==Room 4== |
==Room 4== |
||
| − | The fourth |
+ | The fourth room is a parkour challenge. Similarly to the third room, there are multiple possible parkours, and you will be sent to one randomly. |
| + | <tabber> |
||
| + | Parkour Room 1 = |
||
| + | [[File:Sand-SweptTombRoom4a.png|600px]]<br> |
||
| + | In this parkour, you have to go straight across the room, jumping on sandstone and wooden platforms, however, the wooden platforms will break soon after you land on them. |
||
| + | |-| |
||
| + | Parkour Room 2 = |
||
| + | [[File:Sand-SweptTombRoom4b.png|600px]]<br> |
||
| + | In this parkour, you simply have to parkour up to the top of the room, going around the edges, across nether brick platforms and up the occasional ladder. |
||
| + | |-| |
||
| + | Parkour Room 3 = |
||
| + | [[File:Sand-SweptTombRoom4c.png|600px]]<br> |
||
| + | In this parkour, you simply have to parkour, from the bottom of the room, around a few of the short towers to reach an exit in the side of the room. |
||
| + | |-| |
||
| + | Parkour Room 4 = |
||
| + | [[File:Sand-SweptTombRoom4d.png|600px]]<br> |
||
| + | In this parkour, you have to jump across the pillars in the room. Halfway through, you will pass through a mirror which also functions as a checkpoint, and you will have to do the same parkour as in the first half, but reversed. This parkour is noticeably longer than the other three, but is also the simplest. |
||
| + | </tabber> |
||
==Room 5== |
==Room 5== |
||
| + | [[File:Sand-SweptTombRoom5.png|600px]]<br> |
||
| ⚫ | |||
| ⚫ | |||
| − | |||
| + | *'''???:''' You are not of the old empire... Not one of those who forced me in here. |
||
| ⚫ | |||
| + | *'''???:''' Why do you take arms against me? I only tried to save my people from my father! |
||
| ⚫ | |||
| ⚫ | |||
| ⚫ | |||
| ⚫ | |||
| − | | 36 |
||
| ⚫ | |||
| ⚫ | |||
| ⚫ | |||
| ⚫ | |||
| ⚫ | |||
| ⚫ | |||
| ⚫ | |||
| - |
| - |
||
| − | | |
+ | |{{Element|earth}}: Weakness <br> {{Element|air}}: Defence |
| - |
| - |
||
| + | |Fifth Room |
||
| − | | Sand-Swept Tomb |
||
|- |
|- |
||
| − | | |
+ | |[[File:Shambler(Appearance2).png|100px]] |
| − | | |
+ | |Shambler |
| − | | |
+ | |38 |
| − | | |
+ | |800 |
| − | | |
+ | |Melee |
| - |
| - |
||
| - |
| - |
||
| - |
| - |
||
| + | |Fifth Room |
||
| − | | Sand-Swept Tomb |
||
|- |
|- |
||
| − | | |
+ | |[[File:DuneGladiator.png|100px]] |
| − | | |
+ | |Dune Gladiator |
| − | | |
+ | |40 |
| − | | |
+ | |610 |
| − | | |
+ | |Melee |
| - |
| - |
||
| - |
| - |
||
| - |
| - |
||
| + | |Fifth Room |
||
| − | | Sand-Swept Tomb |
||
|- |
|- |
||
| − | | |
+ | |[[File:DuneRaiser.png|100px]] |
| − | | |
+ | |Dune Raiser |
| − | | |
+ | |40 |
| − | | |
+ | |670 |
| − | | |
+ | |Ranged |
| - |
| - |
||
| - |
| - |
||
| - |
| - |
||
| + | |Fifth Room |
||
| − | | Sand-Swept Tomb |
||
|- |
|- |
||
| − | | |
+ | |[[File:DartFlinger(Appearance2).png|100px]] |
| − | | |
+ | |Dart Flinger |
| − | | |
+ | |38 |
| − | | |
+ | |452 |
| − | | |
+ | |Ranged |
| - |
| - |
||
| − | | |
+ | |{{Element|earth}}: Damage |
| - |
| - |
||
| + | |Fifth Room |
||
| − | | Sand-Swept Tomb |
||
|- |
|- |
||
|} |
|} |
||
==Room 6== |
==Room 6== |
||
| + | [[File:Sand-SweptTombRoom6.png|600px]]<br> |
||
| − | The ground will crumble behind you when you enter the next room, and |
+ | The ground will crumble behind you when you enter the middle section of the next room, and you must run across it without falling. If you fall, you will have to collect 3 tokens from mobs in the lower area to go back and try crossing again. |
| ⚫ | |||
| ⚫ | |||
| + | |The Hungry |
||
| ⚫ | |||
| + | |610 |
||
| + | |Melee |
||
| ⚫ | |||
| + | |{{Element|earth}}: Weakness |
||
| ⚫ | |||
| + | |Sixth Room <br> Underneath Floor |
||
| ⚫ | |||
| + | |} |
||
==Boss== |
==Boss== |
||
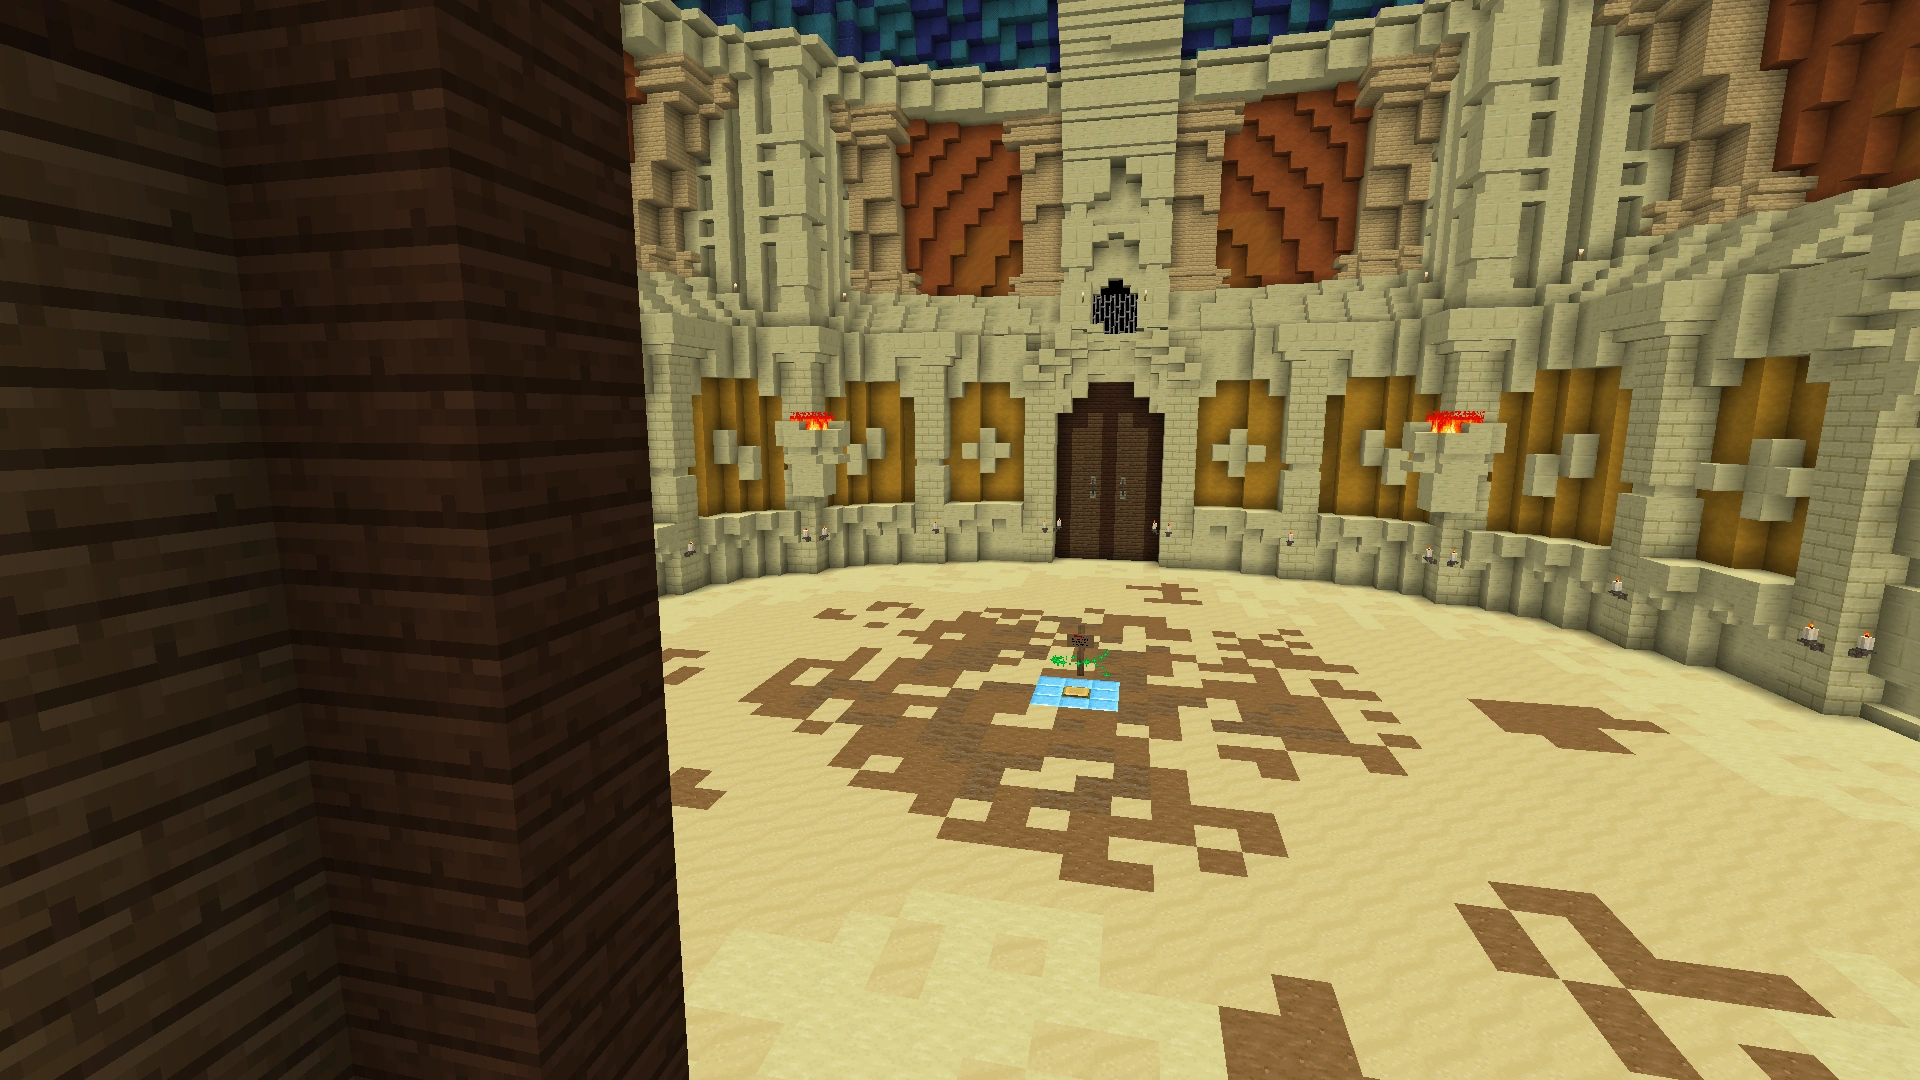
| + | [[File:Sand-SweptTombRoom7.png|600px]]<br> |
||
'''Dialogue:''' |
'''Dialogue:''' |
||
| − | * |
+ | *'''Hashr:''' If you insist on ending me, then I'll dispose of you like I did that wretched emperor! |
| ⚫ | The boss of this dungeon is [[Hashr]], appearing alone in the room. When the player defeats his first phase, the floor will collapse and the player will fall down to another area containing the second and third stages of the boss fight. Once he is killed, the player will then be teleported out of the dungeon and receive their rewards. |
||
| − | |||
| + | {{MobTable}} |
||
| ⚫ | The boss of this dungeon is Hashr, appearing alone in the room. When the player |
||
| ⚫ | |||
| − | |||
| ⚫ | |||
| ⚫ | |||
| + | |40 |
||
| ⚫ | |||
| ⚫ | |||
| ⚫ | |||
| + | |Melee |
||
| ⚫ | |||
| ⚫ | |||
| ⚫ | |||
| − | | |
+ | | - |
| ⚫ | |||
| - |
| - |
||
| + | |Boss Room <br> Upper Area |
||
| ⚫ | |||
| − | | Sand-Swept Tomb |
||
|- |
|- |
||
| − | | |
+ | |[[File:Hashr(Phase2).png|100px]] |
| − | | |
+ | |Hashr (Phase 2) |
| − | | |
+ | |45 |
| − | | |
+ | |8000 |
| − | | |
+ | |Melee |
| − | | |
+ | |Multihit, <br> Pull, <br> Charge |
| − | | |
+ | |{{Element|thunder}}: Damage |
| − | | |
+ | |Hashr (Phase 3) |
| + | |Boss Room <br> Lower Area |
||
| − | | Sand-Swept Tomb |
||
|- |
|- |
||
| − | | |
+ | |[[File:Hashr(Phase3).png|100px]] |
| − | | |
+ | |Hashr (Phase 3) |
| − | | |
+ | |45 |
| − | | |
+ | |4000 |
| − | | |
+ | |Melee |
| − | | |
+ | |Multihit, <br> Charge, <br> Vanish |
| − | | |
+ | |{{Element|thunder}}: Damage |
| - |
| - |
||
| ⚫ | |||
| − | | Sand-Swept Tomb |
||
|- |
|- |
||
|} |
|} |
||
| + | |||
| + | == Dungeon Merchant == |
||
| + | The Dungeon Merchant in front of the Sand-Swept Tomb sells: |
||
| + | {{Trade |
||
| + | |merchant=Dungeon Merchant |
||
| + | |{{TradeRow|in=Hashr's Bone|inimg={{WynnIcon|dead bush}}|inamount=2|out=Dune Beast Jaw|outimg={{ArmourIcon|golden helmet}}}} |
||
| + | |{{TradeRow|in=Hashr's Bone|inimg={{WynnIcon|dead bush}}|inamount=3|out=Sol|outimg={{WeaponIcon|spear_fire2}}}} |
||
| + | |{{TradeRow|in=Hashr's Bone|inimg={{WynnIcon|dead bush}}|inamount=3|out=Jaw Breaker|outimg={{WeaponIcon|dagger_earth3}}}} |
||
| + | |{{TradeRow|in=Hashr's Bone|inimg={{WynnIcon|dead bush}}|inamount=3|out=Miasma|outimg={{WeaponIcon|bow_air3}}}} |
||
| + | |{{TradeRow|in=Hashr's Bone|inimg={{WynnIcon|dead bush}}|inamount=3|out=Clunderthap|outimg={{WeaponIcon|wand_thunder2}}}} |
||
| + | |{{TradeRow|in=Hashr's Bone|inimg={{WynnIcon|dead bush}}|inamount=5|out=Springtrap|outimg={{ArmourIcon|chain chestplate}}}} |
||
| + | |{{TradeRow|in=Hashr's Bone|inimg={{WynnIcon|dead bush}}|inamount=5|out=Hashr Claw|outimg={{WeaponIcon|dagger_thunder2}}}} |
||
| + | |{{TradeRow|in=Hashr's Bone|inimg={{WynnIcon|dead bush}}|inamount=5|out=Karma|outimg={{WeaponIcon|spear_water2}}}} |
||
| + | |{{TradeRow|in=Hashr's Bone|inimg={{WynnIcon|dead bush}}|inamount=5|out=Chaser|outimg={{WeaponIcon|bow_air3}}}} |
||
| + | |{{TradeRow|in=Hashr's Bone|inimg={{WynnIcon|dead bush}}|inamount=5|out=Sprout|outimg={{WeaponIcon|wand_earth2}}}} |
||
| + | |{{TradeRow|in=Sand-Swept Tomb Fragment|inimg={{WynnIcon|cocoa beans}}|inamount=2|out=Dungeon Teleport Scroll|outimg={{WynnIcon|paper}}}} |
||
| + | |{{TradeRow|in=Sand-Swept Tomb Fragment|inimg={{WynnIcon|cocoa beans}}|inamount=3|out=Gathering Axe T5|outimg={{ProfessionIcon|stone axe}}}} |
||
| + | |{{TradeRow|in=Sand-Swept Tomb Fragment|inimg={{WynnIcon|cocoa beans}}|inamount=3|out=Gathering Pickaxe T5|outimg={{ProfessionIcon|stone pickaxe}}}} |
||
| + | |{{TradeRow|in=Sand-Swept Tomb Fragment|inimg={{WynnIcon|cocoa beans}}|inamount=3|out=Gathering Scythe T5|outimg={{ProfessionIcon|stone hoe}}}} |
||
| + | |{{TradeRow|in=Sand-Swept Tomb Fragment|inimg={{WynnIcon|cocoa beans}}|inamount=3|out=Gathering Rod T5|outimg={{ProfessionIcon|stone rod}}}} |
||
| ⚫ | |||
==Tips== |
==Tips== |
||
| − | *When being teleported |
+ | *When being teleported to the third and fourth rooms, you will most likely get separated from others doing the dungeon with you. You can meet back up in the fifth room. |
| − | *In the fifth phase, you can easily survive 60 seconds by just getting on a horse and circling the room |
+ | *In the fifth phase, you can easily survive for 60 seconds by just getting on a [[Horses|horse]] and circling the room |
| − | |||
| − | <br /> |
||
==Trivia== |
==Trivia== |
||
| − | |||
*This dungeon replaced the [[Silverfish Dungeon]] as of the [[Version History#1.14.1|1.14.1 Gameplay Update]]. |
*This dungeon replaced the [[Silverfish Dungeon]] as of the [[Version History#1.14.1|1.14.1 Gameplay Update]]. |
||
Revision as of 03:05, 1 June 2022
| Sand-Swept Tomb | |
| |
| Access | |
|---|---|
| Coordinates | X: 1409, Z: -1830 |
| Suggested Level | 36 |
| Reward | As follows:
|
| Battle | |
| Monsters | Flesh Eater (Lv. 33) Dart Flinger (Lv. 33) Hidden Wall Trap Anubie (Lv. 33) Sphinx (Lv. 33) Tomb Guardian (Lv. 33) |
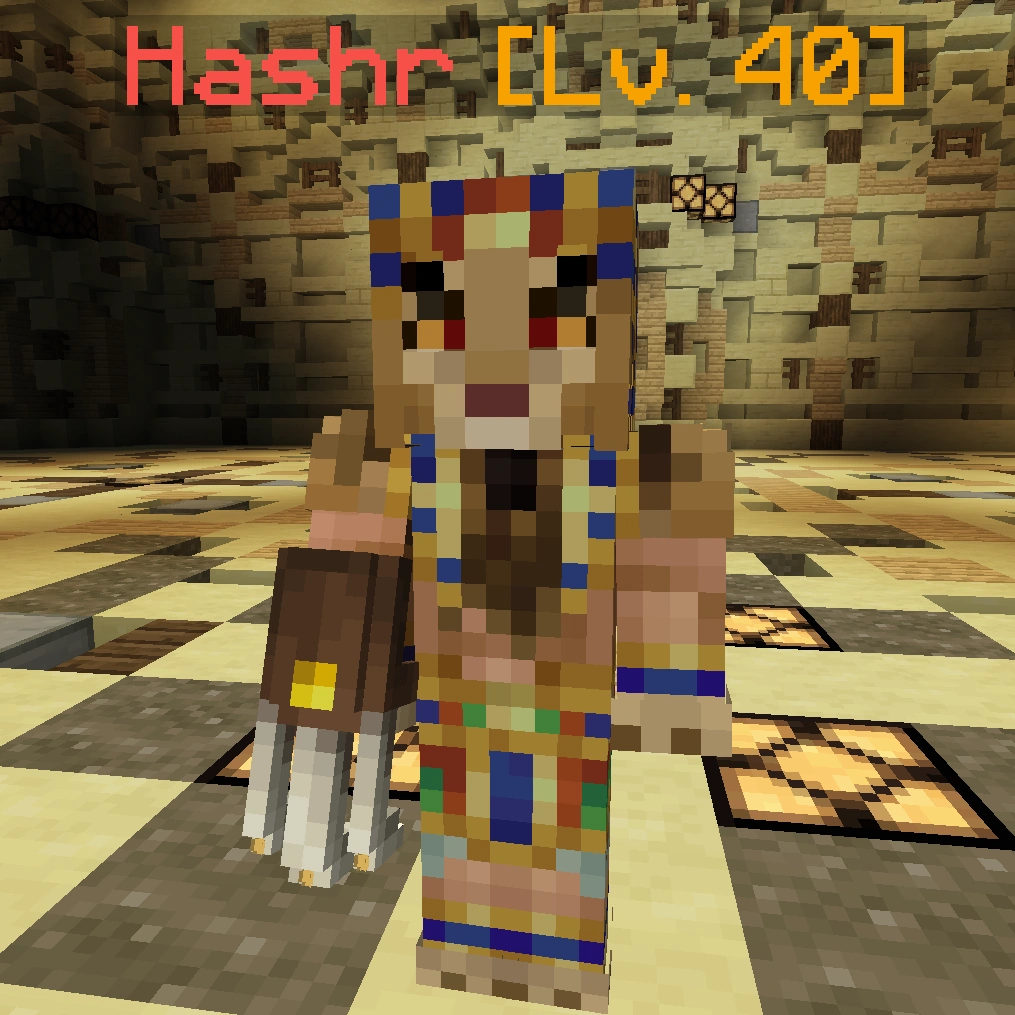
| Boss | Hashr lv. 40 |
| Dungeon | |
| Battle | 85% |
| Puzzle | 0% |
| Parkour | 15% |

This dungeon has a corrupted variant; see Corrupted Sand-Swept Tomb.
"The mysterious tomb lied buried in the sand before Humans ever arrived into the desert from Fruma. Although uncovered, the tomb contains lethal secrets."
Overview
The Sand-Swept Tomb, subtitled "Right Into The Lion's Den..." is a level 36 Dungeon located northeast of Almuj, in the Desert. The boss of the dungeon is Hashr, the son of a mighty emperor who once ruled over the Desert.
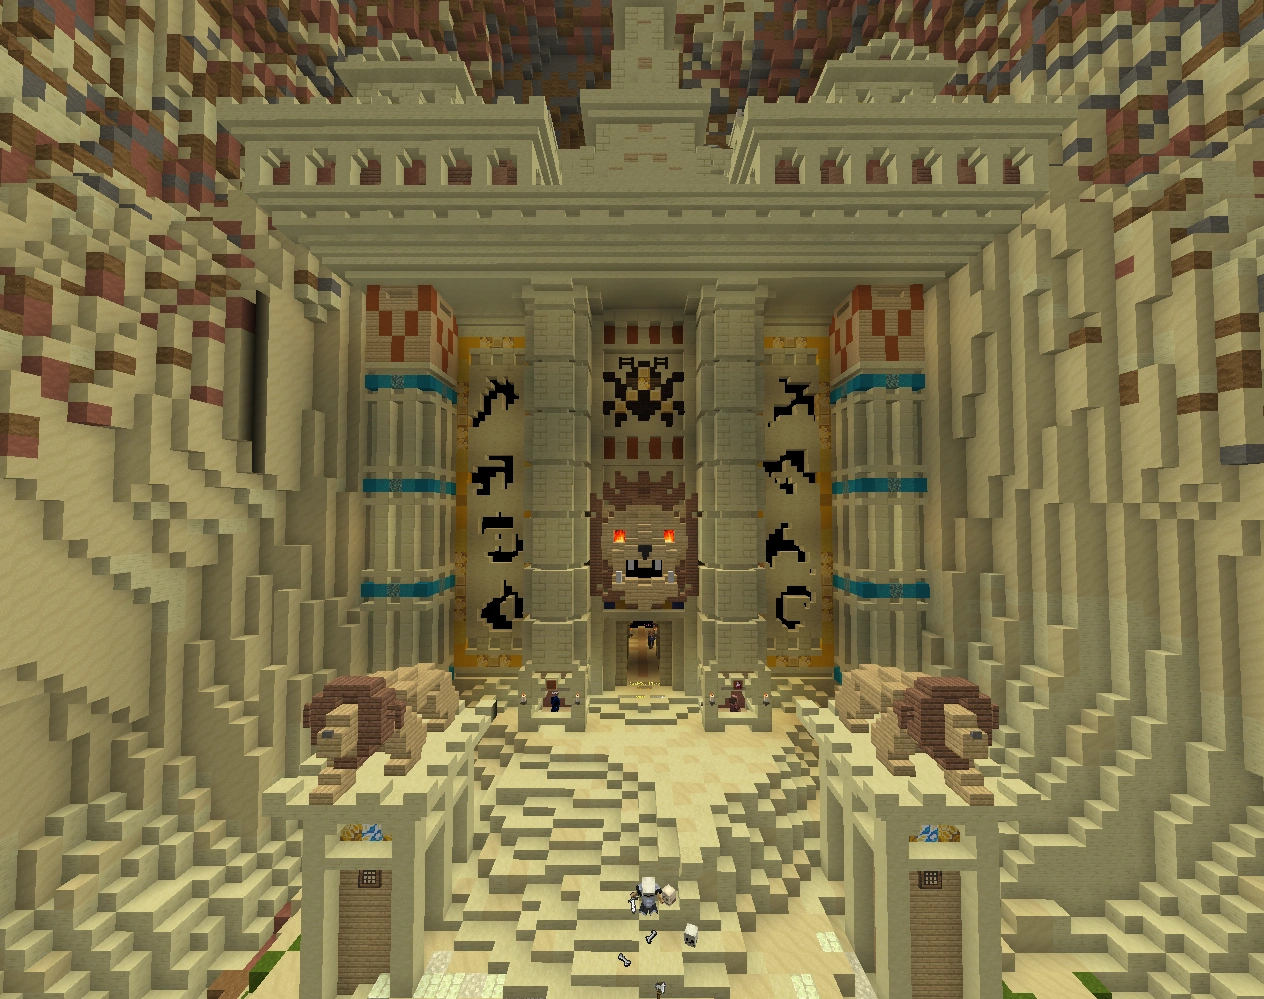
The entrance to the dungeon is a large temple-like structure made of sandstone, protected by a magical barrier. To gain access to the dungeon the player has to complete the level 33 Dungeon Quest Kingdom of Sand, which is begun by talking to Lanu, a mage trying to break said barrier.
A list of the items you can purchase with the rewards from this Dungeon can be found on the Dungeon Merchant page.
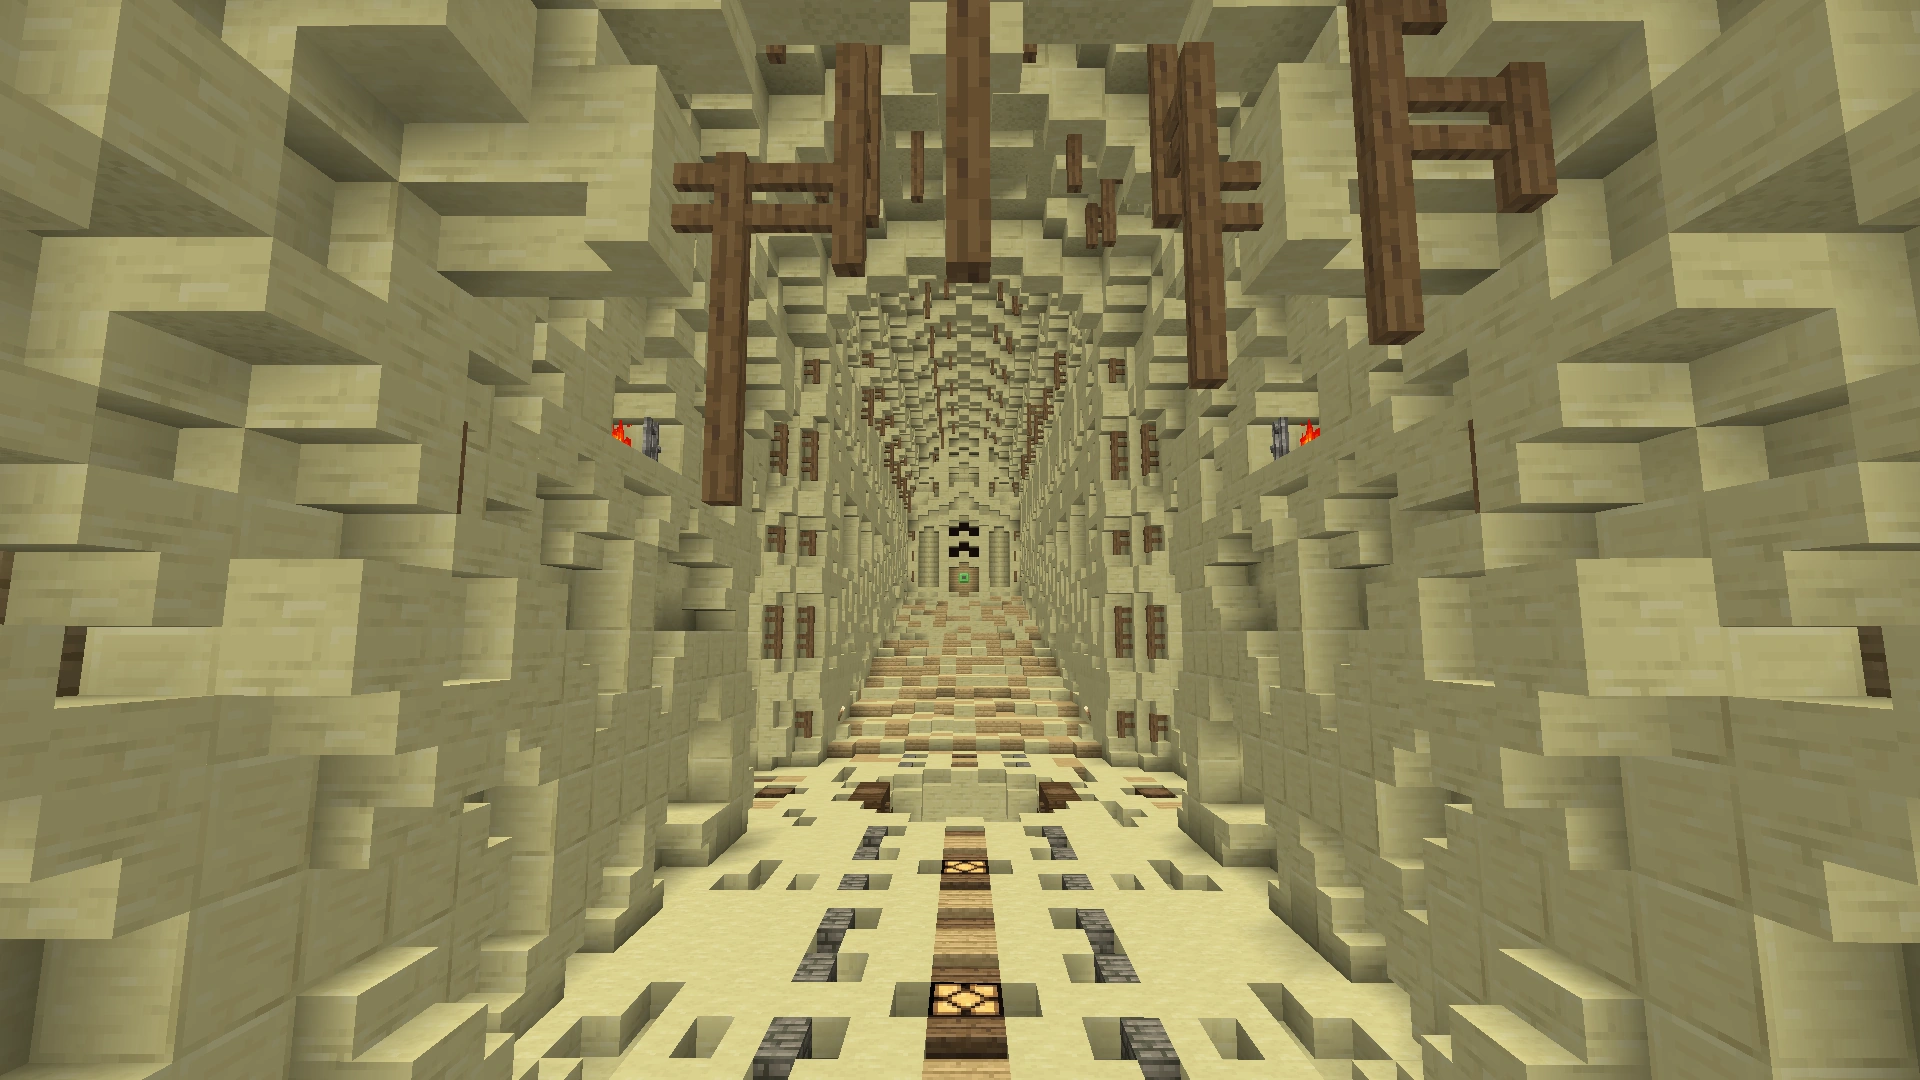
Room 1
Dialogue:
- ???: Who is the fool that has opened this accursed cage?
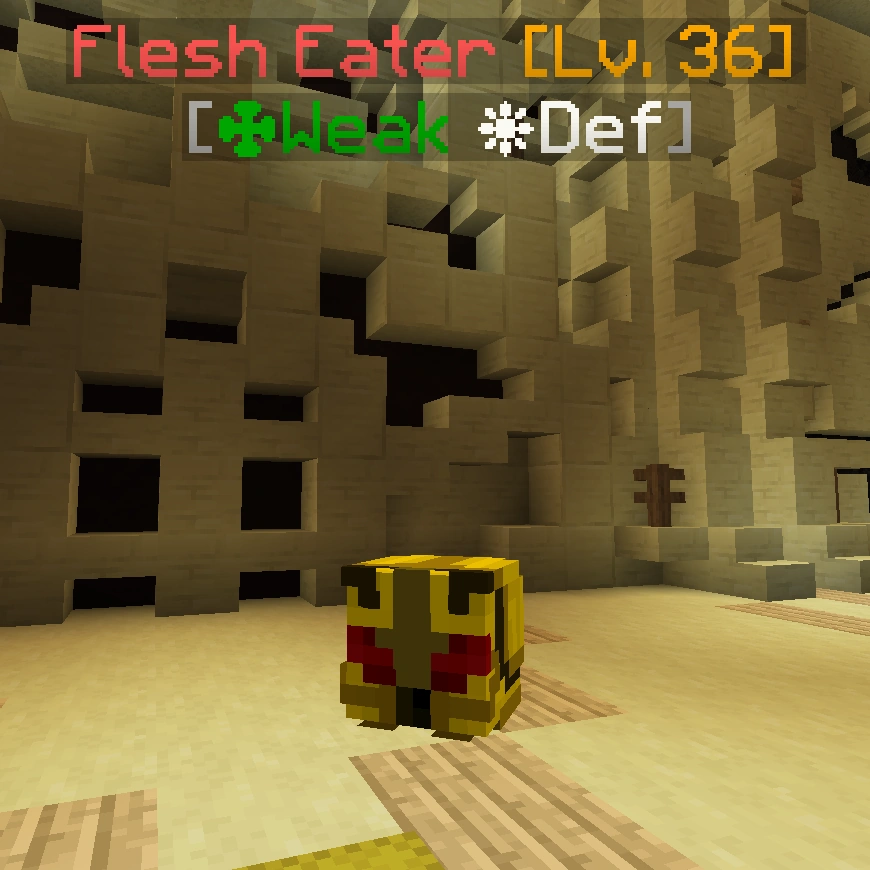
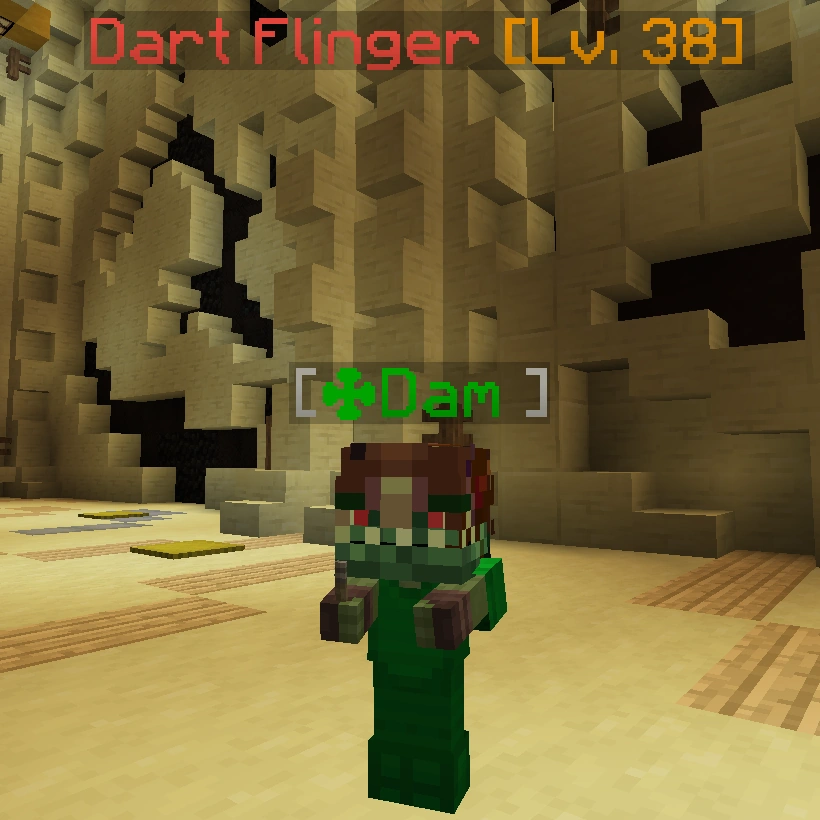
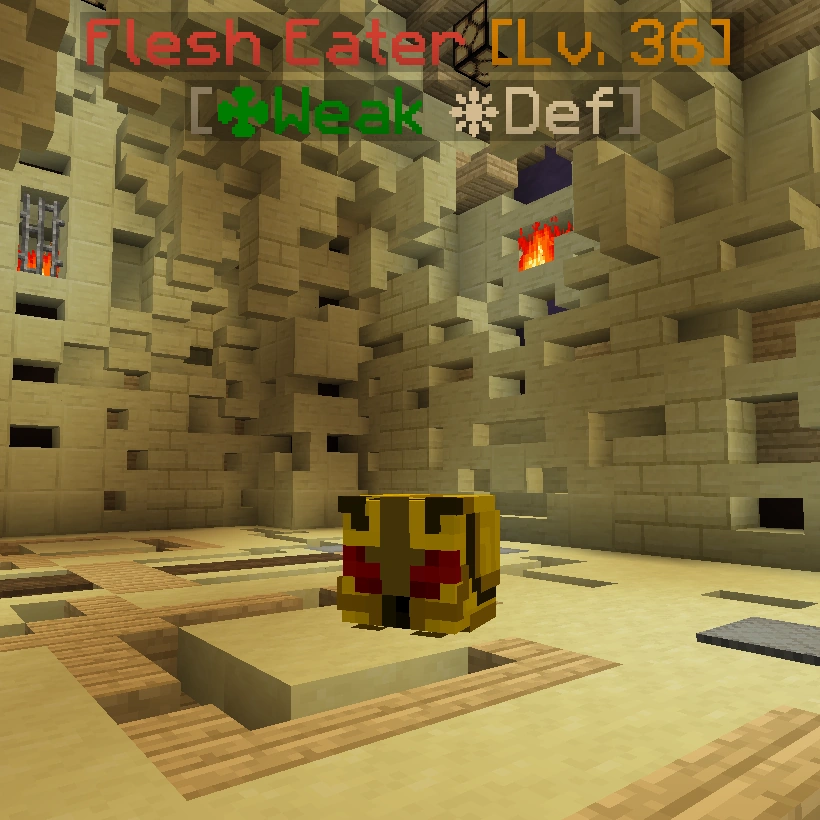
The first room consists of a fighting challenge. When you stand on the pressure plate in the middle of the room, you will activate three waves of mobs that spawn once every fifteen seconds. The final wave consists only of one miniboss, which drops a token that can be used to enter the next room. However, in some cases the boss will drop a hammer instead of the token. If this happens, you must redo the fight.
| Image | Name | Level | Health | AI Type | Abilities | Elemental Stats | Drops | Location |
|---|---|---|---|---|---|---|---|---|
|
Flesh Eater | 36 | 325 | Melee | - | ✤ Earth: Weakness ❋ Air: Defence |
- | First Room First Wave |
|
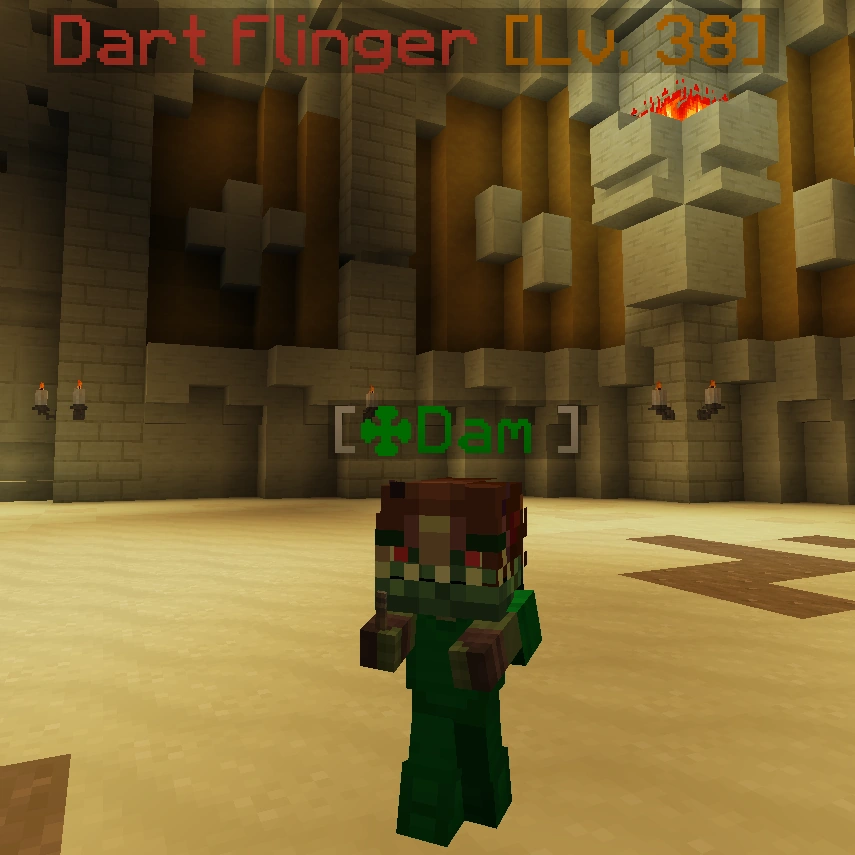
Dart Flinger | 38 | 452 | Ranged | - | ✤ Earth: Damage | - | First Room Second Wave |
|
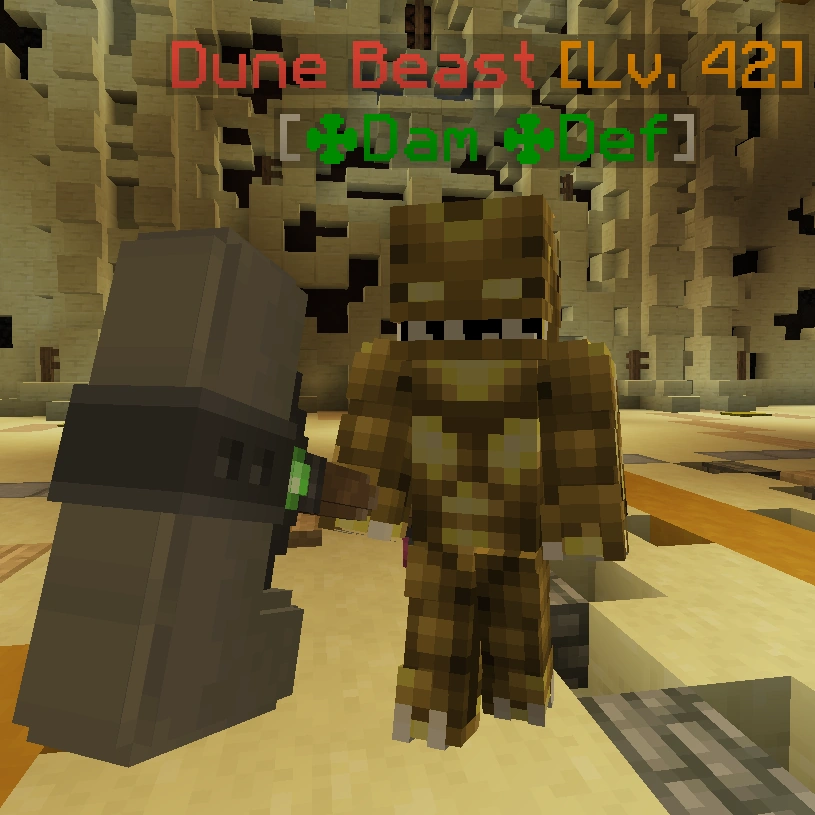
Dune Beast | 42 | 2200 | Melee | Pull | ✤ Earth: Damage, Defence | Sand-Swept Tomb Token | First Room Third Wave |
Room 2
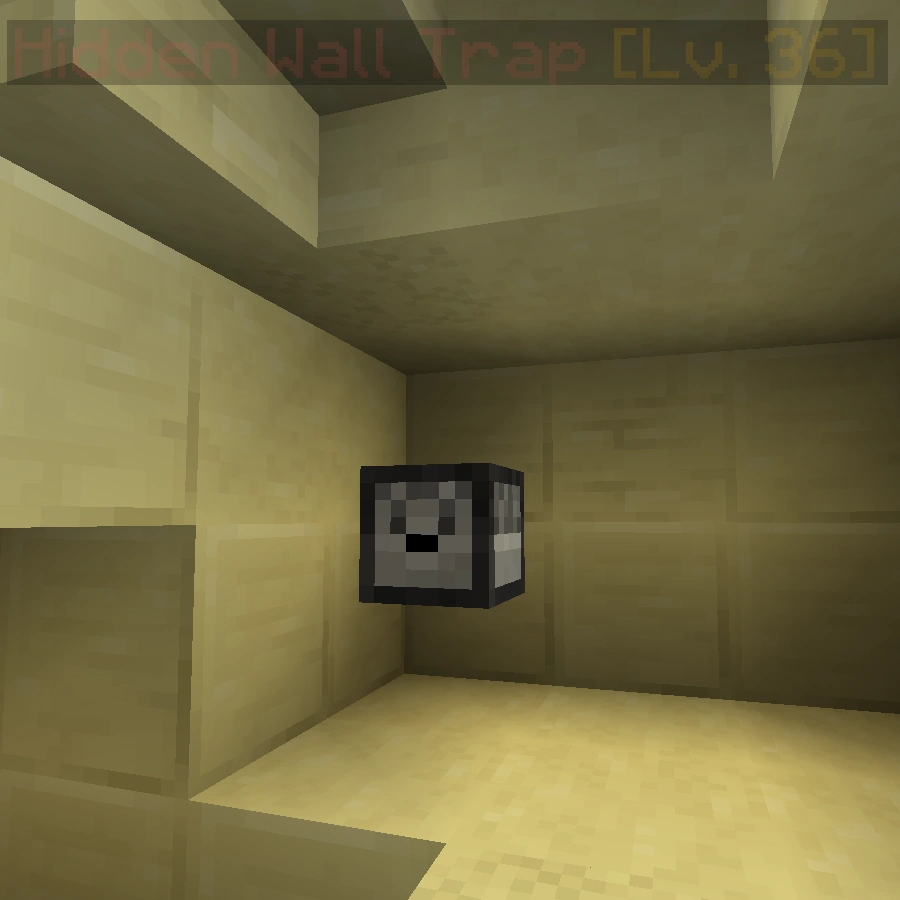
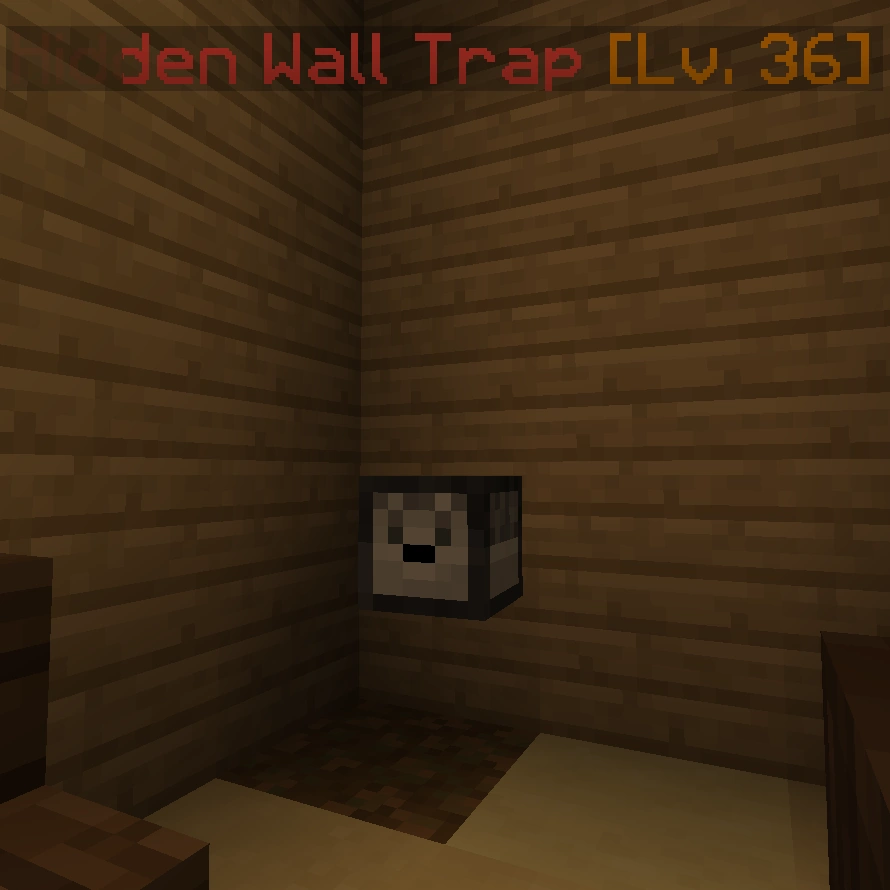
In the second phase, you walk through a hallway while 'Hidden Wall Traps' pop out of the walls, shooting arrows at you. Press the button at the end of the room, which opens a pitfall in the centre of the room. Run back to the centre of the room and jump down into the water. If you just keep sprinting or use a horse you will not get hit by any of the arrows.
| Image | Name | Level | Health | AI Type | Abilities | Elemental Stats | Drops | Location |
|---|---|---|---|---|---|---|---|---|
|
Hidden Wall Trap | 36 | Invincible | Ranged | - | - | - | Second Room Upper Area |
|
Hidden Wall Trap | 36 | Invincible | Ranged | - | - | - | Second Room Lower Area |
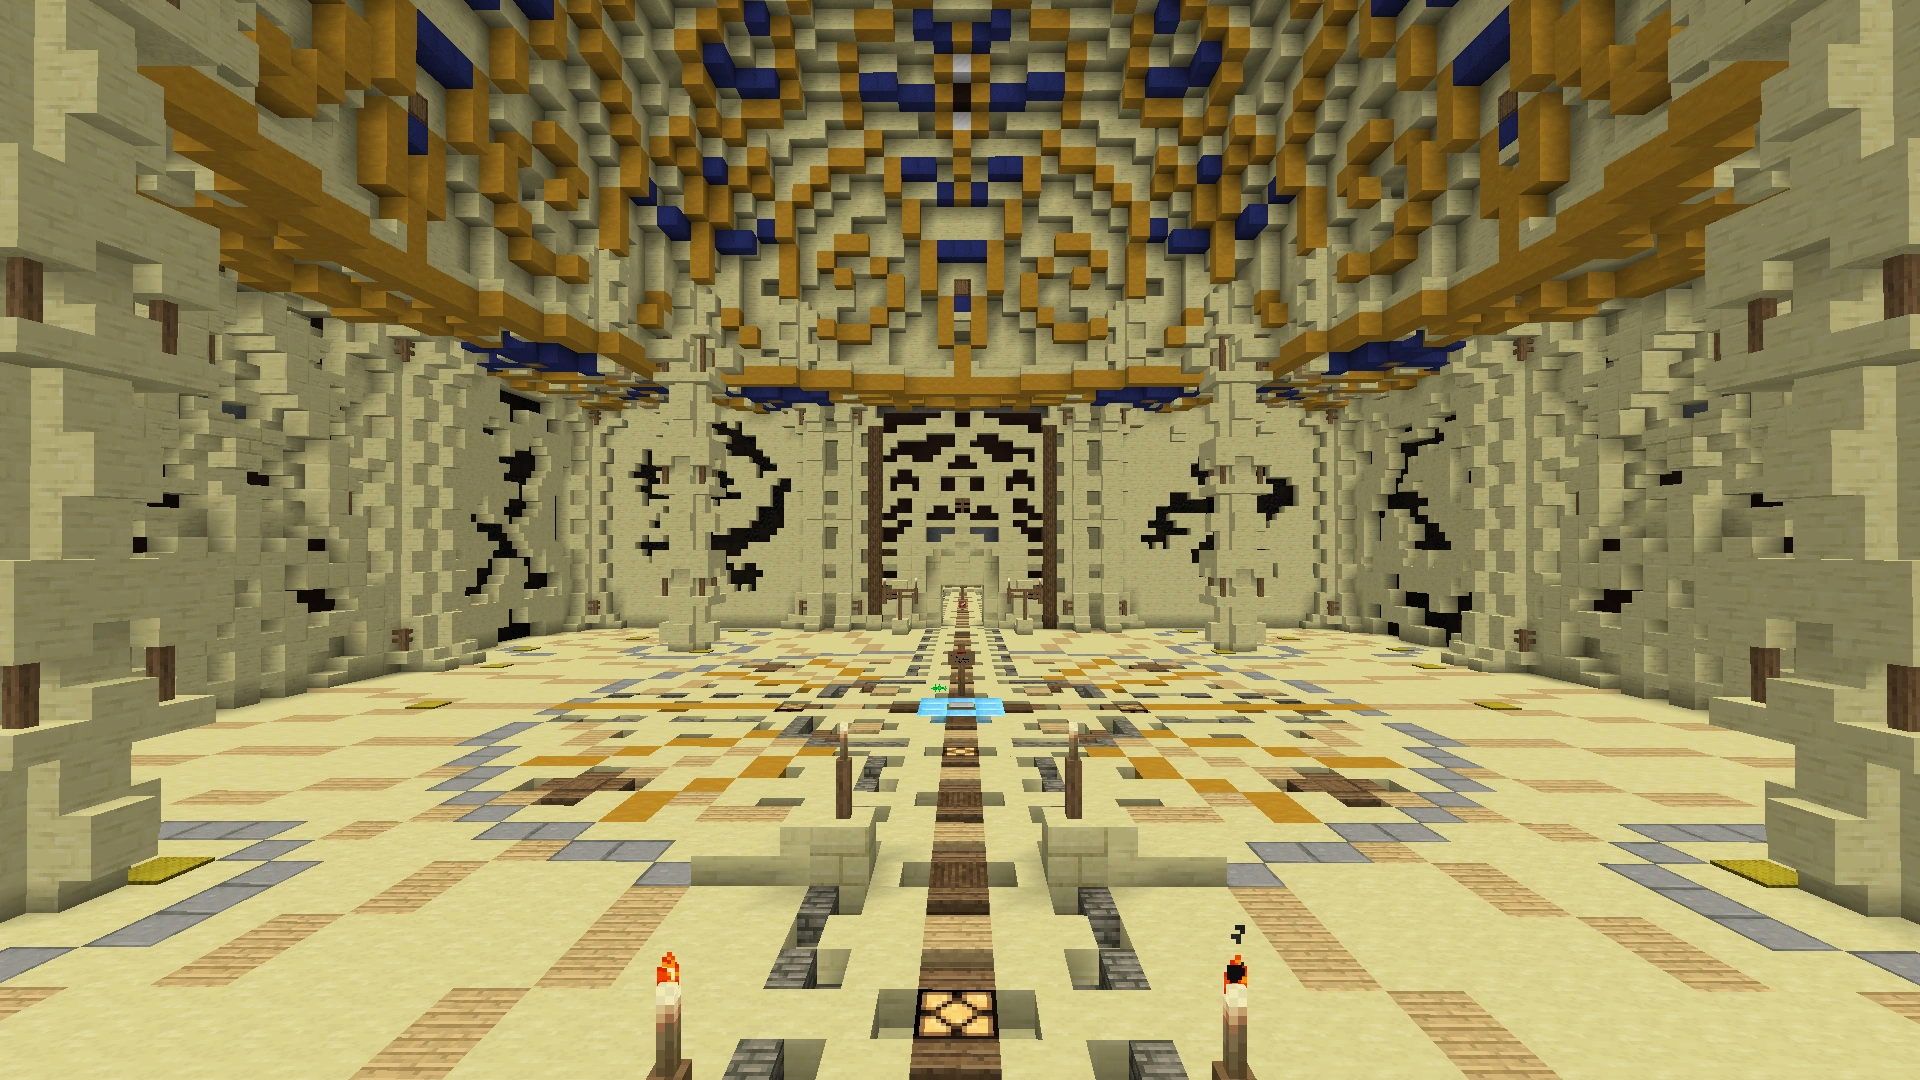
Room 3

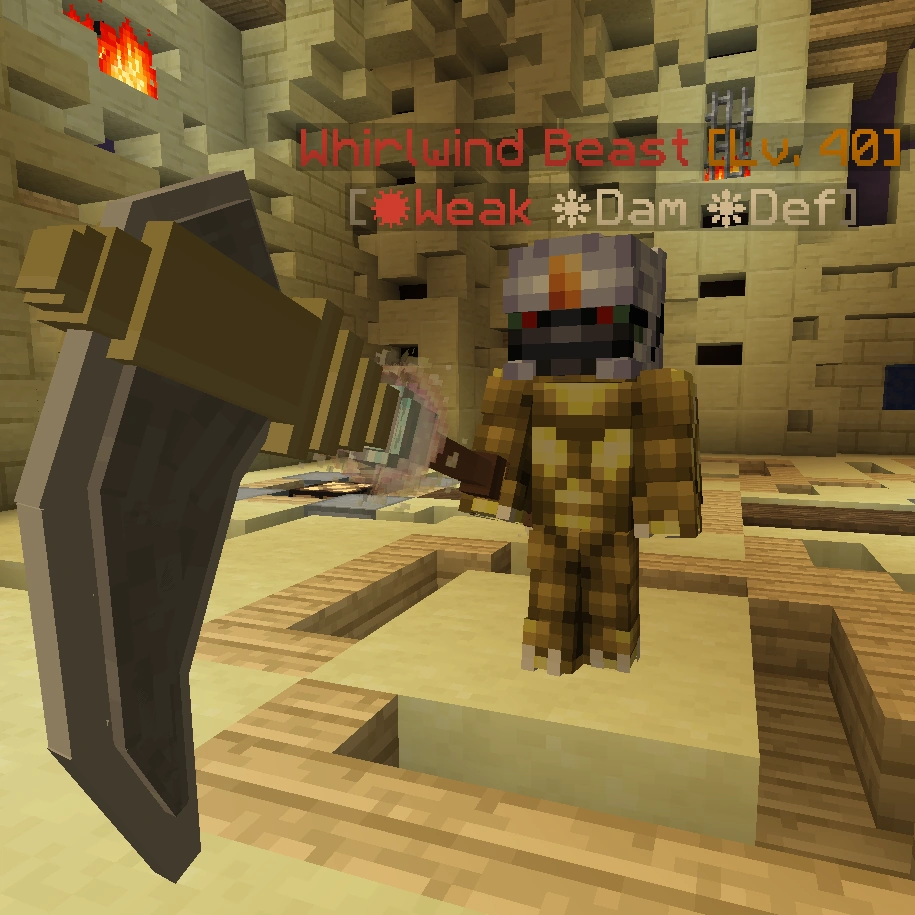
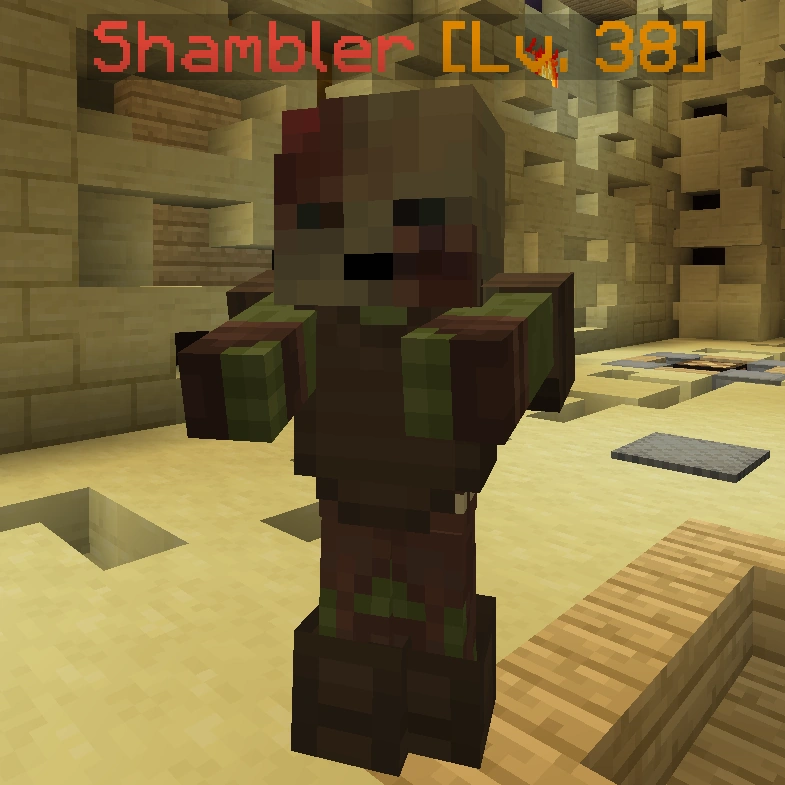
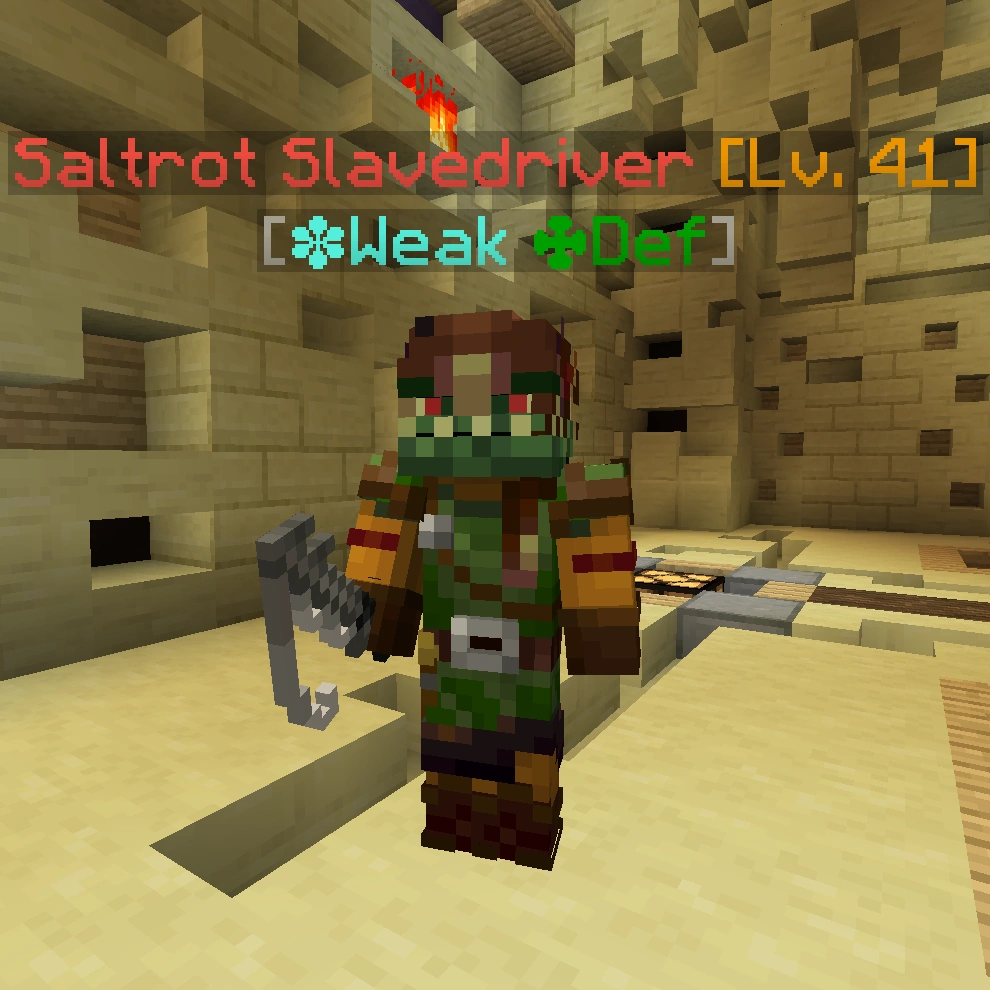
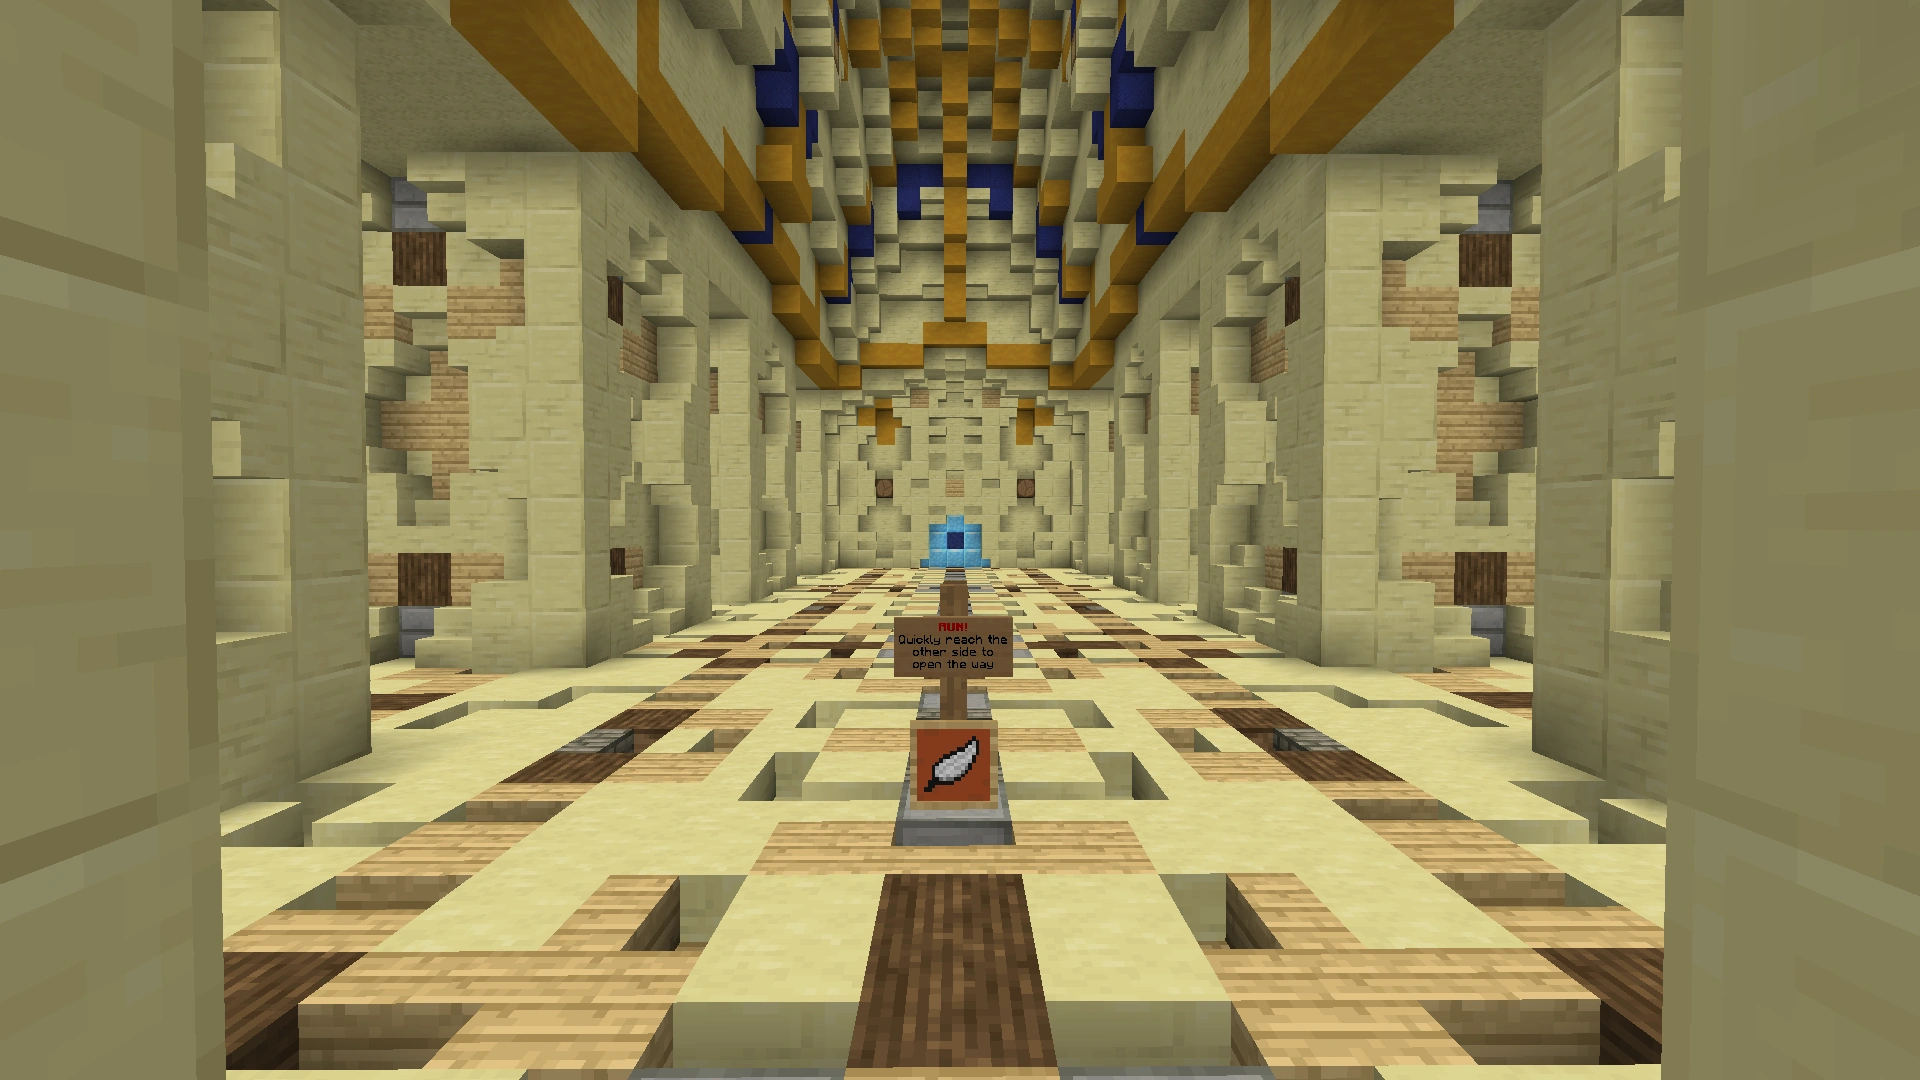
The third phase is another fighting challenge. You will be teleported to a random location where you will fight monsters to get tokens to move on. The locations you can get teleported to vary in the mobs you will fight and the number of tokens needed to move on.
In this room, you will have to survive three waves of mobs, spawning every 15 seconds, and kill a miniboss in the last wave to move on.
| Image | Name | Level | Health | AI Type | Abilities | Elemental Stats | Drops | Location |
|---|---|---|---|---|---|---|---|---|
|
Flesh Eater | 36 | 325 | Melee | - | ✤ Earth: Weakness ❋ Air: Defence |
- | 1 Token Room First Wave |
|
Whirlwind Beast | 40 | 1650 | Melee | Charge | ✹ Fire: Weakness ❋ Air: Damage, Defence |
- | 1 Token Room First Wave, Third Wave |
|
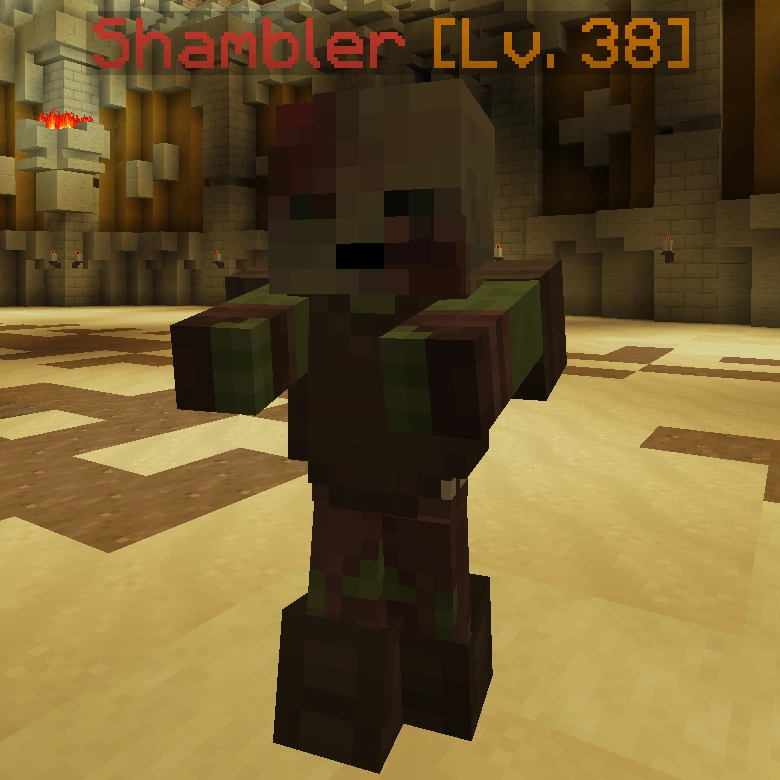
Shambler | 38 | 800 | Melee | - | - | - | 1 Token Room Second Wave |
|
Saltrot Slavedriver | 41 | 2175 | Ranged | Weakness II | ✽ Water: Weakness ✤ Earth: Defence |
- | 1 Token Room Second Wave |
|
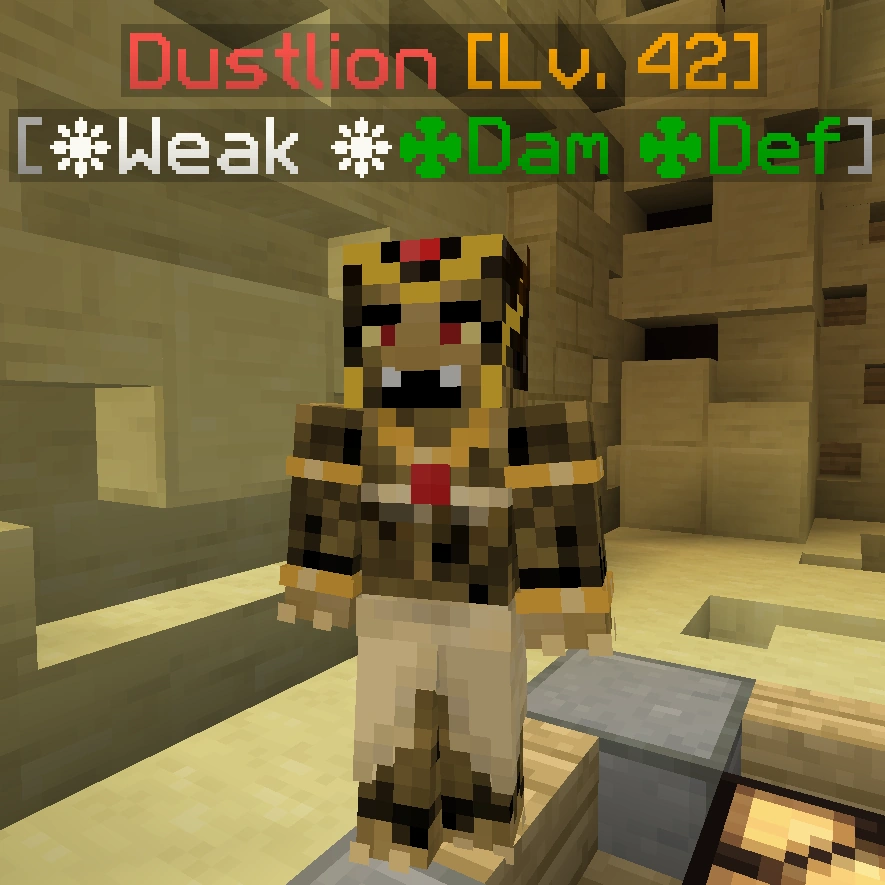
Dustlion | 42 | 2125 | Ranged | Teleport, Pull | ❋ Air: Weakness, Damage ✤ Earth: Damage, Defence |
Sand-Swept Tomb Token | 1 Token Room Third Wave |
In this room, you will have to kill 6 of the large mobs while being swarmed by the other mobs in the room to progress.
| Image | Name | Level | Health | AI Type | Abilities | Elemental Stats | Drops | Location |
|---|---|---|---|---|---|---|---|---|
|
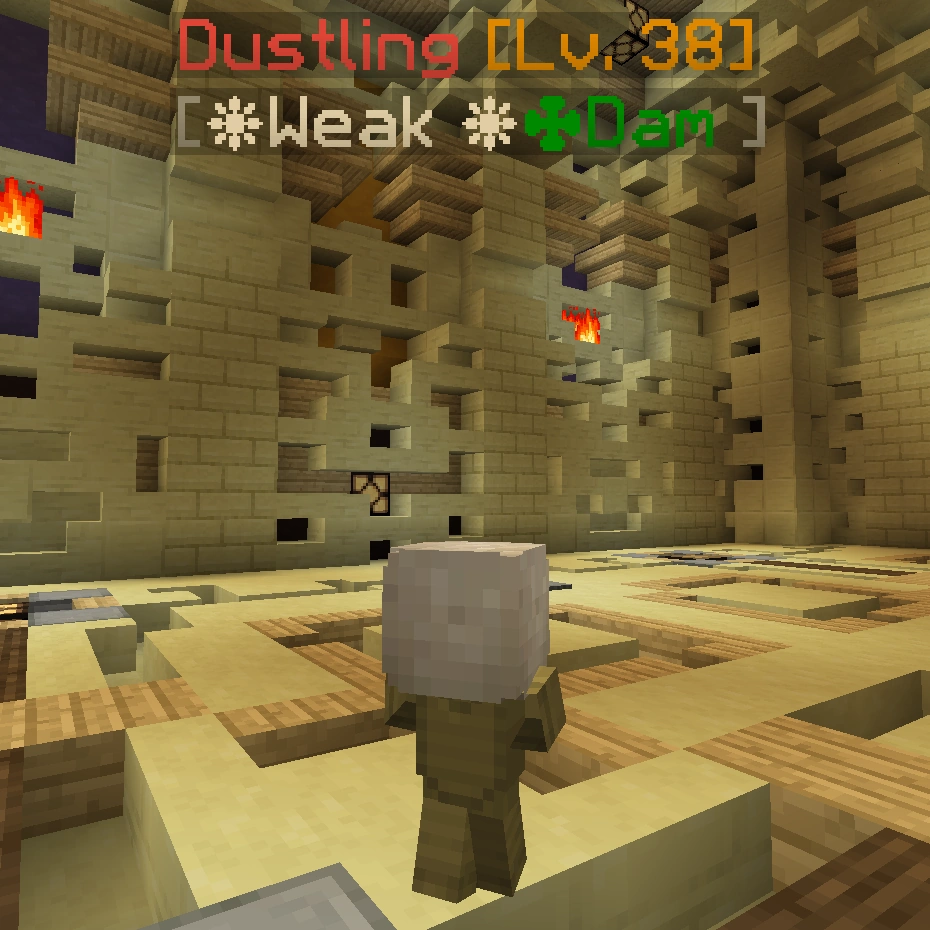
Dustling | 38 | 475 | Melee | - | ❋ Air: Weakness, Damage ✤ Earth: Damage |
- | 6 Tokens Room, Dust Devil |
|
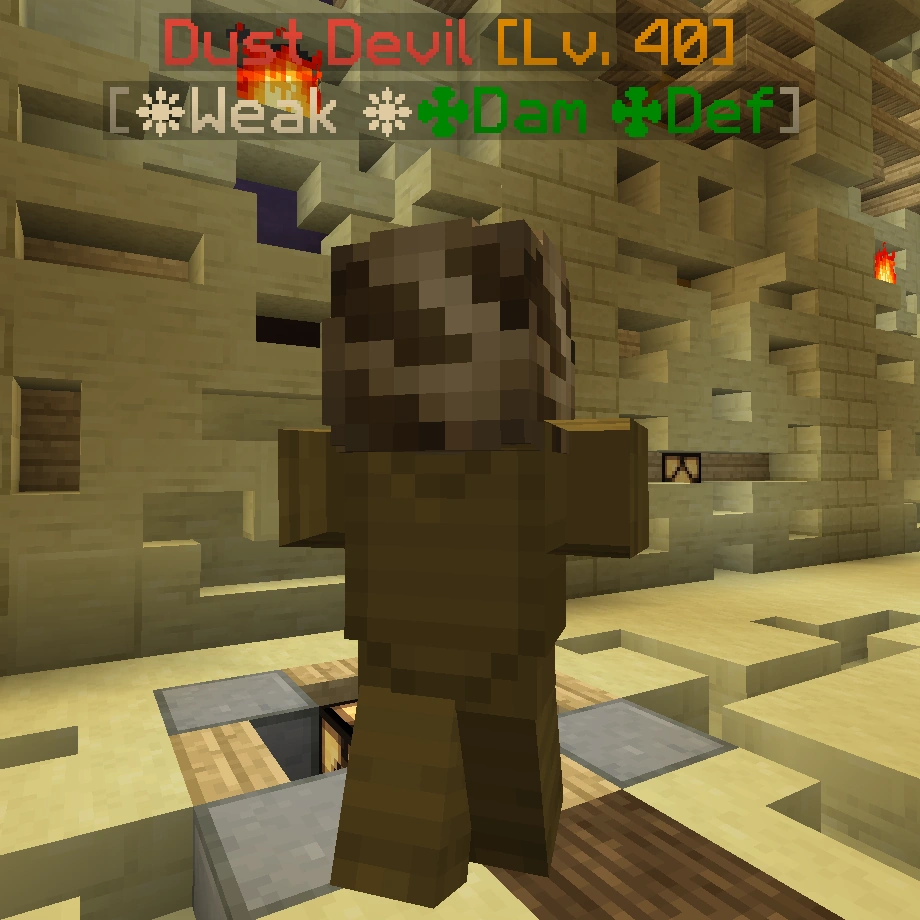
Dust Devil | 40 | 975 | Melee | Vanish | ❋ Air: Weakness, Damage ✤ Earth: Damage, Defence |
Sand-Swept Tomb Token, 4 Dustlings |
6 Tokens Room |
In this room, you have to kill 15 slowly spawning token mobs while being peppered with arrows by ranged mobs in the walls of the room.
| Image | Name | Level | Health | AI Type | Abilities | Elemental Stats | Drops | Location |
|---|---|---|---|---|---|---|---|---|

|
Hidden Wall Trap | 36 | Invincible | Ranged | - | - | - | 15 Tokens Room |
|
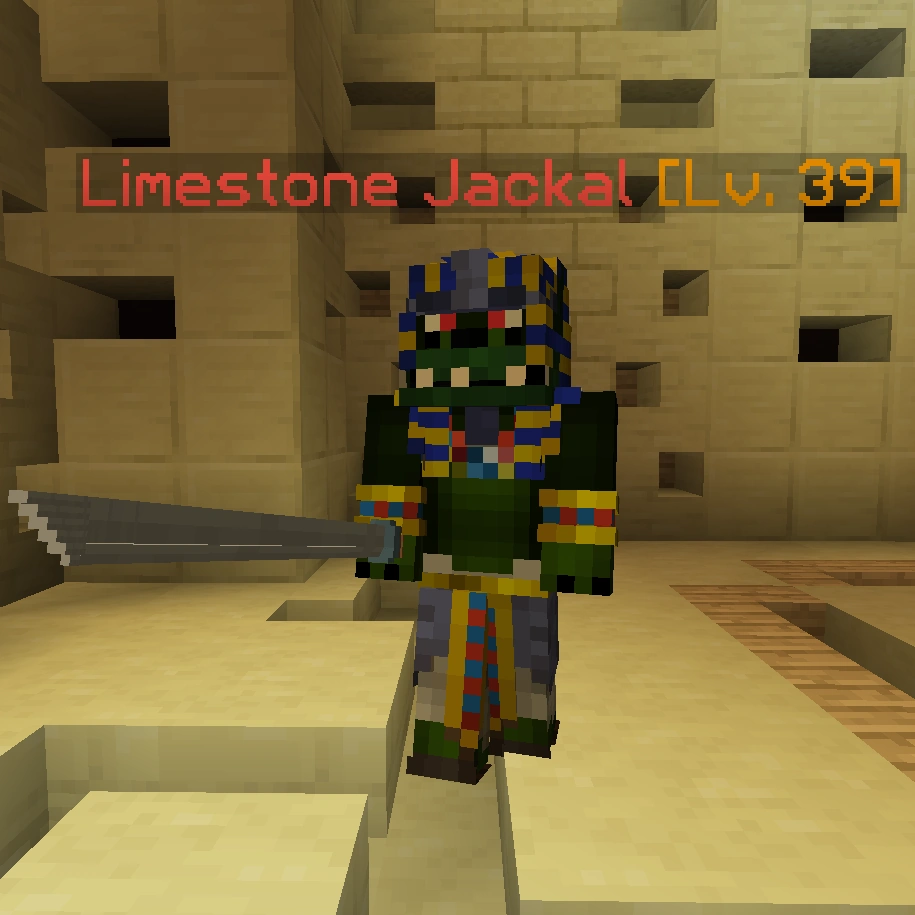
Limestone Jackal | 39 | 575 | Melee | Charge | - | Sand-Swept Tomb Token | 15 Tokens Room |
Room 4
The fourth room is a parkour challenge. Similarly to the third room, there are multiple possible parkours, and you will be sent to one randomly.
Room 5
Dialogue:
- ???: You are not of the old empire... Not one of those who forced me in here.
- ???: Why do you take arms against me? I only tried to save my people from my father!
In the fifth phase, you have to survive a horde of monsters for 60 seconds until a door opens leading to the last parkour.
| Image | Name | Level | Health | AI Type | Abilities | Elemental Stats | Drops | Location |
|---|---|---|---|---|---|---|---|---|

|
Flesh Eater | 36 | 325 | Melee | - | ✤ Earth: Weakness ❋ Air: Defence |
- | Fifth Room |
|
Shambler | 38 | 800 | Melee | - | - | - | Fifth Room |
|
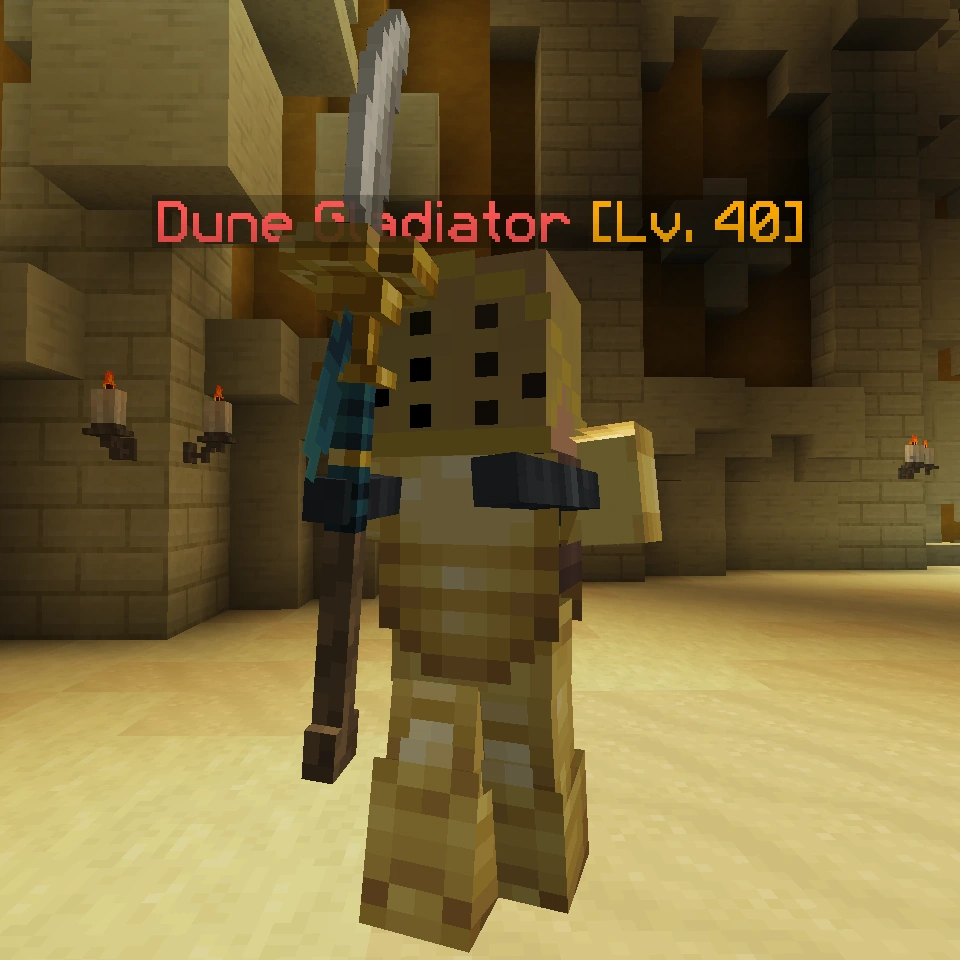
Dune Gladiator | 40 | 610 | Melee | - | - | - | Fifth Room |

|
Dune Raiser | 40 | 670 | Ranged | - | - | - | Fifth Room |
|
Dart Flinger | 38 | 452 | Ranged | - | ✤ Earth: Damage | - | Fifth Room |
Room 6
The ground will crumble behind you when you enter the middle section of the next room, and you must run across it without falling. If you fall, you will have to collect 3 tokens from mobs in the lower area to go back and try crossing again.
| Image | Name | Level | Health | AI Type | Abilities | Elemental Stats | Drops | Location |
|---|---|---|---|---|---|---|---|---|

|
The Hungry | 40 | 610 | Melee | - | ✤ Earth: Weakness | Sand-Swept Tomb Token | Sixth Room Underneath Floor |
Boss
Dialogue:
- Hashr: If you insist on ending me, then I'll dispose of you like I did that wretched emperor!
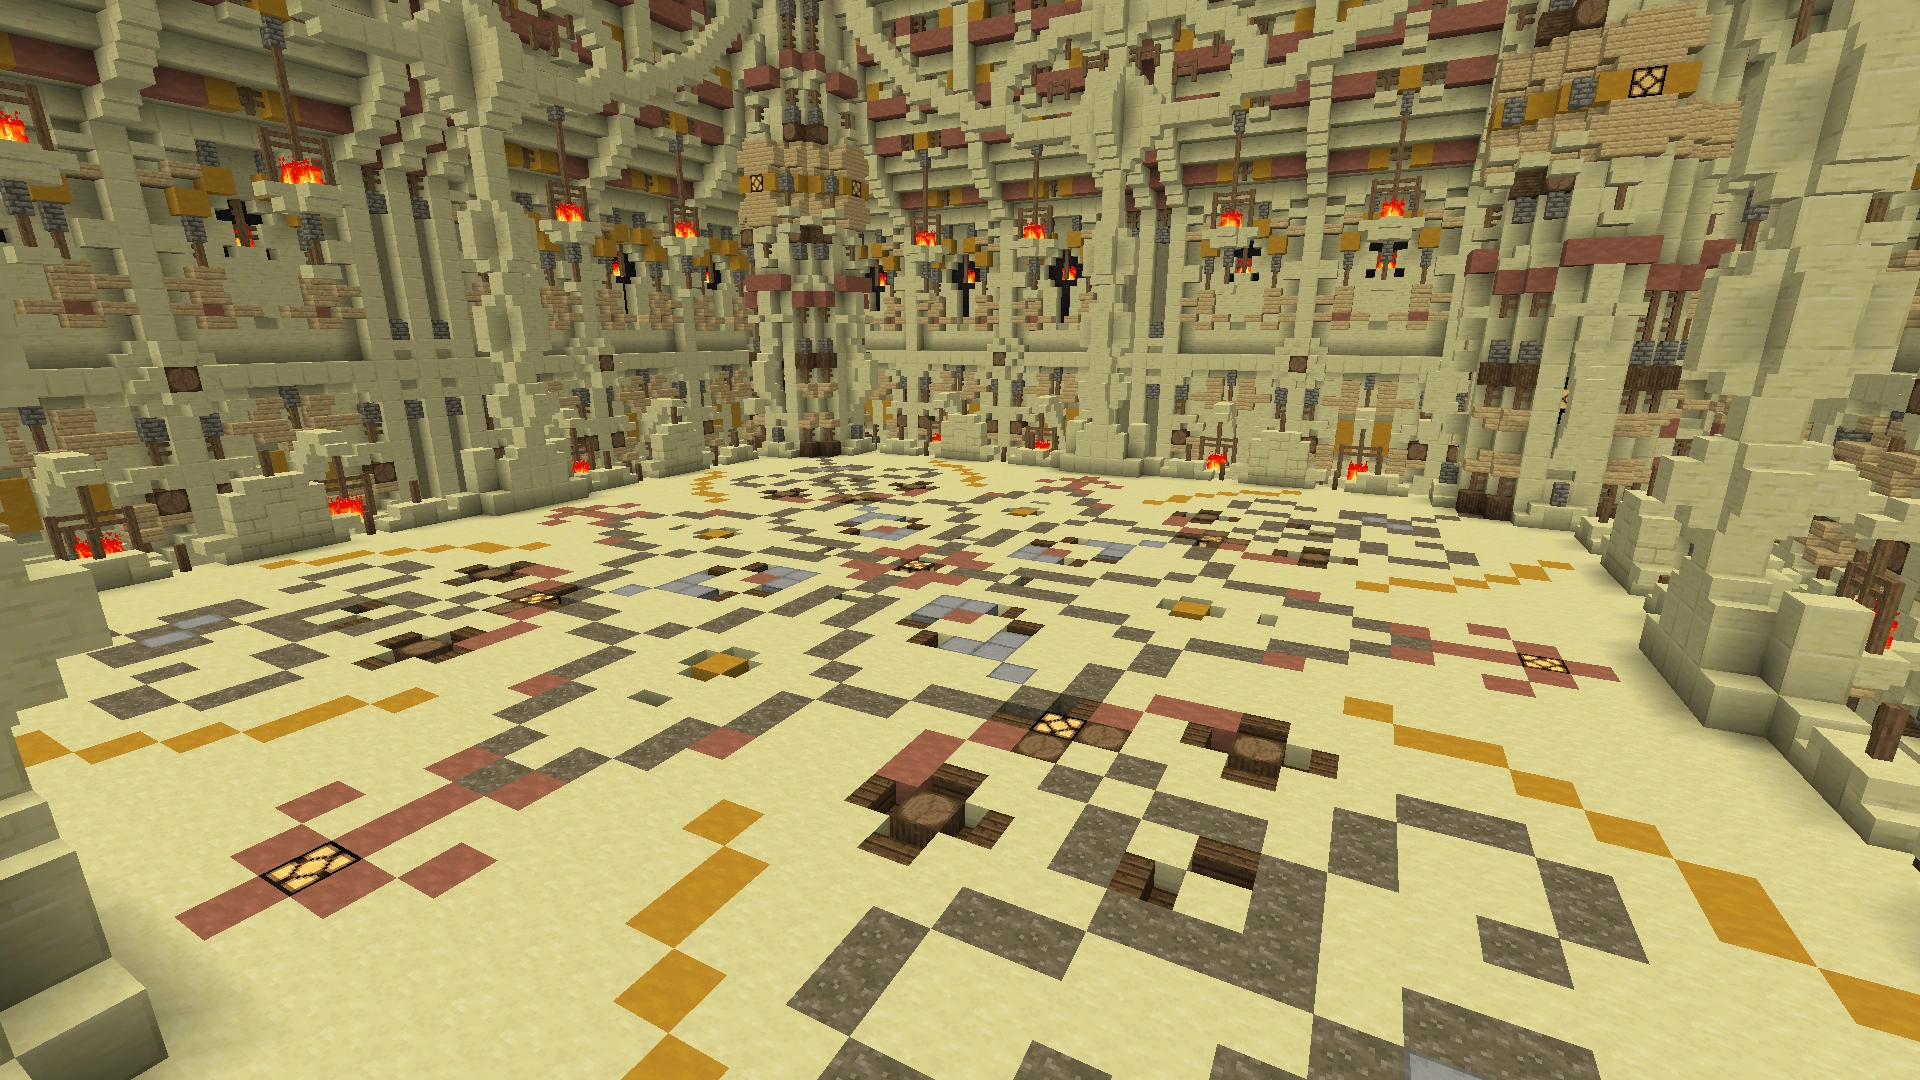
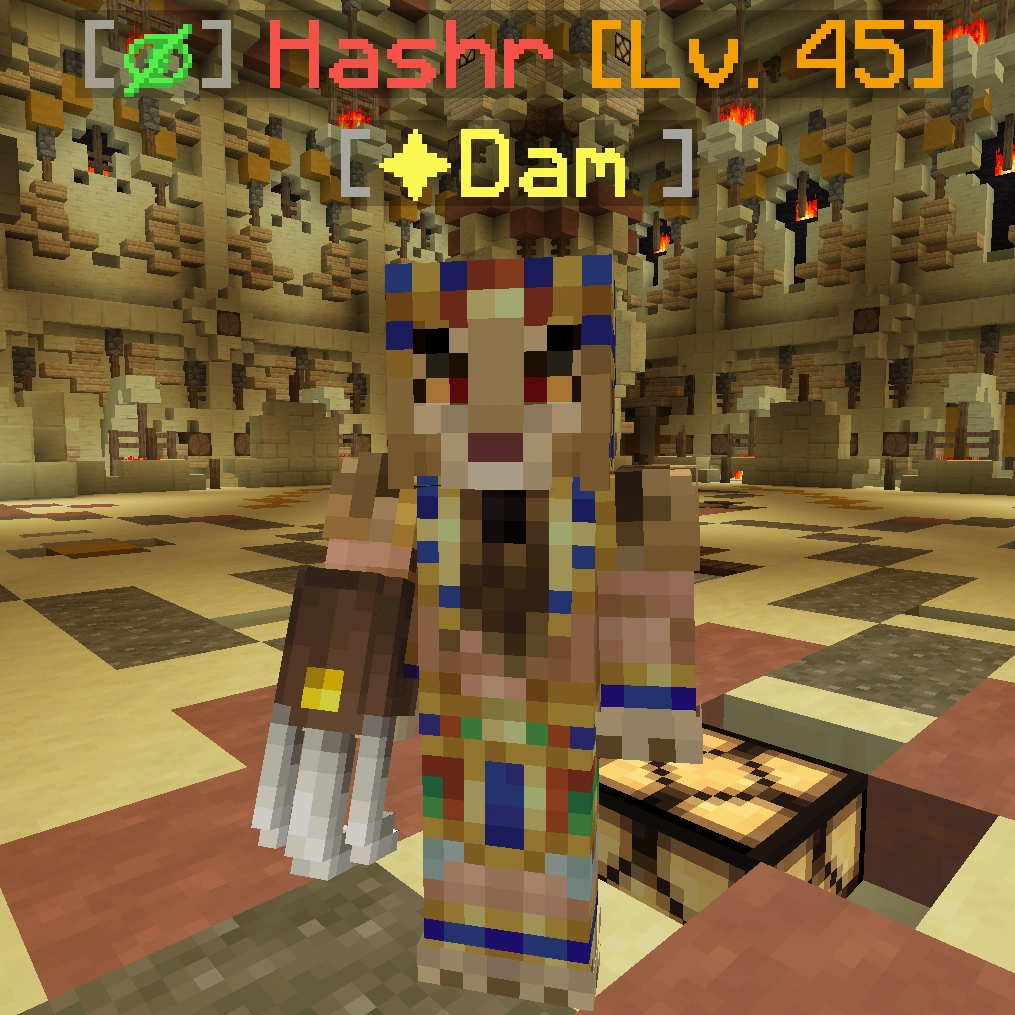
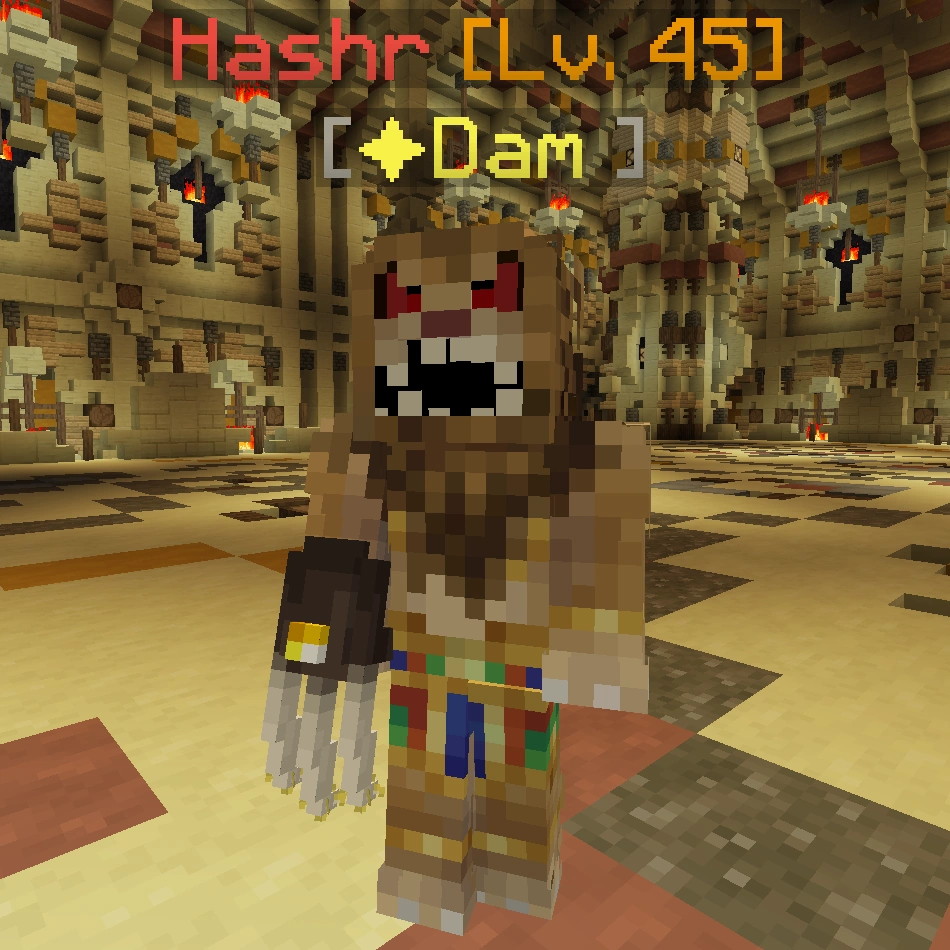
The boss of this dungeon is Hashr, appearing alone in the room. When the player defeats his first phase, the floor will collapse and the player will fall down to another area containing the second and third stages of the boss fight. Once he is killed, the player will then be teleported out of the dungeon and receive their rewards.
| Image | Name | Level | Health | AI Type | Abilities | Elemental Stats | Drops | Location |
|---|---|---|---|---|---|---|---|---|
|
Hashr (Phase 1) | 40 | 3800 | Melee | Charge | - | - | Boss Room Upper Area |
|
Hashr (Phase 2) | 45 | 8000 | Melee | Multihit, Pull, Charge |
✦ Thunder: Damage | Hashr (Phase 3) | Boss Room Lower Area |
|
Hashr (Phase 3) | 45 | 4000 | Melee | Multihit, Charge, Vanish |
✦ Thunder: Damage | - | Hashr (Phase 2) |
Dungeon Merchant
The Dungeon Merchant in front of the Sand-Swept Tomb sells:
| Dungeon Merchant Trades | |
|---|---|
| Price | Product |
| 2 Hashr's Bone |
1 Dune Beast Jaw |
| 3 Hashr's Bone |
1 Sol |
| 3 Hashr's Bone |
1 Jaw Breaker |
| 3 Hashr's Bone |
1 Miasma |
| 3 Hashr's Bone |
1 Clunderthap |
| 5 Hashr's Bone |
1 Springtrap |
| 5 Hashr's Bone |
1 Hashr Claw |
| 5 Hashr's Bone |
1 Karma |
| 5 Hashr's Bone |
1 Chaser |
| 5 Hashr's Bone |
1 Sprout |
| 2 Sand-Swept Tomb Fragment |
1 Dungeon Teleport Scroll |
| 3 Sand-Swept Tomb Fragment |
1 Gathering Axe T5 |
| 3 Sand-Swept Tomb Fragment |
1 Gathering Pickaxe T5 |
| 3 Sand-Swept Tomb Fragment |
1 Gathering Scythe T5 |
| 3 Sand-Swept Tomb Fragment |
1 Gathering Rod T5 |
Tips
- When being teleported to the third and fourth rooms, you will most likely get separated from others doing the dungeon with you. You can meet back up in the fifth room.
- In the fifth phase, you can easily survive for 60 seconds by just getting on a horse and circling the room
Trivia
- This dungeon replaced the Silverfish Dungeon as of the 1.14.1 Gameplay Update.