| Tower of Ascension | |
| Quest Info | |
|---|---|
| Length | Long |
| Difficulty | Hard |
| Location | Tower of Ascension |
| Province | Wynn |
| Combat Level | 40 |
| Starter NPC | Ankou |
| Reward | As follows:
|
Tower of Ascension is one of the most difficult quests in Wynncraft, and arguably the most difficult in the province of Wynn. It will test the player's skills throughout series of fights that might require the player to request help from others. The quest starts at Tower of Ascension where they have to talk to Ankou, who gives you the task to clear every single floor of the tower. (Note: Some enemy health points may be outdated)
Dialogue[]
Ankou is the NPC who starts and ends the quest, and provides the only dialogue. The floormaster on each level of the Tower will only tell you that it needs tokens, or that you can proceed.
First[]
- Ankou: Hehehe... Hello there.
- Ankou: Welcome to the Tower of Ascension!
- Ankou: I challenge you to reach the final floor!
- Ankou: Have you got what it takes to conquer it?
- Ankou: Perhaps you would like to know the layout of the tower first? Hehehehe...
- Ankou: There are 7 floors in this tower, each with ten levels.
- Ankou: Each floor has nine regular levels and one boss level.
- Ankou: To pass a regular level, you must collect five tokens from the challenge on that level, and one token from boss levels.
- Ankou: After you beat a whole floor, you will return here and you can begin the next one...
- Ankou: So, what do you say? Hehehe...
- Ankou: Turn left and head to the first floor...if you dare...
Intermediate Stages[]
Intermediate Stages have the following pattern:
- Begin the Xth Floor
- Collect 5 tokens and hand them to the Floor Master [Floor X, Level Y] (Repeats 9 times per set)
- Collect the boss token and hand it to the Floor Master [Floor X, Level 10]
- Floormaster: Well done, adventurer, you have successfully completed this floor! You may proceed.
Final Stage[]
- Ankou: You have completed my tower, I see...
- Ankou: Did you enjoy Death? Many challengers certainly did. Her power is... unmatched, hehehe...
- Ankou: And you... You are unlike all of them, yes? Few have managed to ascend these floors.
- Ankou: A tower of madness, fueled by Death herself... Quite a challenge, yes?
- Ankou: You have joined us now, champion... Few can claim this victory as their own. Fewer still have held their mind.
- Ankou: For this honor... A reward, for you. You have truly earned it... Hehehehe...
Floors[]
There are 7 floors each of them containing 10 levels, for a total of 70 rooms in the tower. At the first 9 levels for each floor you have to kill mobs to receive 5 tokens, which you'll have to give to the Floormaster to let you ascend to the next level. In the tenth level of each floor is a powerful boss, which must be killed once to unlock the next floor. If you die on a given level for each floor, your progress will be saved and you can skip each level by just walking to the teleport point on the far side of the room.
Mobs[]
| Image | Name | Level | Health | AI Type | Abilities | Elemental Stats | Drops | Location |
|---|---|---|---|---|---|---|---|---|
|
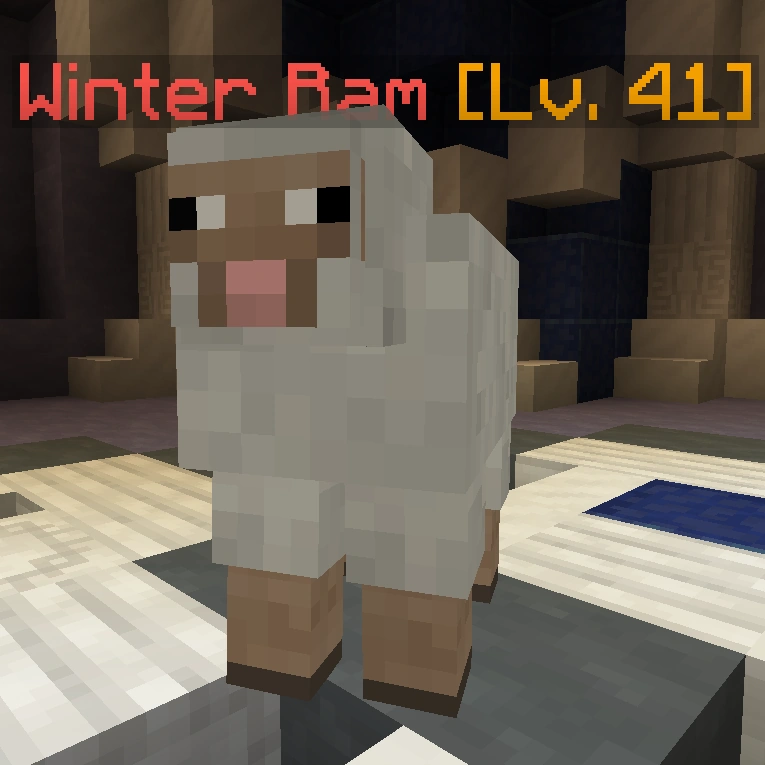
Winter Ram | 41 | 825 | Melee | - | - | Cold Shard | Tower of Ascension |
|
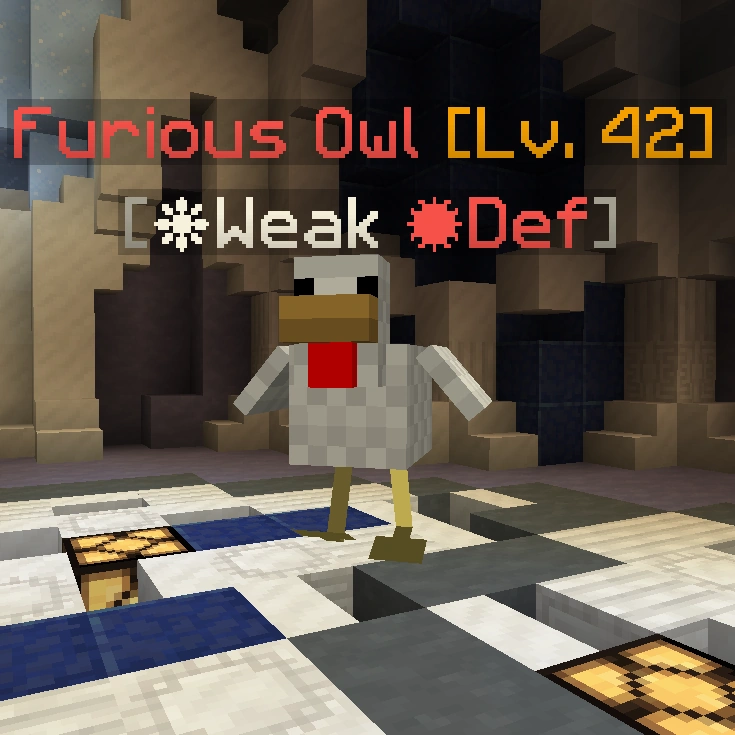
Furious Owl | 42 | 885 | Melee | - | ❋ Weak ✹ Def |
Frosty Shard | Tower of Ascension |
|
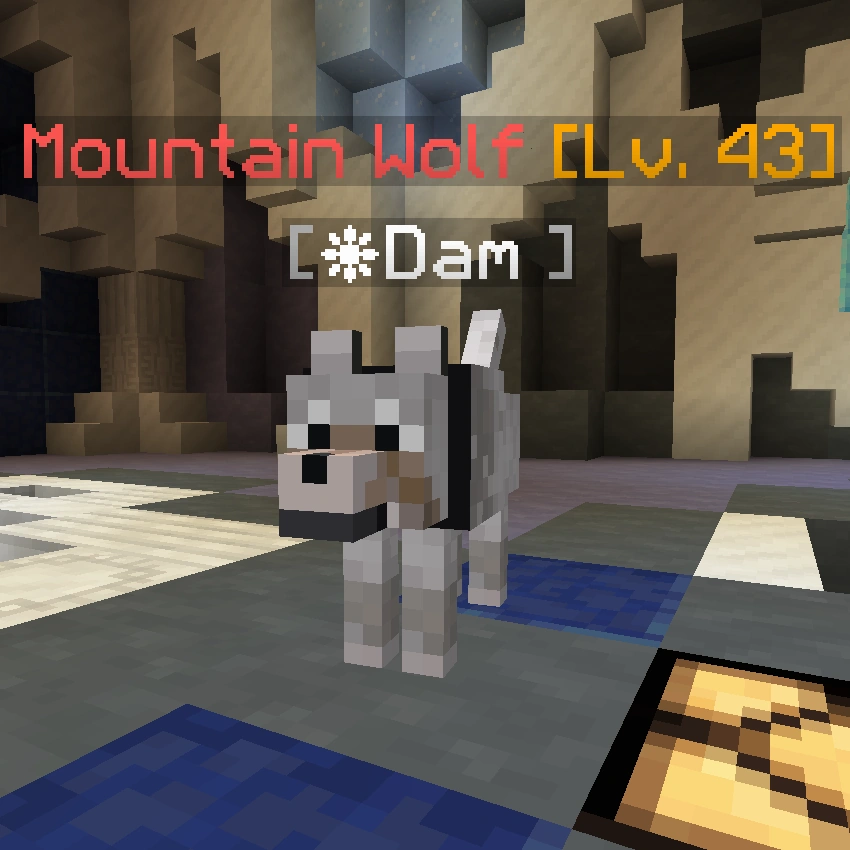
Mountain Wolf | 43 | 950 | Ranged | - | ❋ Dam | Wind Shard | Tower of Ascension |
|
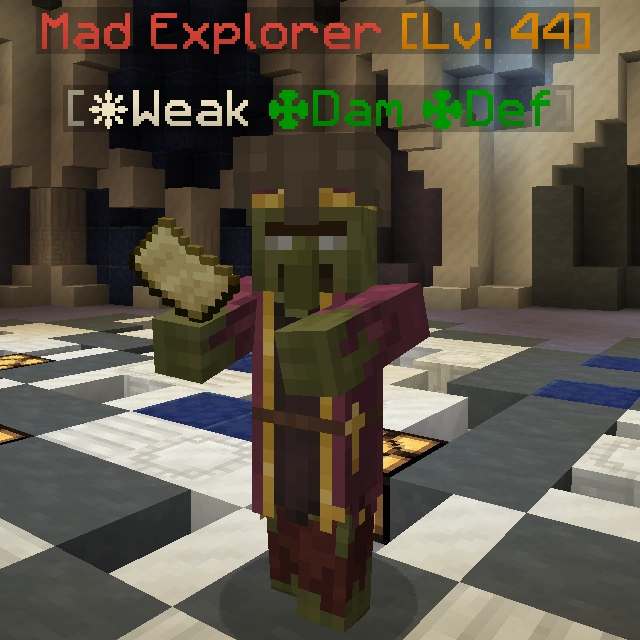
Mad Explorer | 44 | 1010 | Melee | - | ❋ Weak ✤ Dam ✤ Def |
Snow Shard | Tower of Ascension |
|
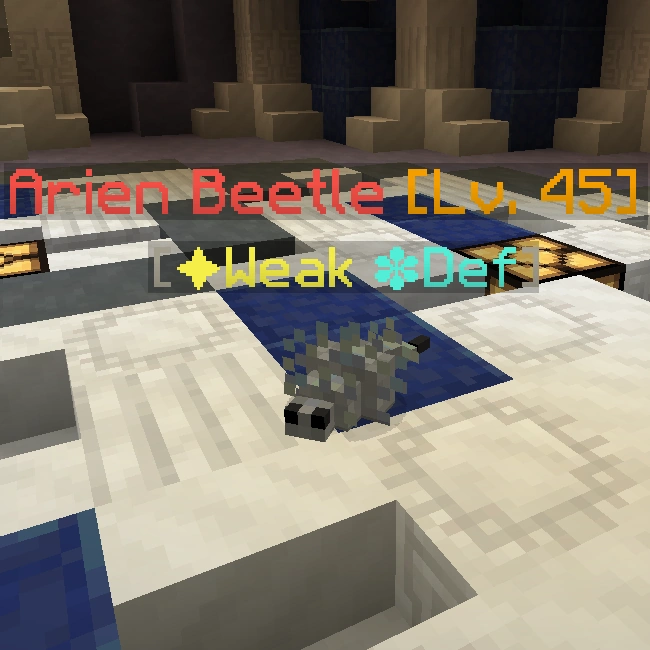
Arien Beetle | 45 | 1075 | Melee | Slowness II | ✦ Weak ❉ Def |
Ice Shard | Tower of Ascension |
|
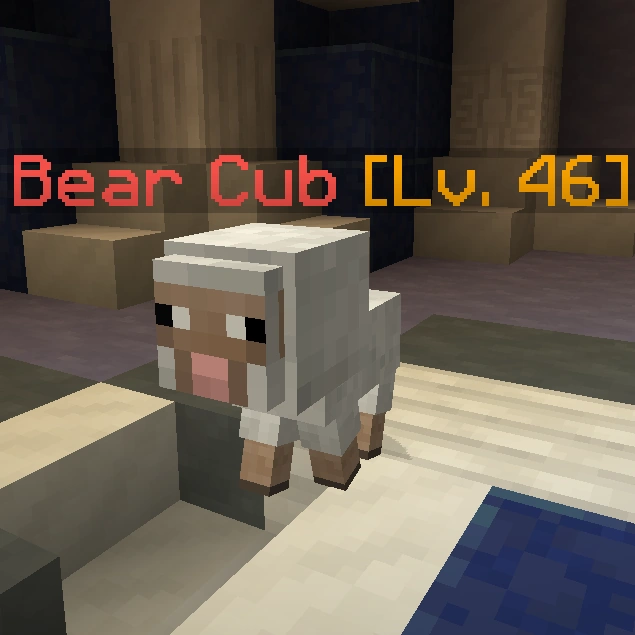
Bear Cub | 46 | 1150 | Melee | - | - | Winter Shard | Tower of Ascension |
|
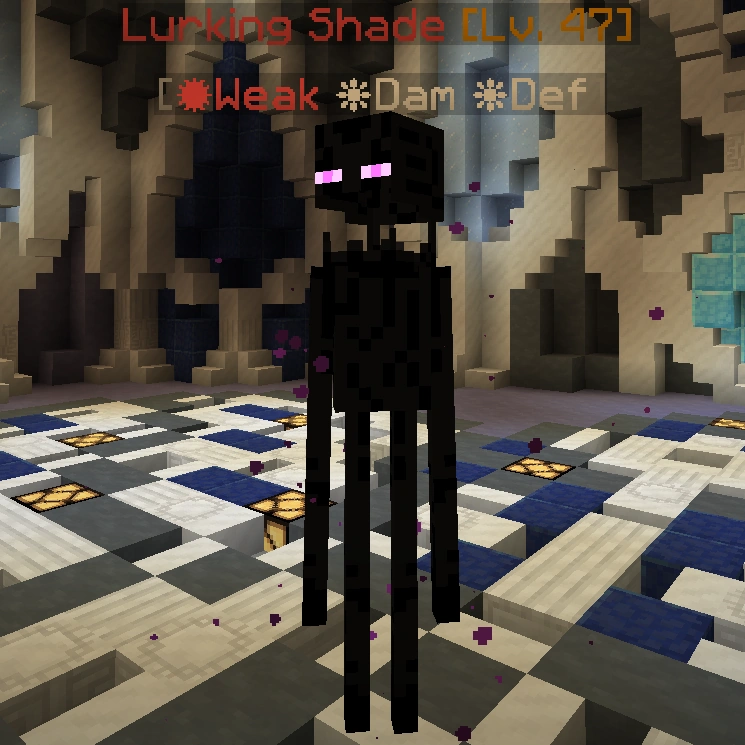
Lurking Shade | 47 | 1475 | Melee | - | ✹ Weak ❋ Dam ❋ Def |
Hail Shard | Tower of Ascension |
|
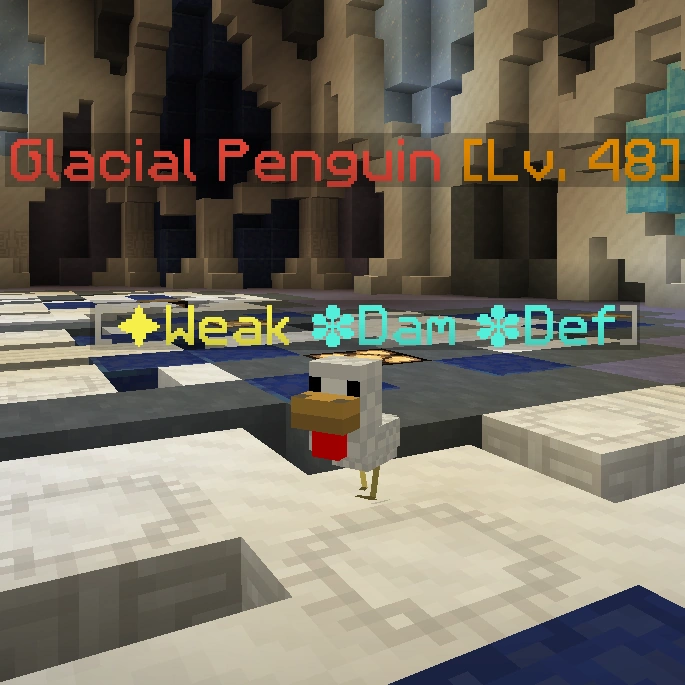
Glacial Penguin | 48 | 1300 | Melee | - | ✦ Weak ❉ Dam ❉ Def |
Frozen Shard | Tower of Ascension |
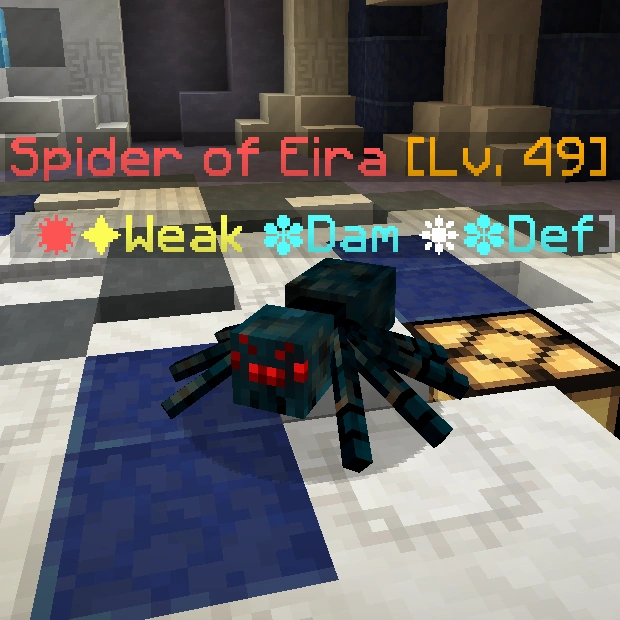
|
Spider of Eira | 49 | 1385 | Melee | Charge | ✦ ✹ Weak ❉ Dam ❋ ❉ Def |
Whirlwind Shard | Tower of Ascension |
|
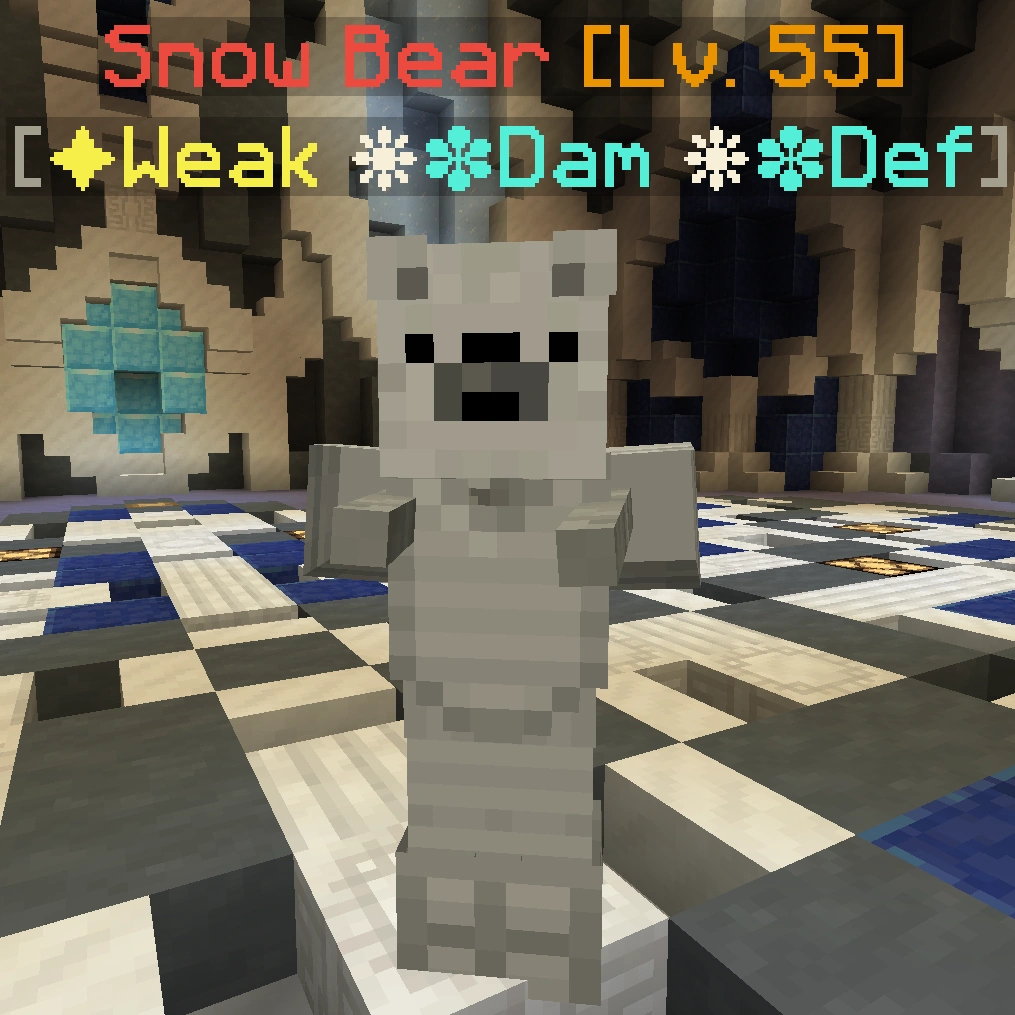
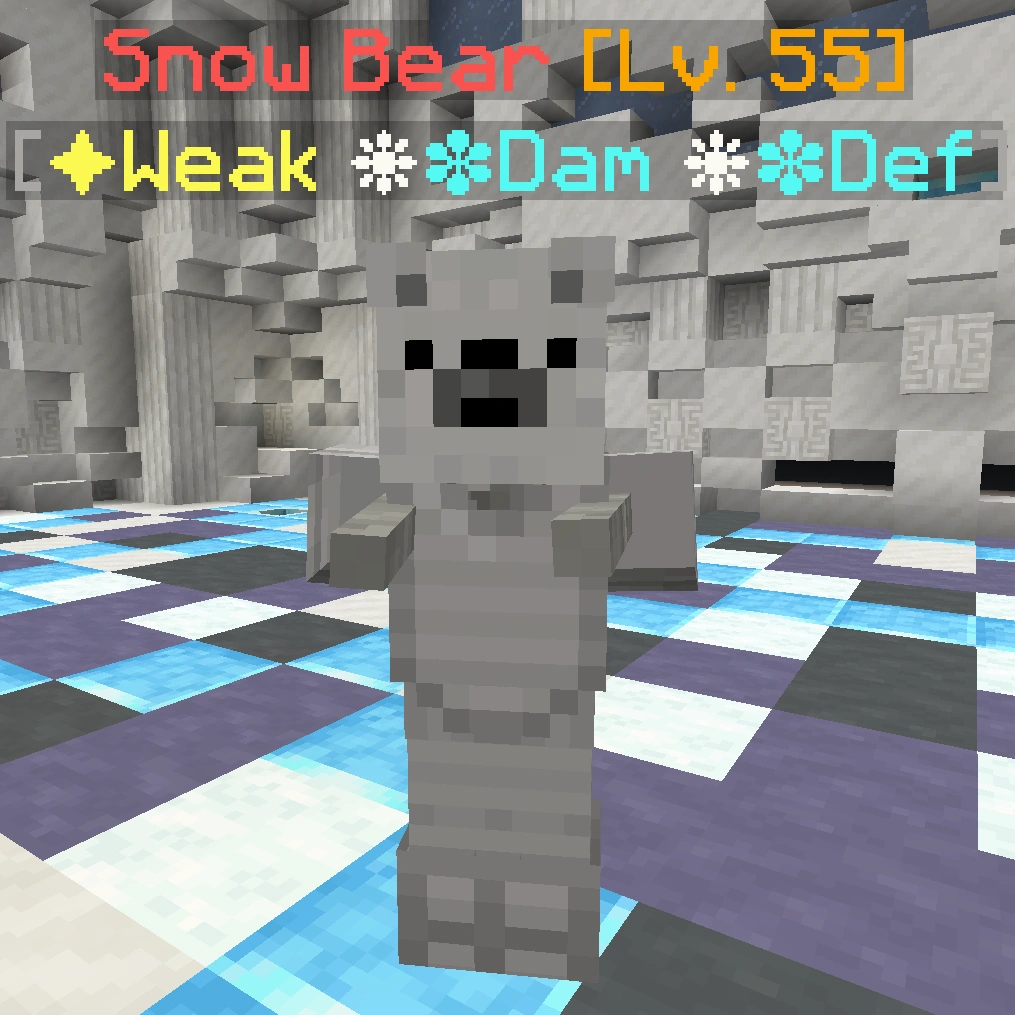
Snow Bear | 55 | 18500 | Ranged | Slowness | ✦ Weak ❋ ❉ Dam ❋ ❉ Def |
Crystal Shard | Tower of Ascension |
| Image | Name | Level | Health | AI Type | Abilities | Elemental Stats | Drops | Location |
|---|---|---|---|---|---|---|---|---|
|
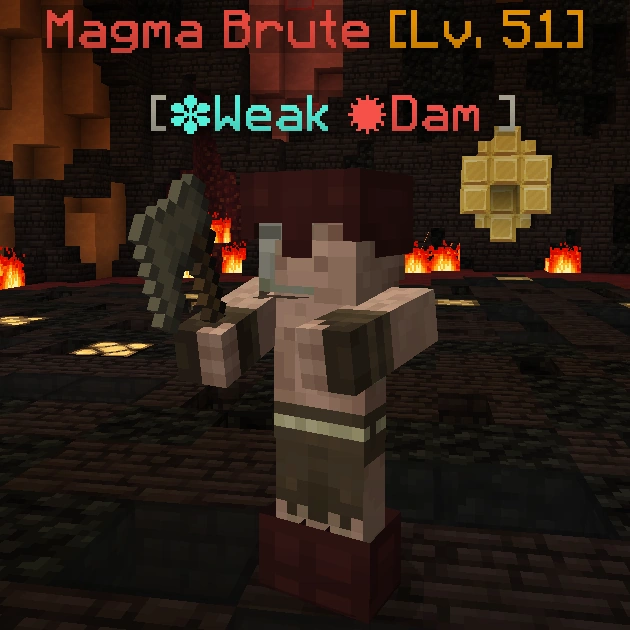
Magma Brute | 51 | 1565 | Melee | - | ❉ Weak ✹ Dam |
Searing Shard | Tower of Ascension |
|
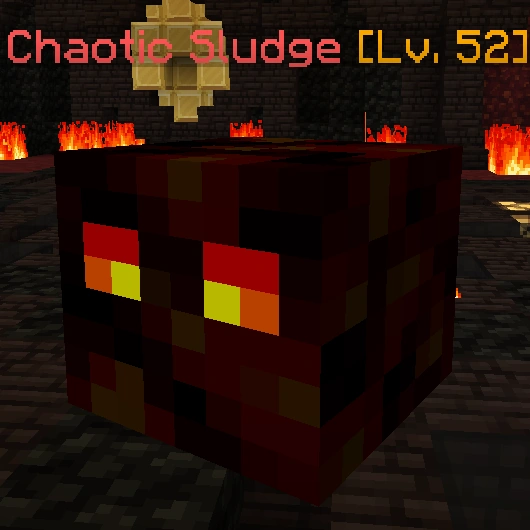
Chaotic Sludge | 52 | 1675 | Ranged | - | - | Lava Shard | Tower of Ascension |
|
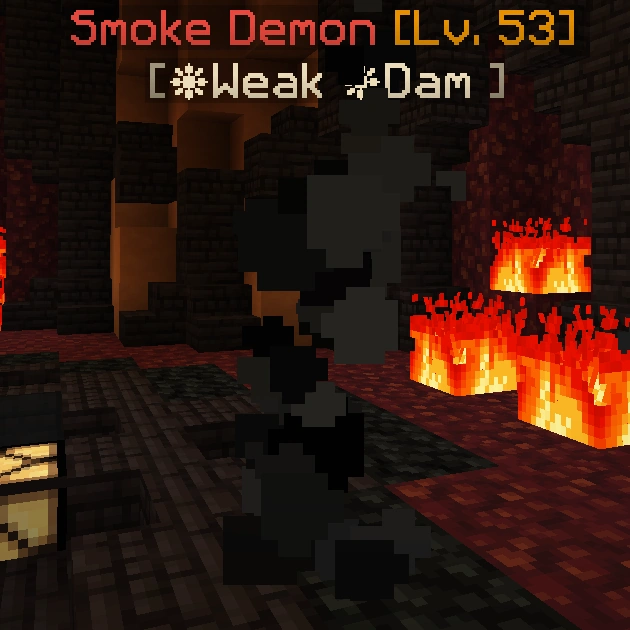
Smoke Demon | 53 | 1785 | Melee | - | ❋ Weak ❋ Dam |
Singed Shard | Tower of Ascension |
|
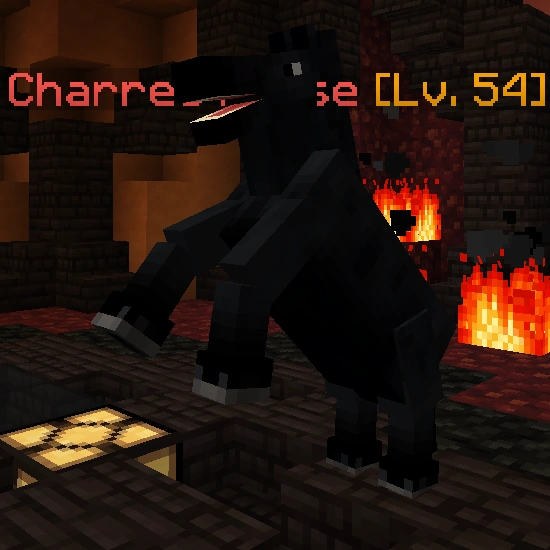
Charred Horse | 54 | 1895 | Melee | - | - | Flaming Shard | Tower of Ascension |
|
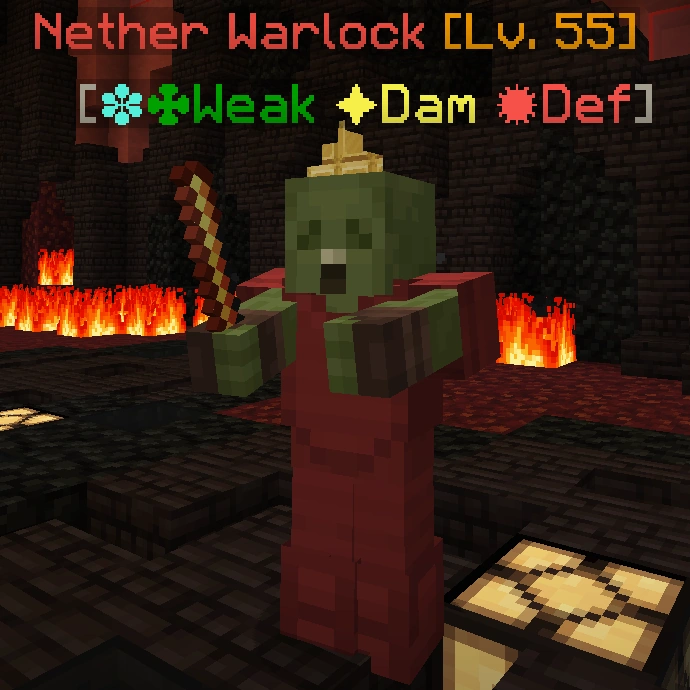
Nether Warlock | 55 | 2000 | Ranged | Teleport | ❉ ✤ Weak ✦ Dam ✹ Def |
Volcanic Shard | Tower of Ascension |
|
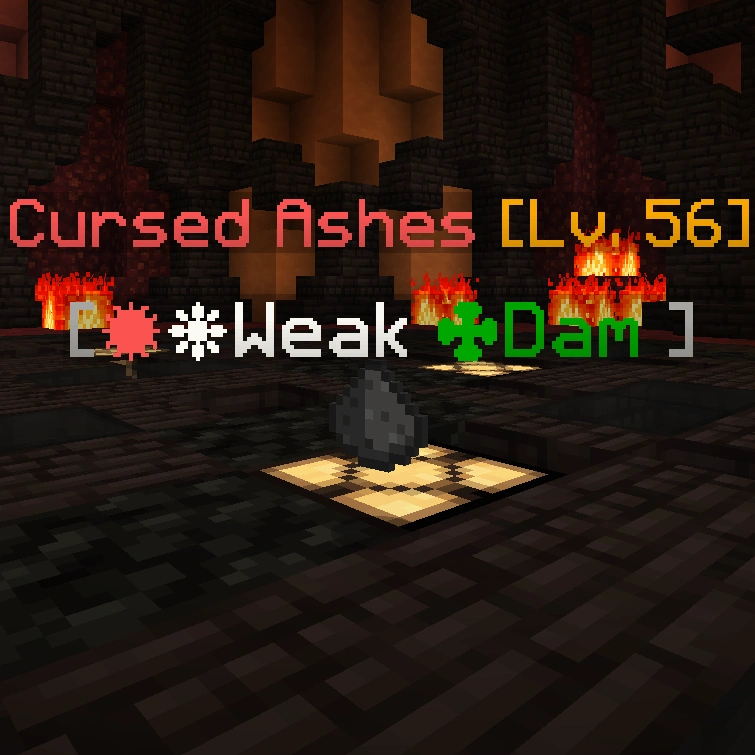
Cursed Ashes | 56 | 2150 | Melee | - | ✹ ❋ Weak ✤ Dam |
Ash Shard | Tower of Ascension |
|
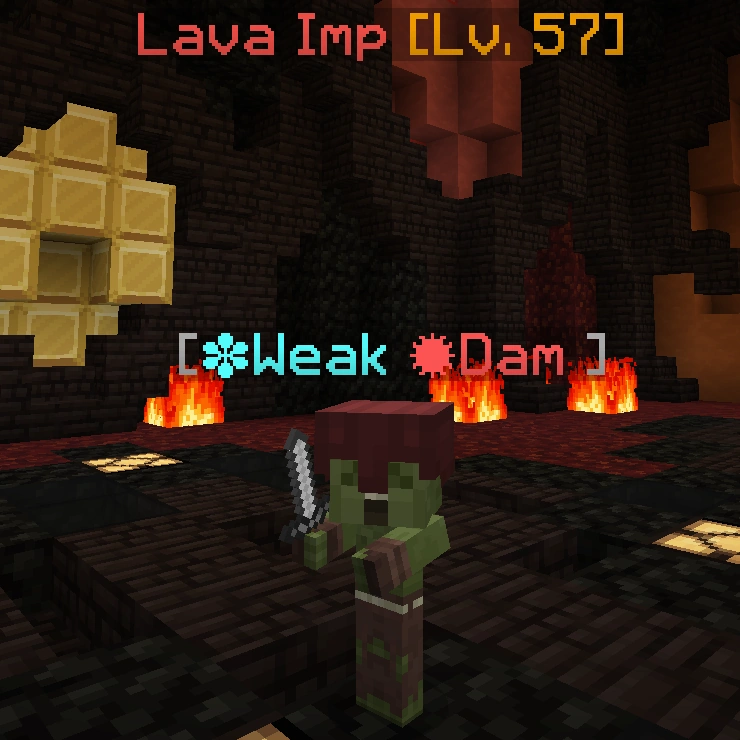
Lava Imp | 57 | 2285 | Melee | - | ❉ Weak ✹ Dam |
Warm Shard | Tower of Ascension |
|
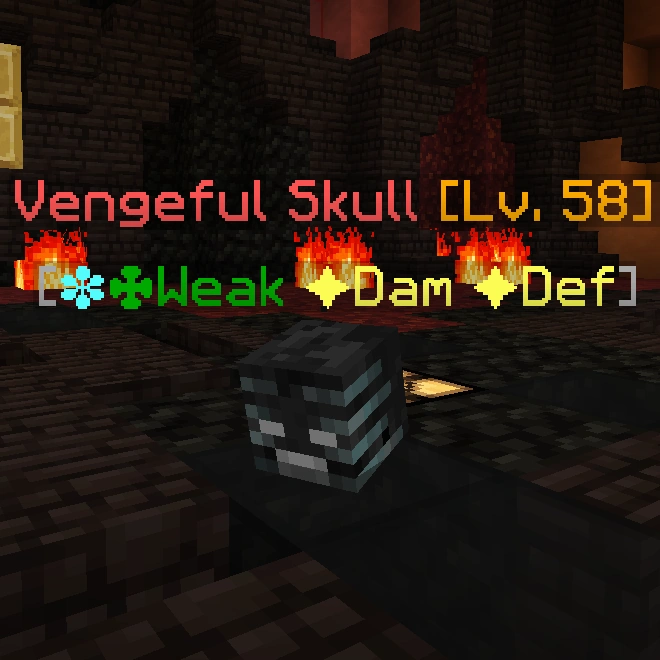
Vengeful Skull | 58 | 2425 | Ranged | - | ❉ ✤ Weak ✦ Dam ✦ Def |
Melted Shard | Tower of Ascension |
|
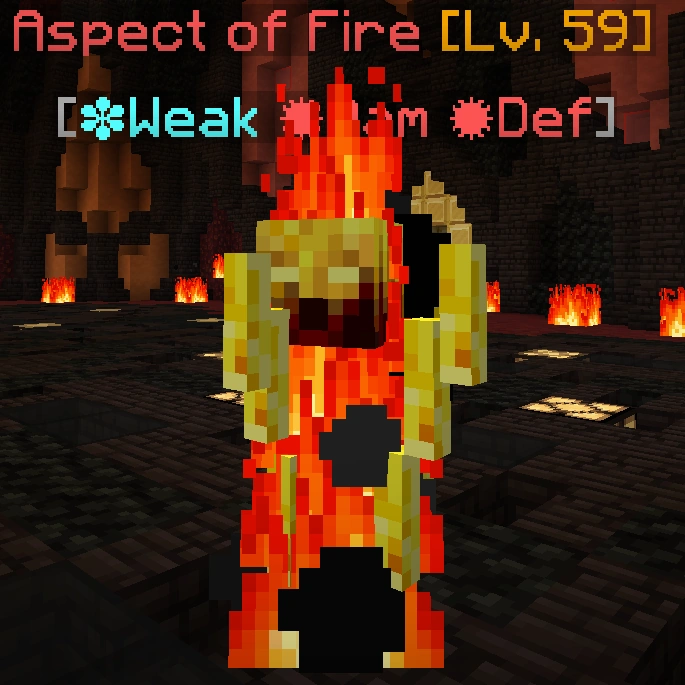
Aspect of Fire | 59 | 3075 | Melee | Flamethrower | ❉ Weak ✹ Dam ✹ Def |
Demonic Shard | Tower of Ascension |
|
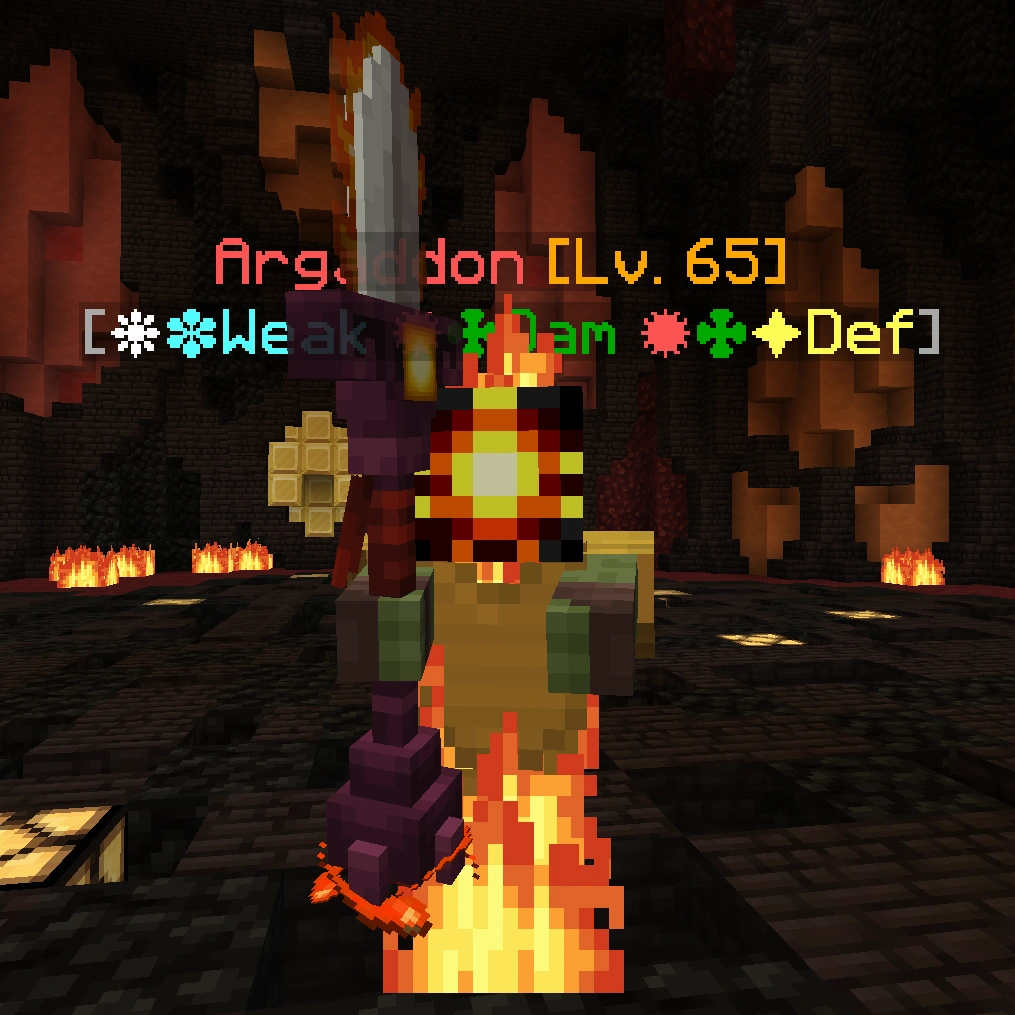
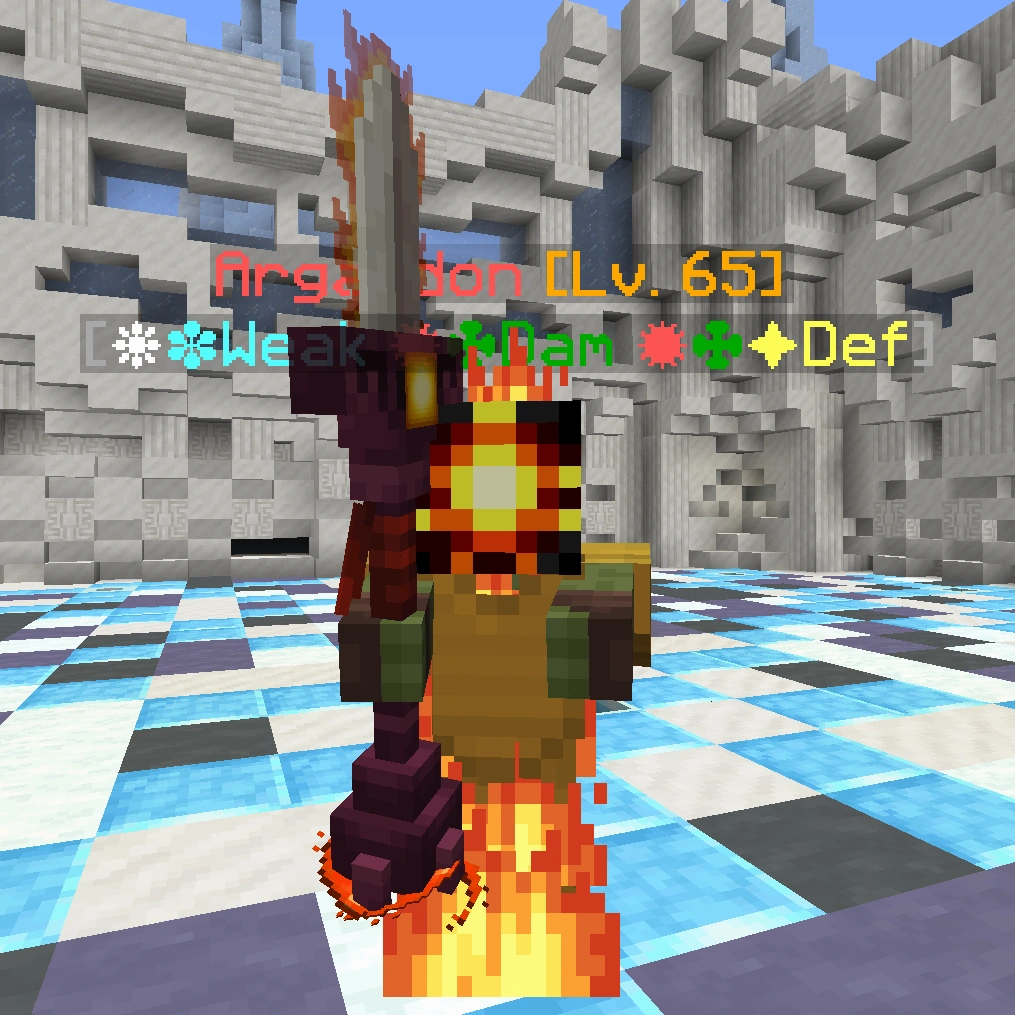
Argaddon | 65 | 30000 | Melee | Meteor | ❋ ❉ Weak ✹ ✤ Dam ✹ ✤ ✦ Def |
Crystal Shard | Tower of Ascension |
| Image | Name | Level | Health | AI Type | Abilities | Elemental Stats | Drops | Location |
|---|---|---|---|---|---|---|---|---|
|
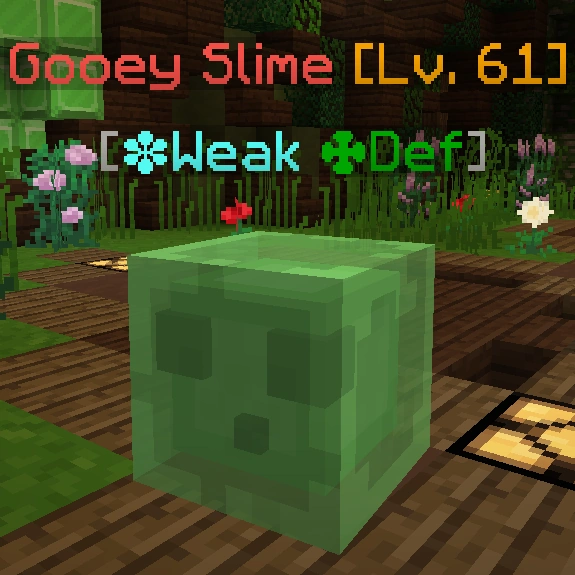
Gooey Slime | 61 | 2840 | Melee | - | ❉ Weak ✤ Def |
Gooey Shard | Tower of Ascension |
|
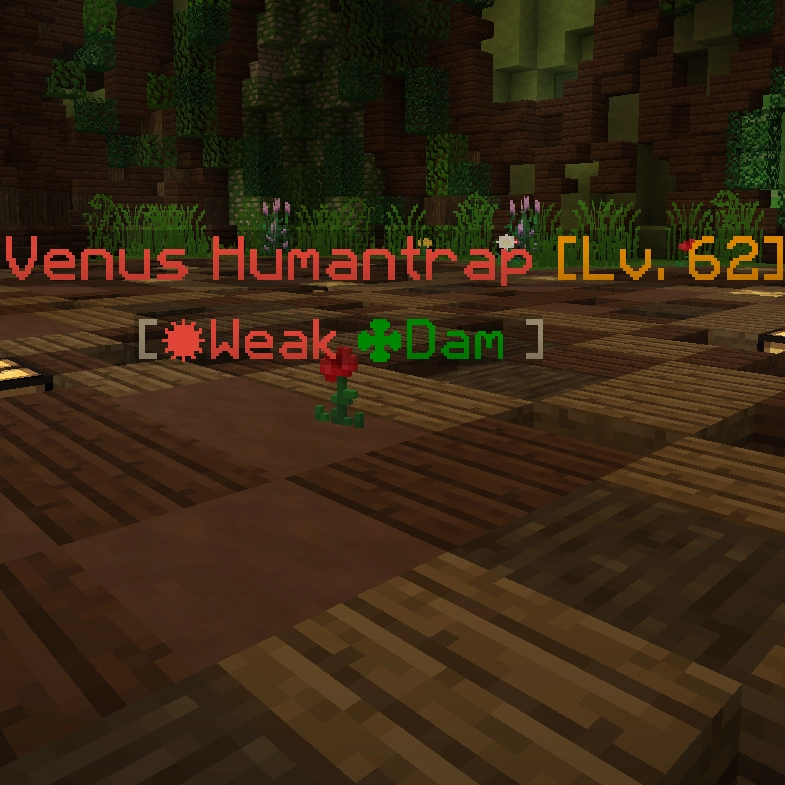
Venus Humantrap | 62 | 2740 | Melee | - | ✹ Weak ✤ Dam |
Spine Shard | Tower of Ascension |
|
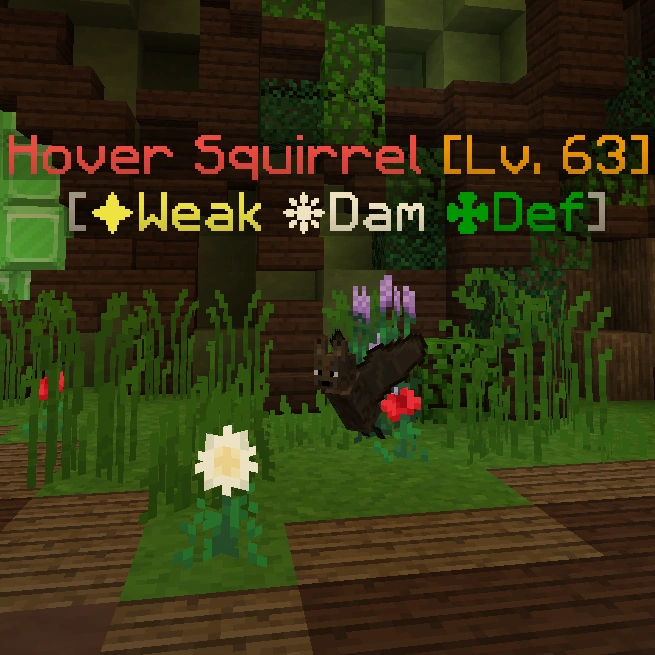
Hover Squirrel | 63 | 3074 | Ranged | - | ✦ Weak ❋ Dam ✤ Def |
Soft Shard | Tower of Ascension |
|
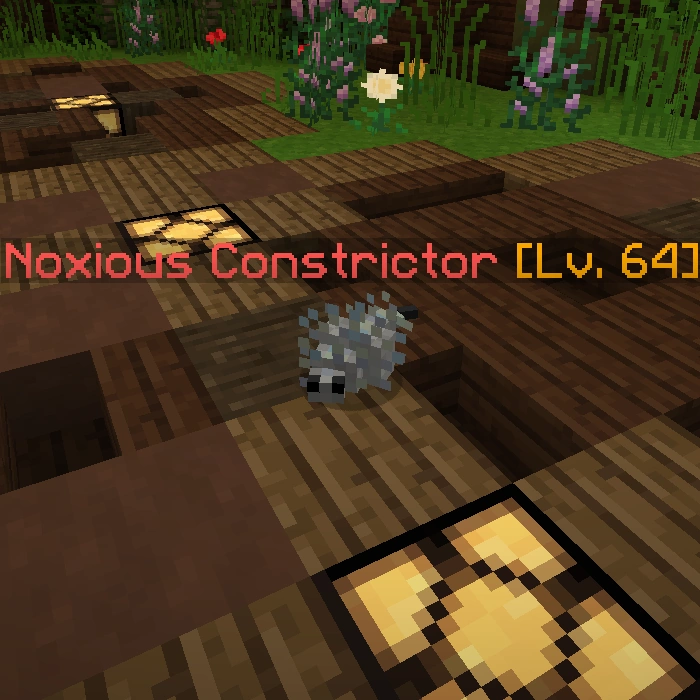
Noxious Constrictor | 64 | 3063 | Melee | - | - | Toxic Shard | Tower of Ascension |
|
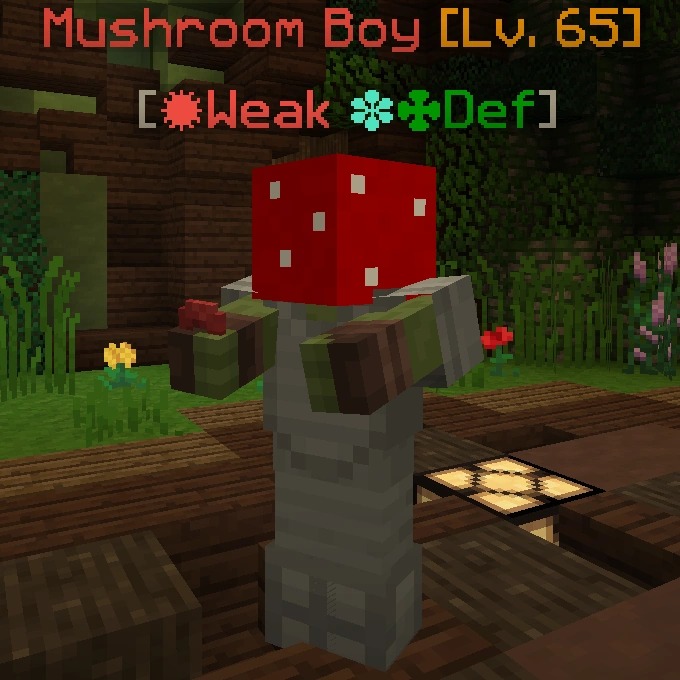
Mushroom Boy | 65 | 3335 | Melee | Multihit | ✹ Weak ❉ ✤ Def |
Spore Shard | Tower of Ascension |

|
Jack of The Jungle | 66 | 3475 | Ranged | Slowness | ✤ Weak ✦ Dam ✦ Def |
Tricky Shard | Tower of Ascension |
|
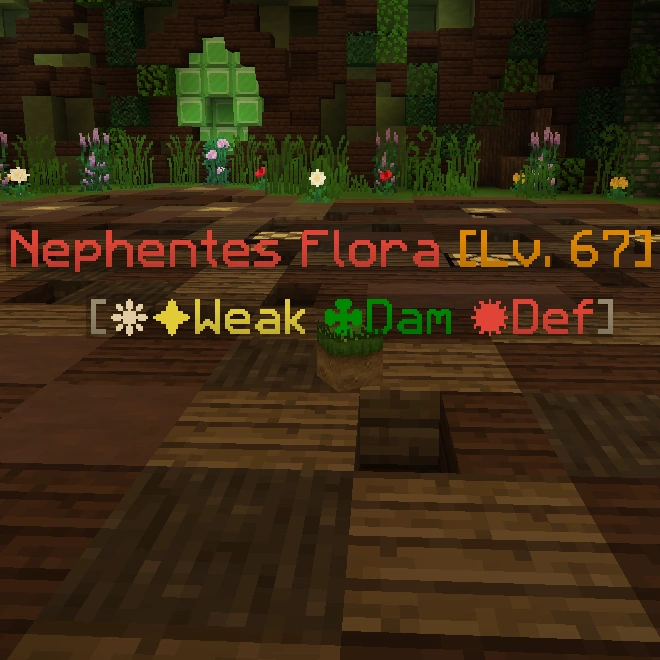
Nephentes Flora | 67 | 3430 | Ranged | Weakness | ❋ ✦ Weak ✤ Dam ✹ Def |
Light Shard | Tower of Ascension |
|
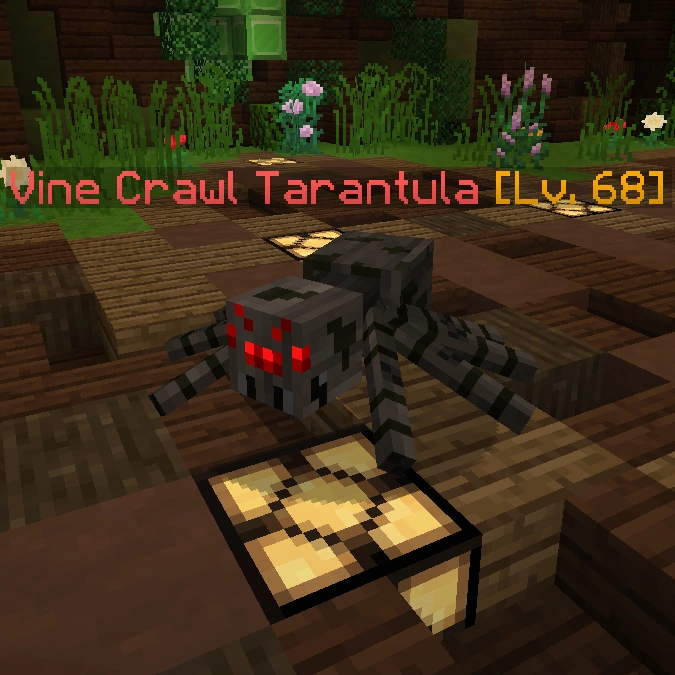
Vine Crawl Tarantula | 68 | 3730 | Melee | Charge | - | Wild Shard | Tower of Ascension |
|
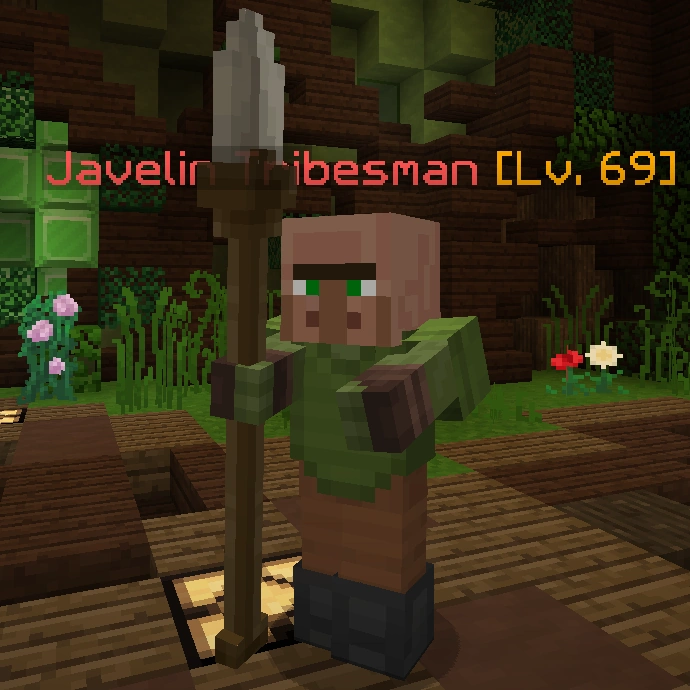
Javelin Tribesman | 69 | 3900 | Ranged | Arrow Storm | - | Mellow Shard | Tower of Ascension |
|
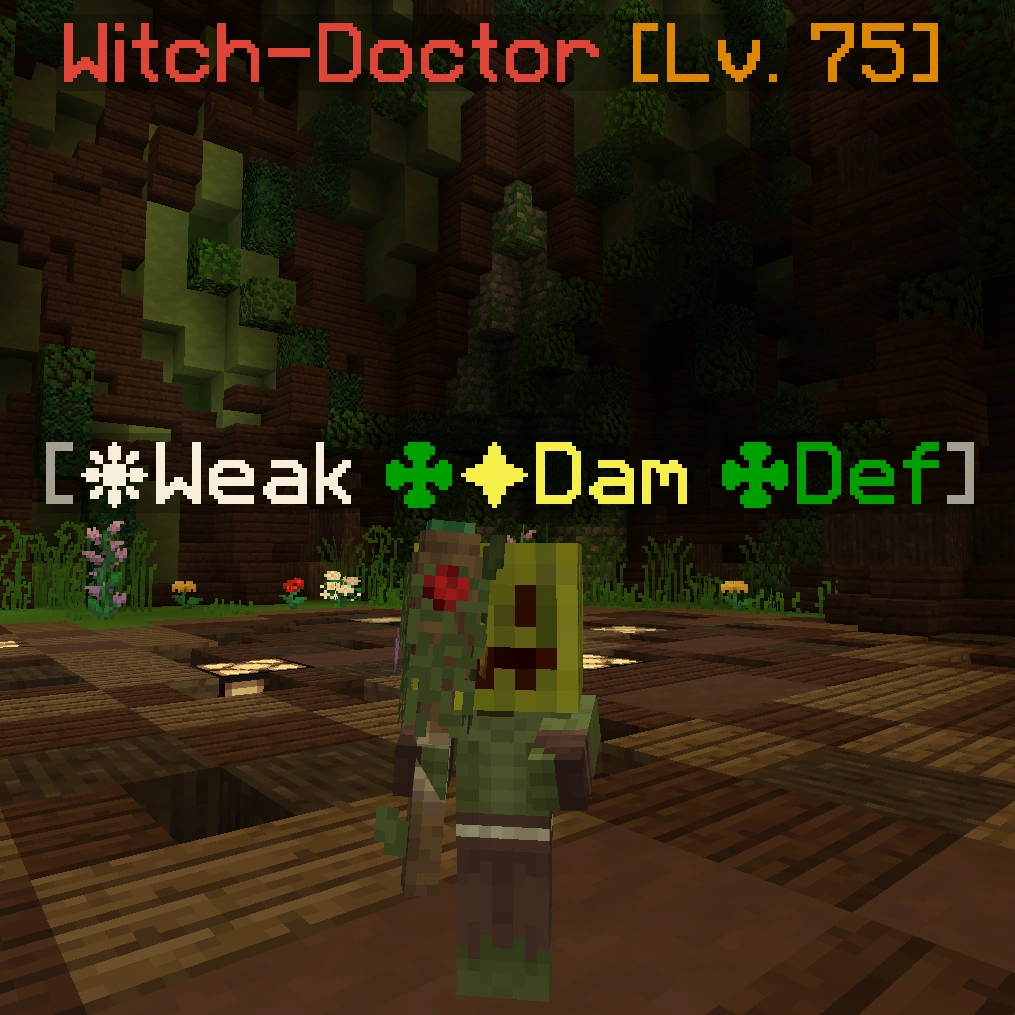
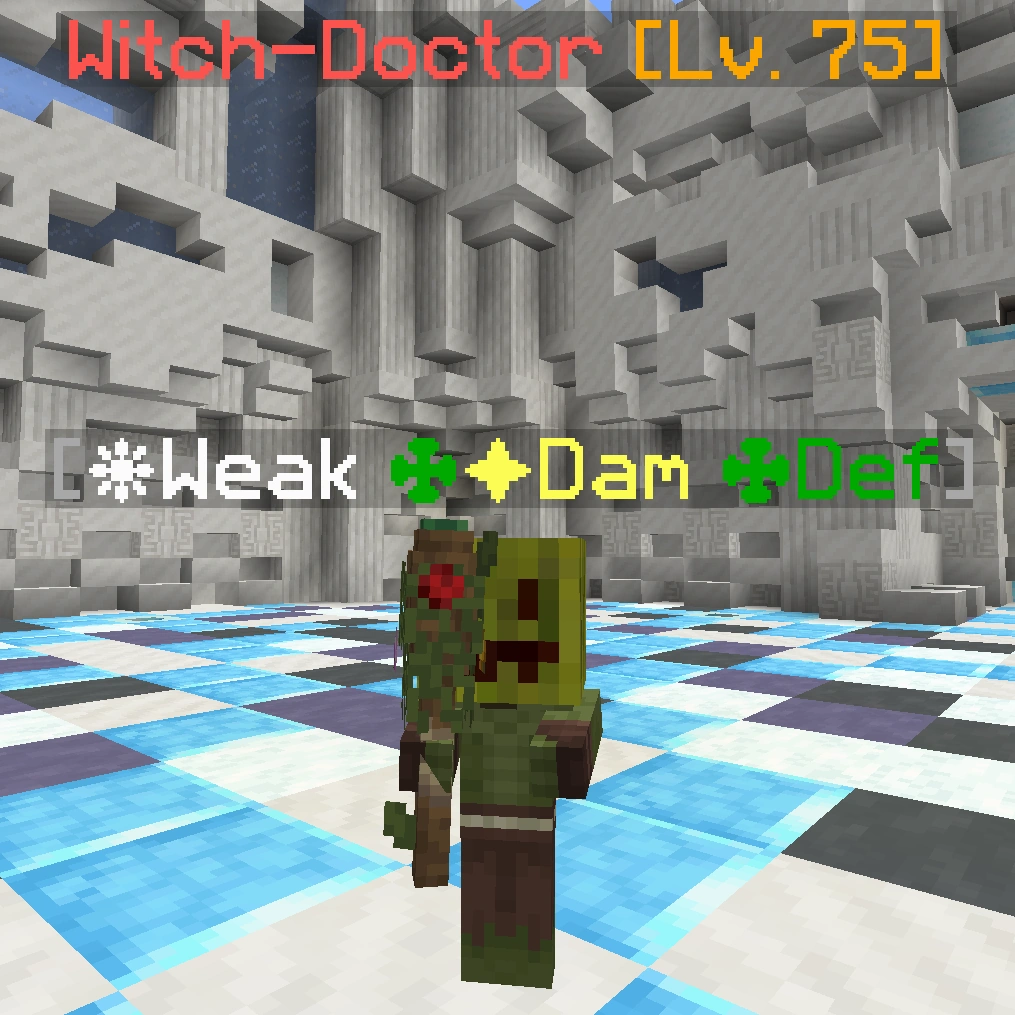
Witch-Doctor | 75 | 54,000 | Ranged | Weakness II | ❋ Weak ✤ ✦ Dam ✤ Def |
Crystal Shard | Tower of Ascension |
|
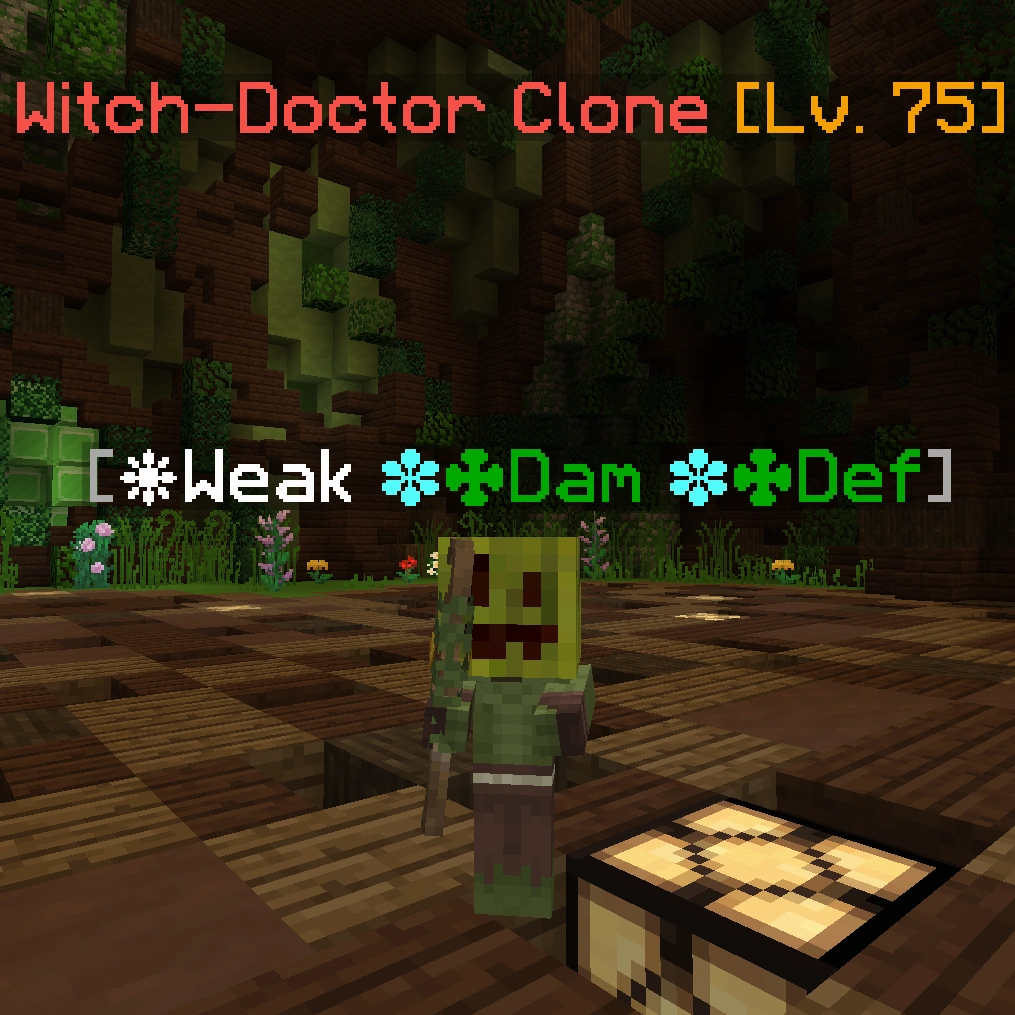
Witch-Doctor Clone | 75 | 27,000 | Ranged | Push | ❋ Weak ❉ ✤ Dam ❉ ✤ Def |
None | Tower of Ascension |
| Image | Name | Level | Health | AI Type | Abilities | Elemental Stats | Drops | Location |
|---|---|---|---|---|---|---|---|---|
|
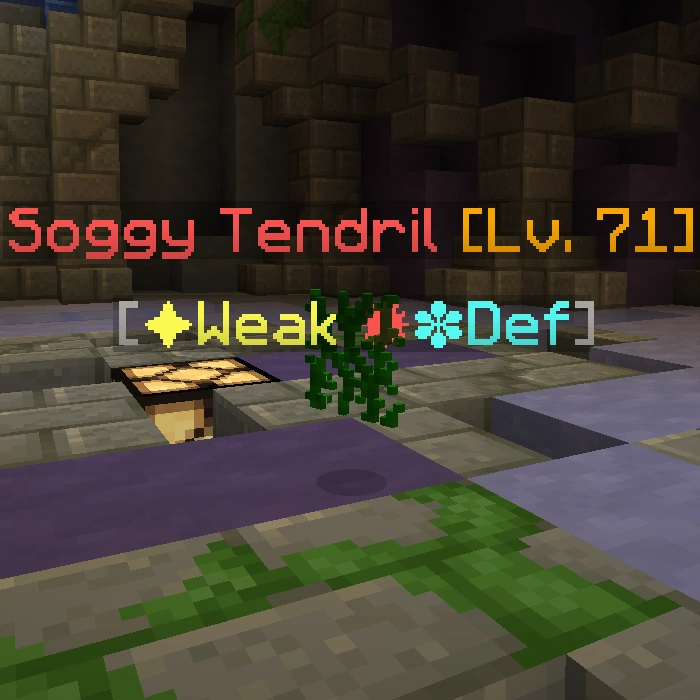
Soggy Tendril | 71 | 3975 | Melee | - | ✦ Weak ✹ ❉ Def |
Silver Shard | Tower of Ascension |
|
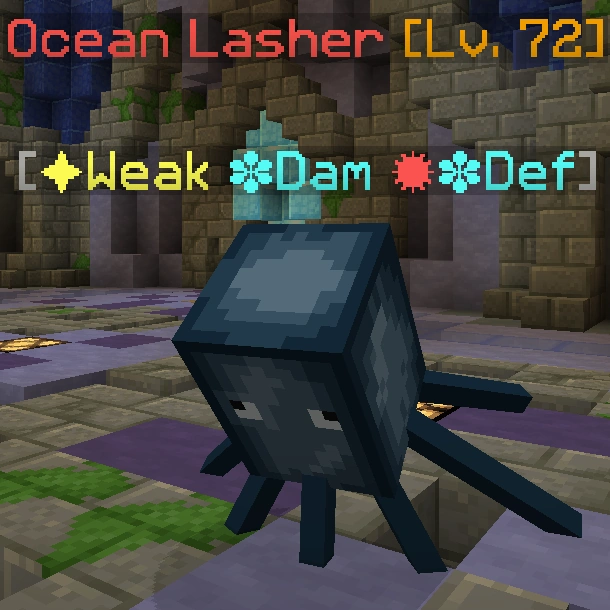
Ocean Lasher | 72 | 4400 | Ranged | - | ✦ Weak ❉ Dam ✹ ❉ Def |
Aqueous Shard | Tower of Ascension |
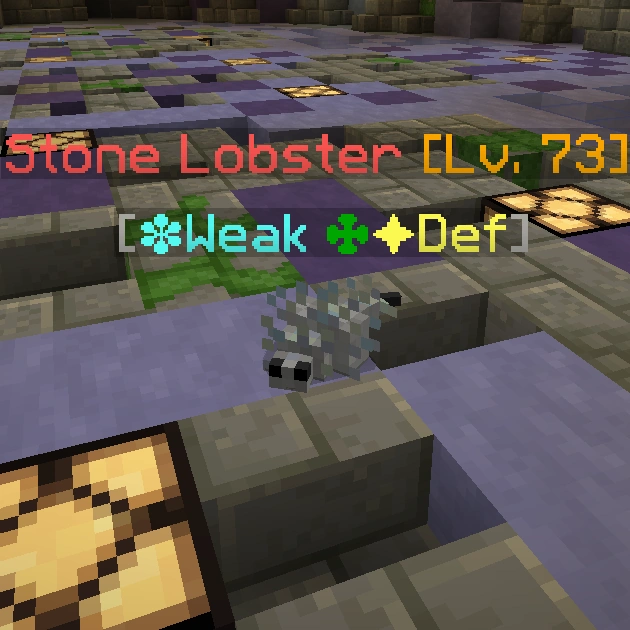
|
Stone Lobster | 73 | 5075 | Melee | - | ❉ Weak ✤ ✦ Def |
Storm Shard | Tower of Ascension |
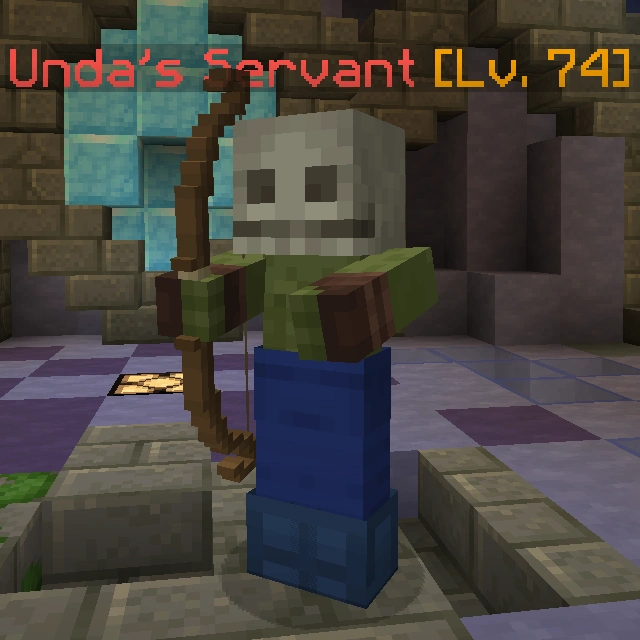
|
Unda's Servant | 74 | 4750 | Ranged | - | - | Kelp Shard | Tower of Ascension |

|
Sunken Treasure | 75 | 4900 | Melee | - | ✹ Weak ✤ Def |
Gemstone Shard | Tower of Ascension |

|
Trench Angler | 76 | 5100 | Melee | Charge | ✦ Weak ❉ Dam ✹ Def |
Oceanic Shard | Tower of Ascension |
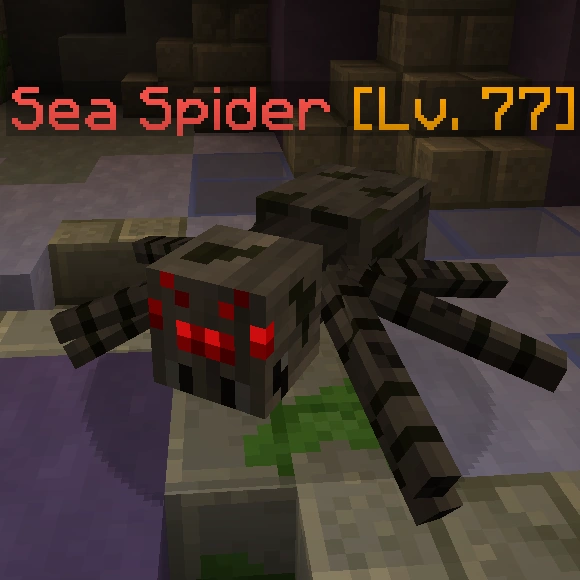
|
Sea Spider | 77 | 5300 | Melee | Web | - | Coral Shard | Tower of Ascension |
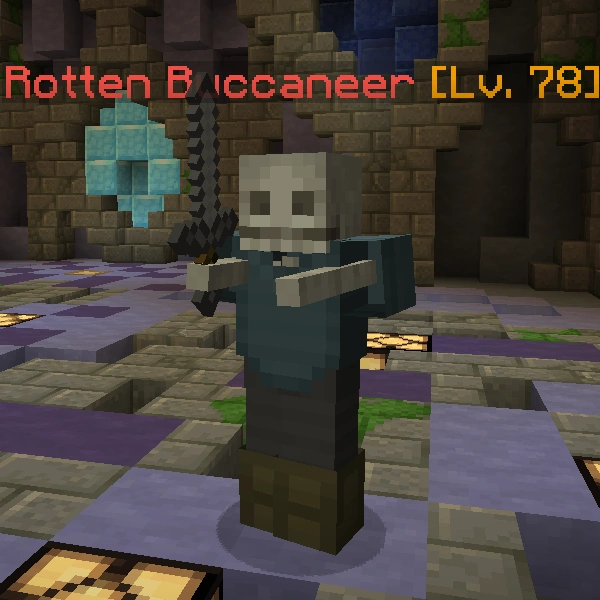
|
Rotten Buccaneer | 78 | 5500 | Melee | - | - | Briny Shard | Tower of Ascension |
|
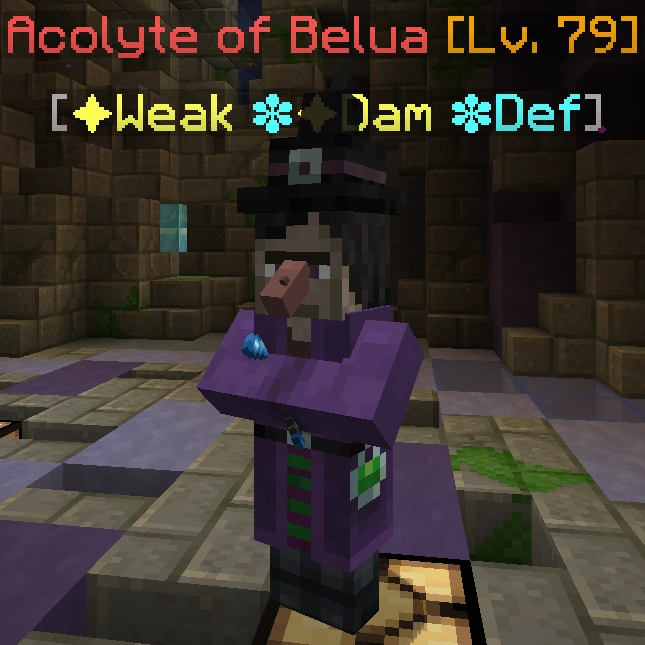
Acolyte of Belua | 79 | 5685 | Ranged | Slowness II | ✦ Weak ❉ ✦ Dam ❉ Def |
Kraken Shard | Tower of Ascension |
|
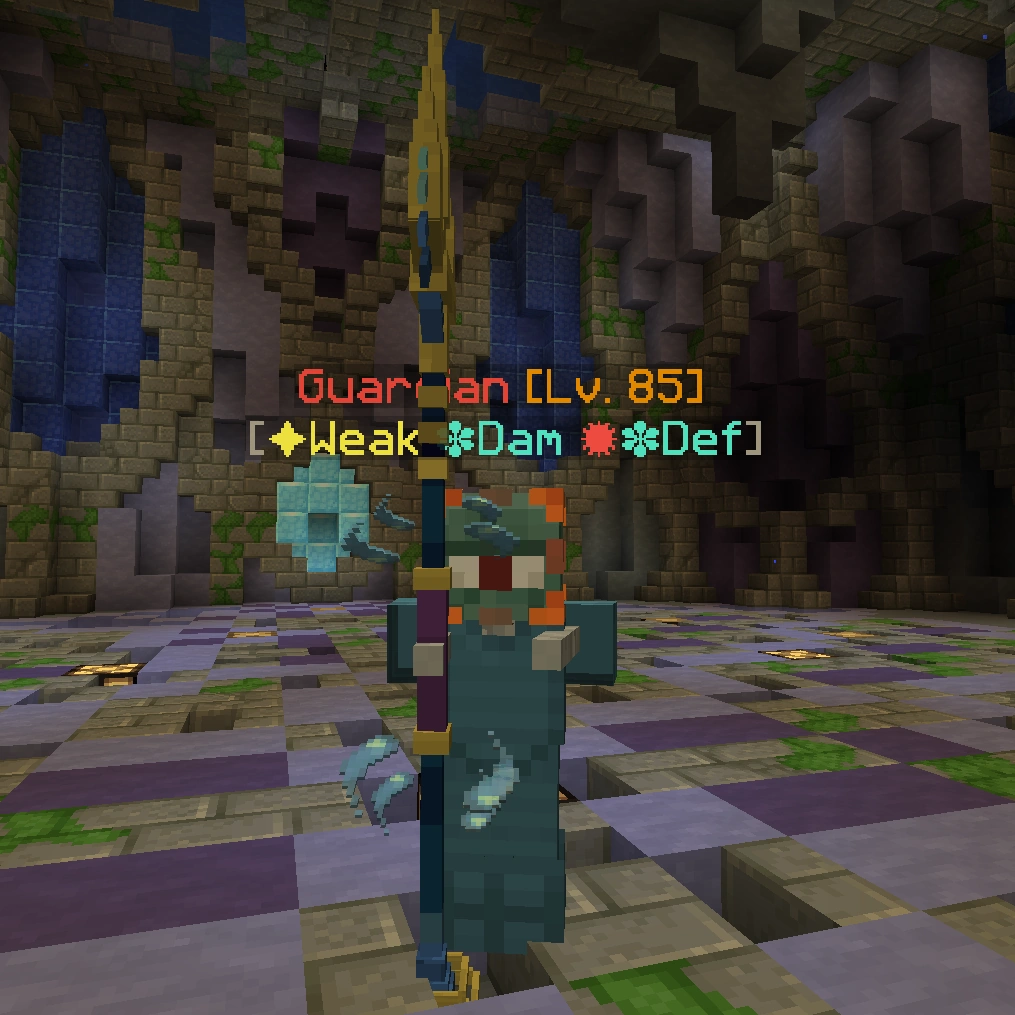
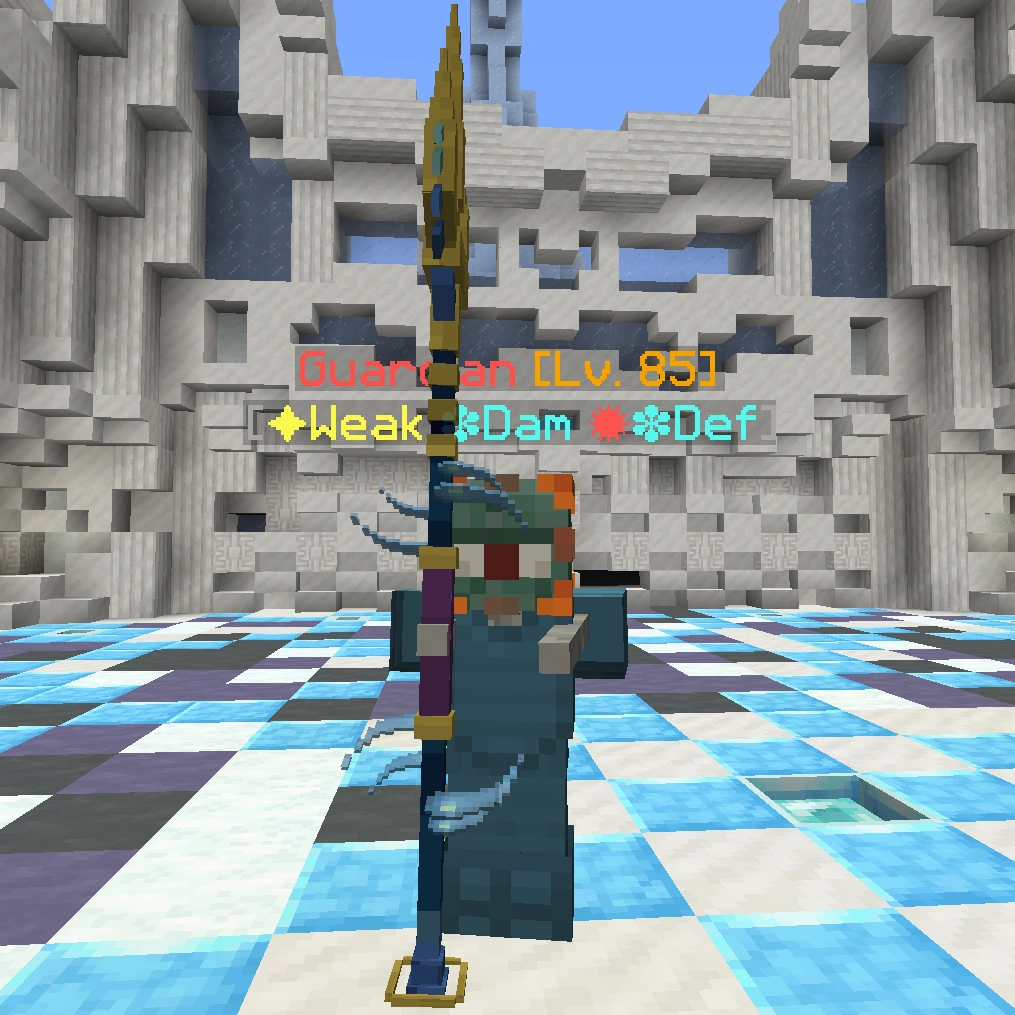
Guardian | 85 | 128000 | Melee | Charge | ✦ Weak ❉ Dam ✹ ❉ Def |
Crystal Shard | Tower of Ascension |
| Image | Name | Level | Health | AI Type | Abilities | Elemental Stats | Drops | Location |
|---|---|---|---|---|---|---|---|---|
|
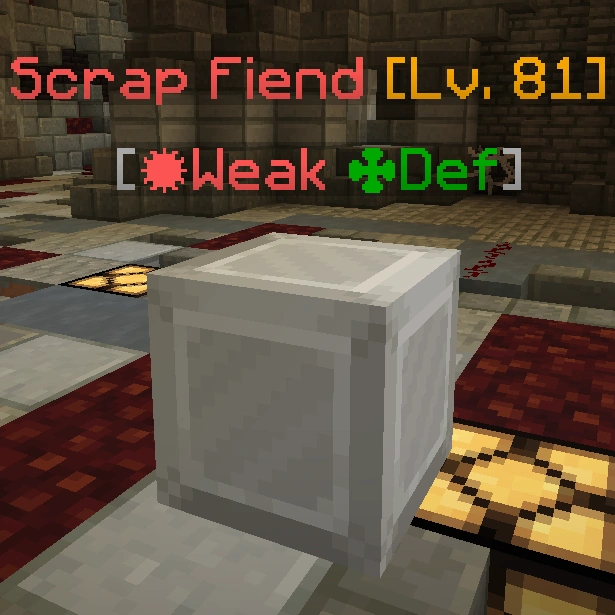
Scrap Fiend | 81 | 6825 | Melee | - | ✹ Weak ✤ Def |
Rusty Shard | Tower of Ascension |
|
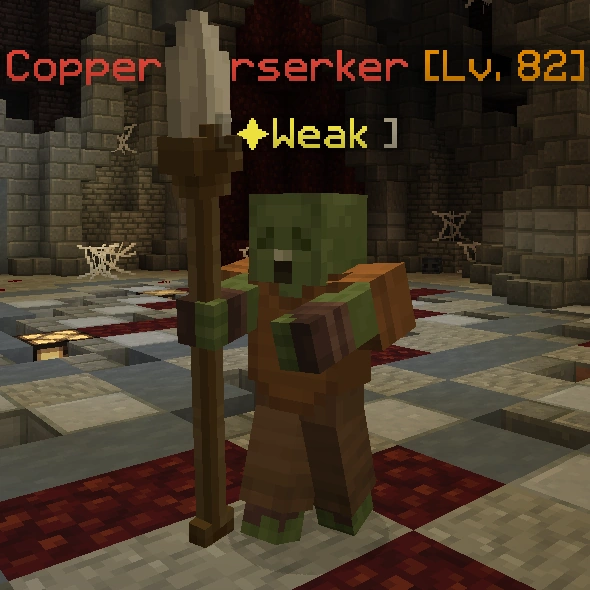
Copper Berserker | 82 | 5565 | Melee | - | ✦ Weak | Broken Shard | Tower of Ascension |
|
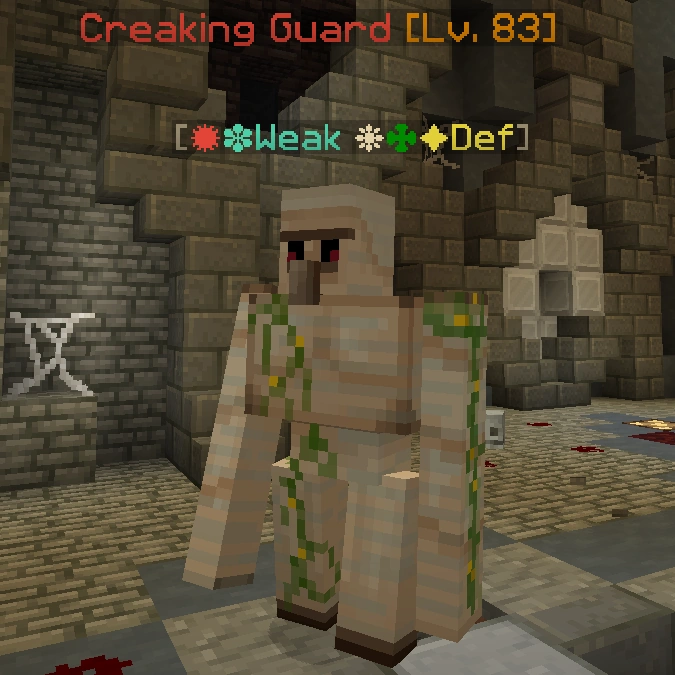
Creaking Guard | 83 | 7330 | Melee | Flamethrower | ✹ ❉ Weak ❋ ✦ ✤ Def |
Iron Shard | Tower of Ascension |
|
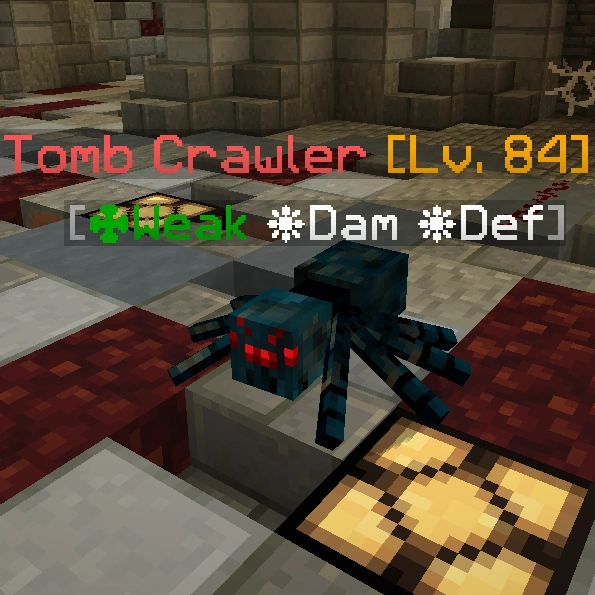
Tomb Crawler | 84 | 6765 | Melee | - | ✤ Weak ❋ Dam ❋ Def |
Faded Shard | Tower of Ascension |
|
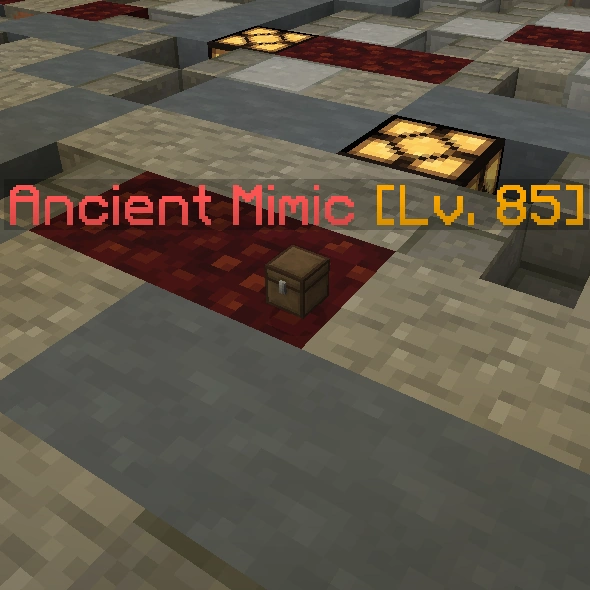
Ancient Mimic | 85 | 6150 | Melee | - | - | Steam Shard | Tower of Ascension |

|
Wretched Hag | 86 | 8110 | Ranged | Slowness II | ❉ Weak ✤ ✦ Dam ✦ Def |
Ancient Shard | Tower of Ascension |
|
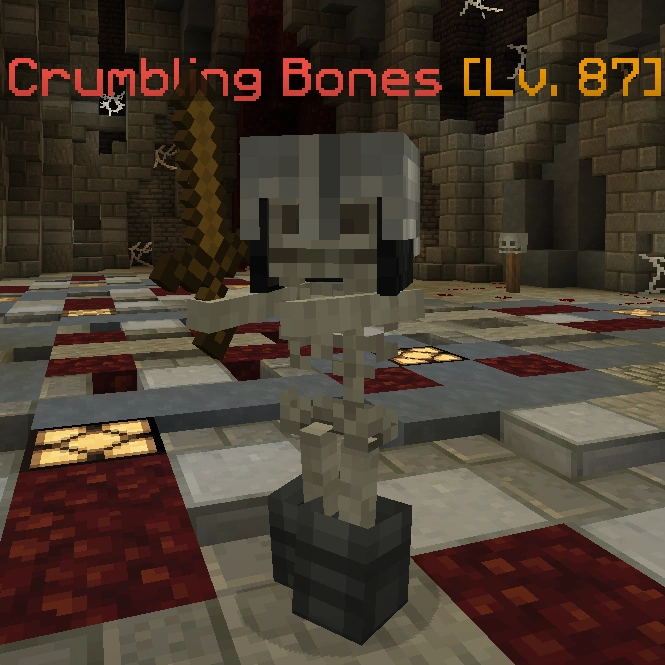
Crumbling Bones | 87 | 6600 | Melee | - | - | Brass Shard | Tower of Ascension |
|
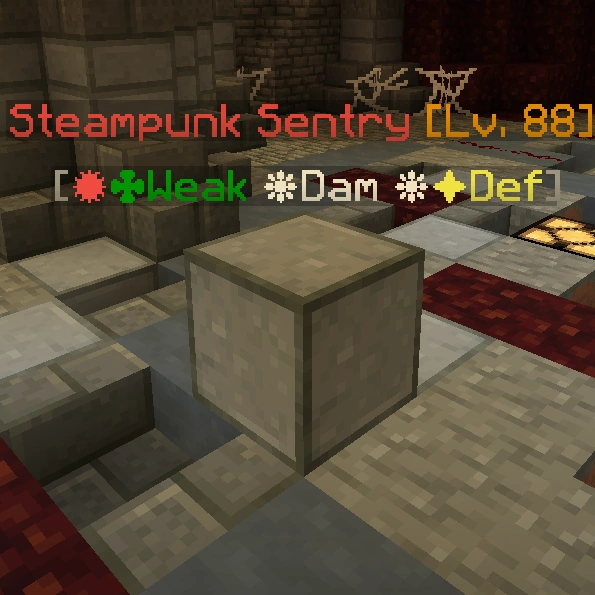
Steampunk Sentry | 88 | 8675 | Ranged | Arrow Storm | ✹ ✤ Weak ❋ Dam ❋ ✦ Def |
Steel Shard | Tower of Ascension |
|
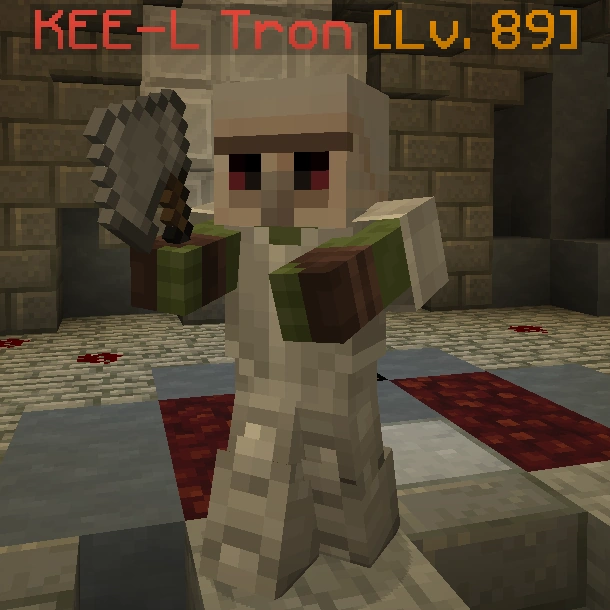
KEE-L Tron | 89 | 7050 | Melee | Charge | - | Electrical Shard | Tower of Ascension |
|
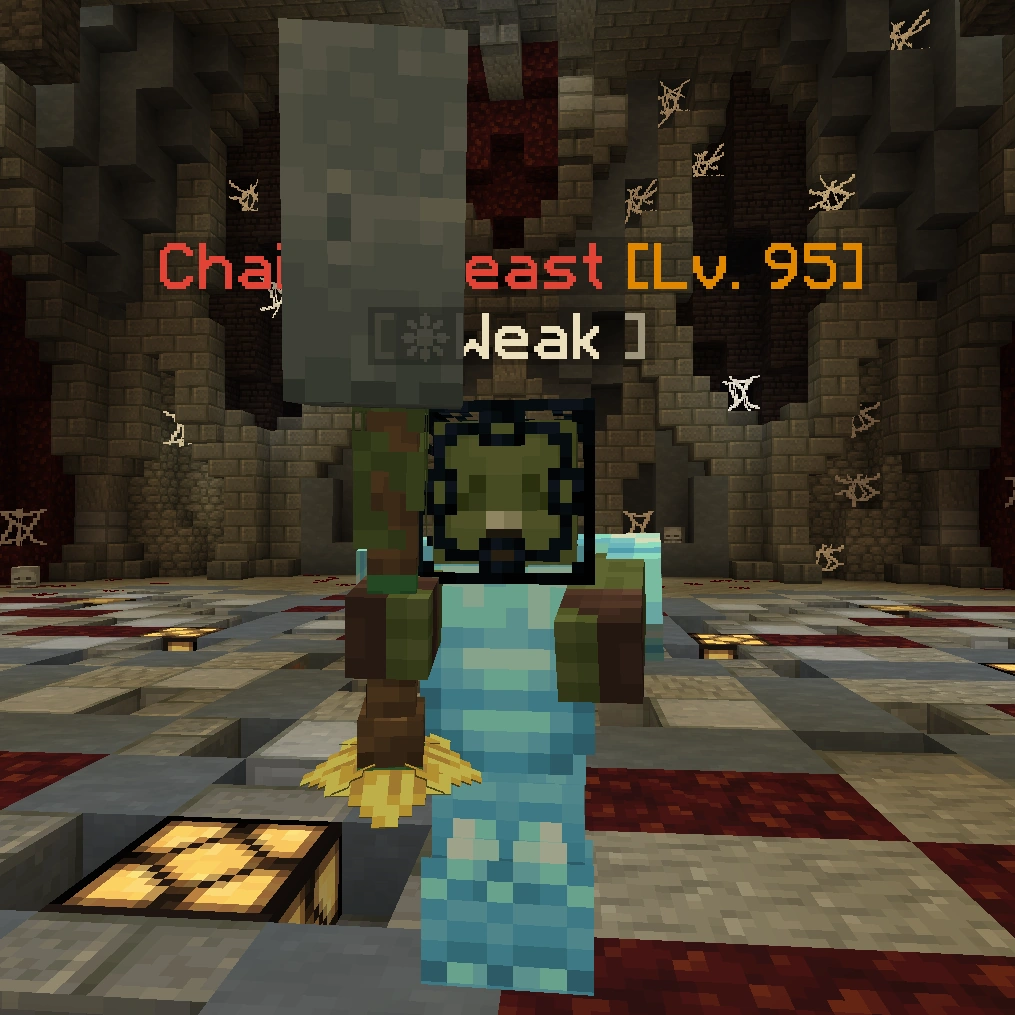
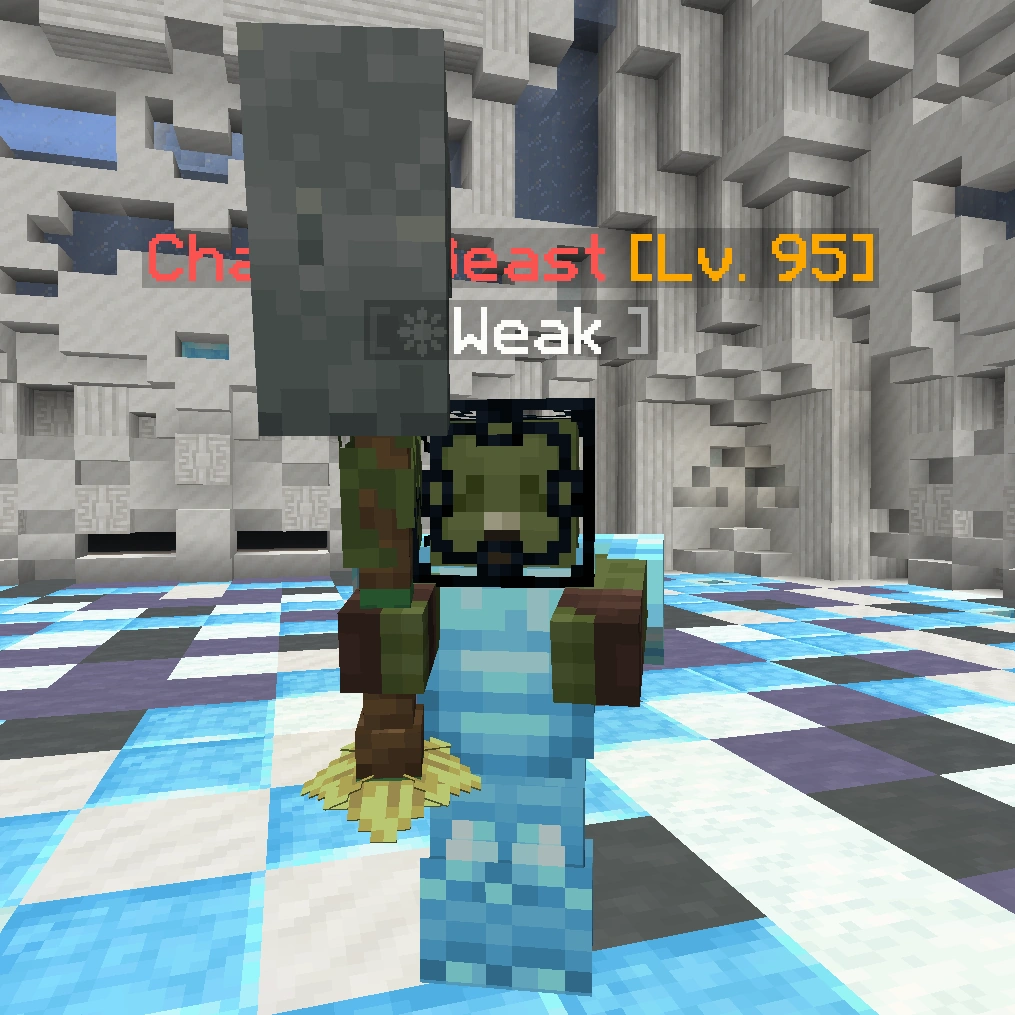
Chained Beast | 95 | 100000 | Melee | Charge | ❋ Weak | Crystal Shard | Tower of Ascension |
| Image | Name | Level | Health | AI Type | Abilities | Elemental Stats | Drops | Location |
|---|---|---|---|---|---|---|---|---|
|
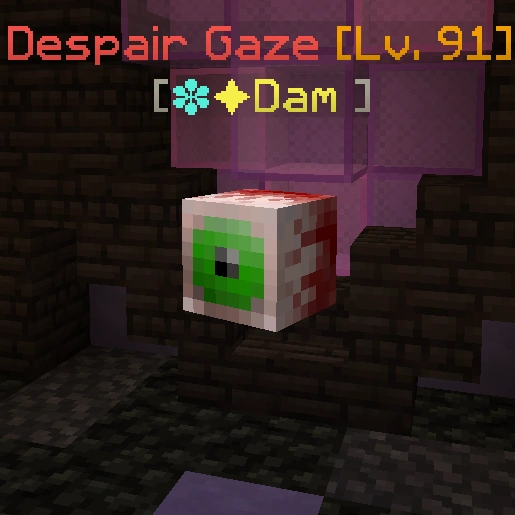
Despair Gaze | 91 | 8550 | Ranged | - | ❉ ✦ Dam | Dark Shard | Tower of Ascension |
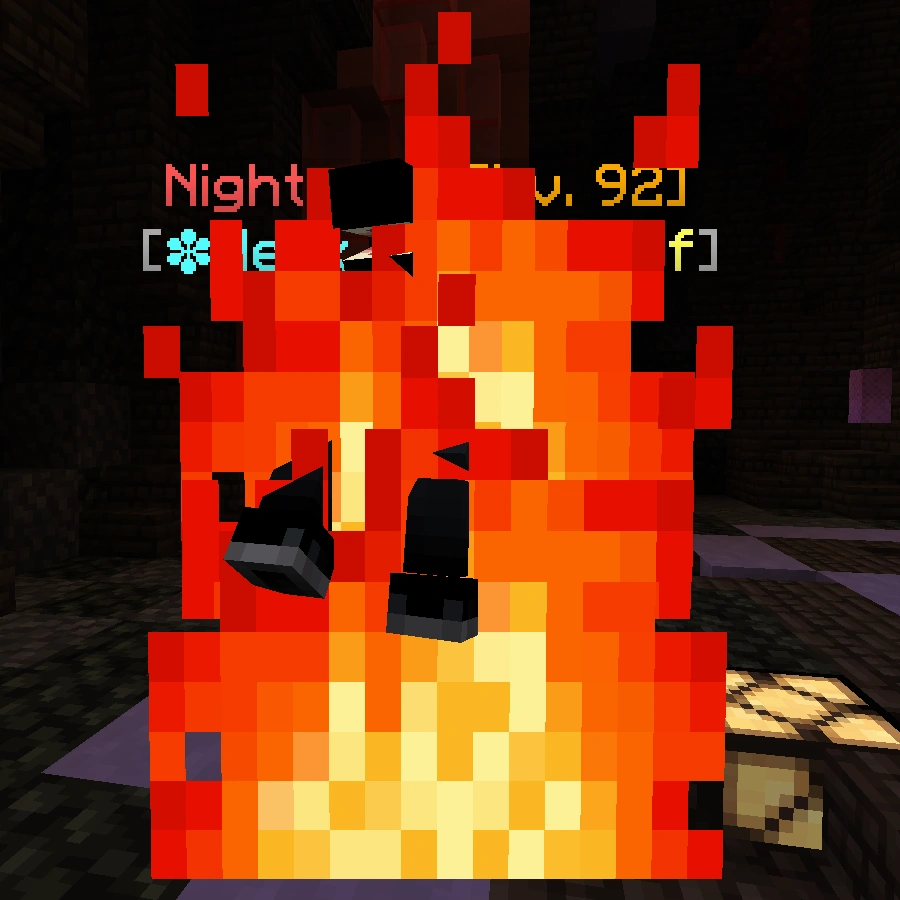
|
Nightmare | 92 | 8835 | Melee | Charge | ❉ Weak ✹ Dam ✦ Def |
Warped Shard | Tower of Ascension |
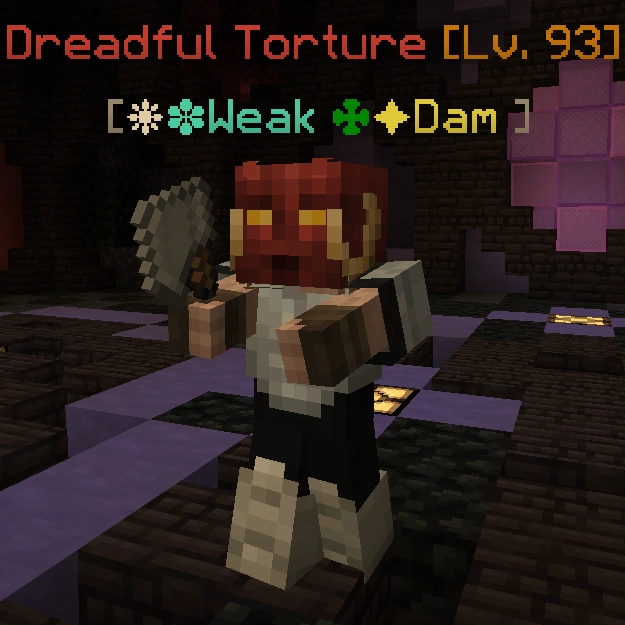
|
Dreadful Torture | 93 | 9125 | Melee | Slowness | ❋ ❉ Weak ✤ ✦ Dam |
Corrupt Shard | Tower of Ascension |

|
Spirit of Makai | 94 | 9400 | Ranged | Self-Destruct | ❋ ❉ ✤ Weak ✦ Dam ✹ ✦ Def |
Malignant Shard | Tower of Ascension |

|
Twisted Soul | 95 | 9700 | Melee | Teleport | ✹ Weak ✦ Dam ❋ Def |
Vile Shard | Tower of Ascension |
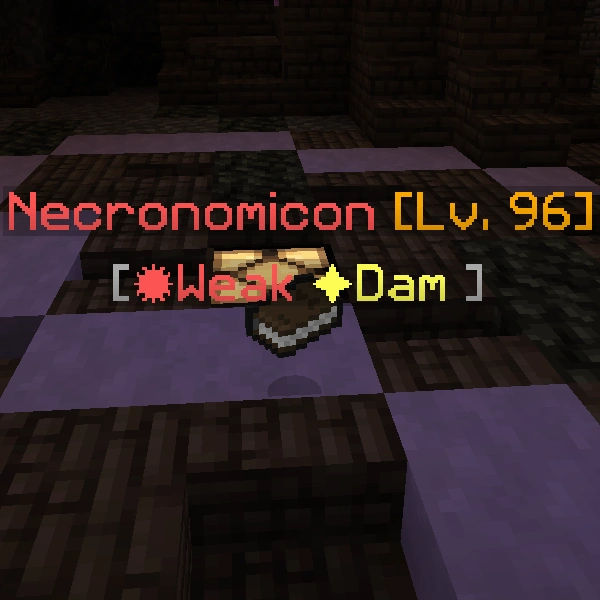
|
Necronomicon | 96 | 10000 | Melee | Vanish | ✹ Weak ✦ Dam |
Shadow Shard | Tower of Ascension |
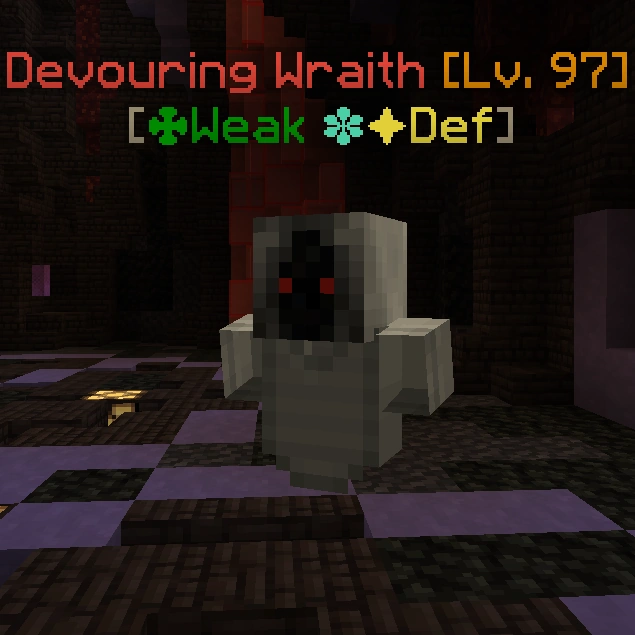
|
Devouring Wraith | 97 | 10350 | Melee | Weakness II | ✤ Weak ❉ ✦ Def |
Twisted Shard | Tower of Ascension |
|
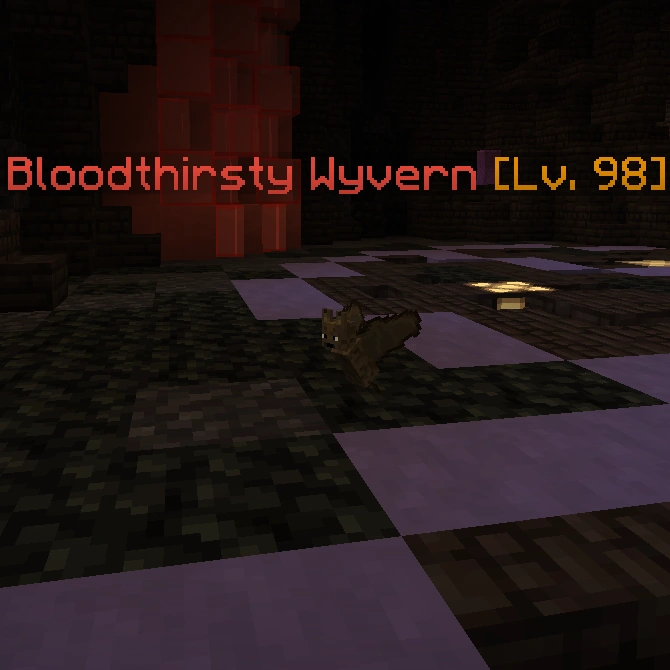
Bloodthirsty Wyvern | 98 | 10675 | Melee | Charge | - | Ghostly Shard | Tower of Ascension |
|
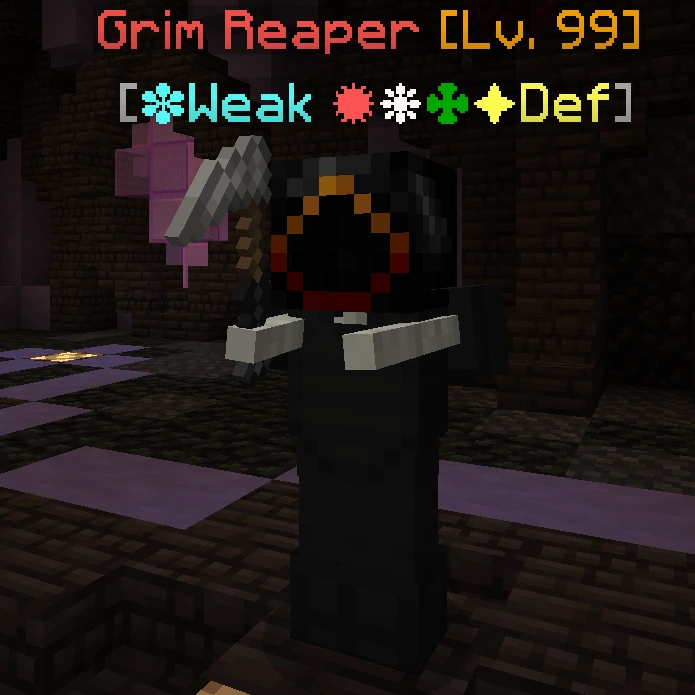
Grim Reaper | 99 | 26400 | Melee | Multihit | ❉ Weak ✹ ❋ ✤ ✦ Def |
Unholy Shard | Tower of Ascension |
|
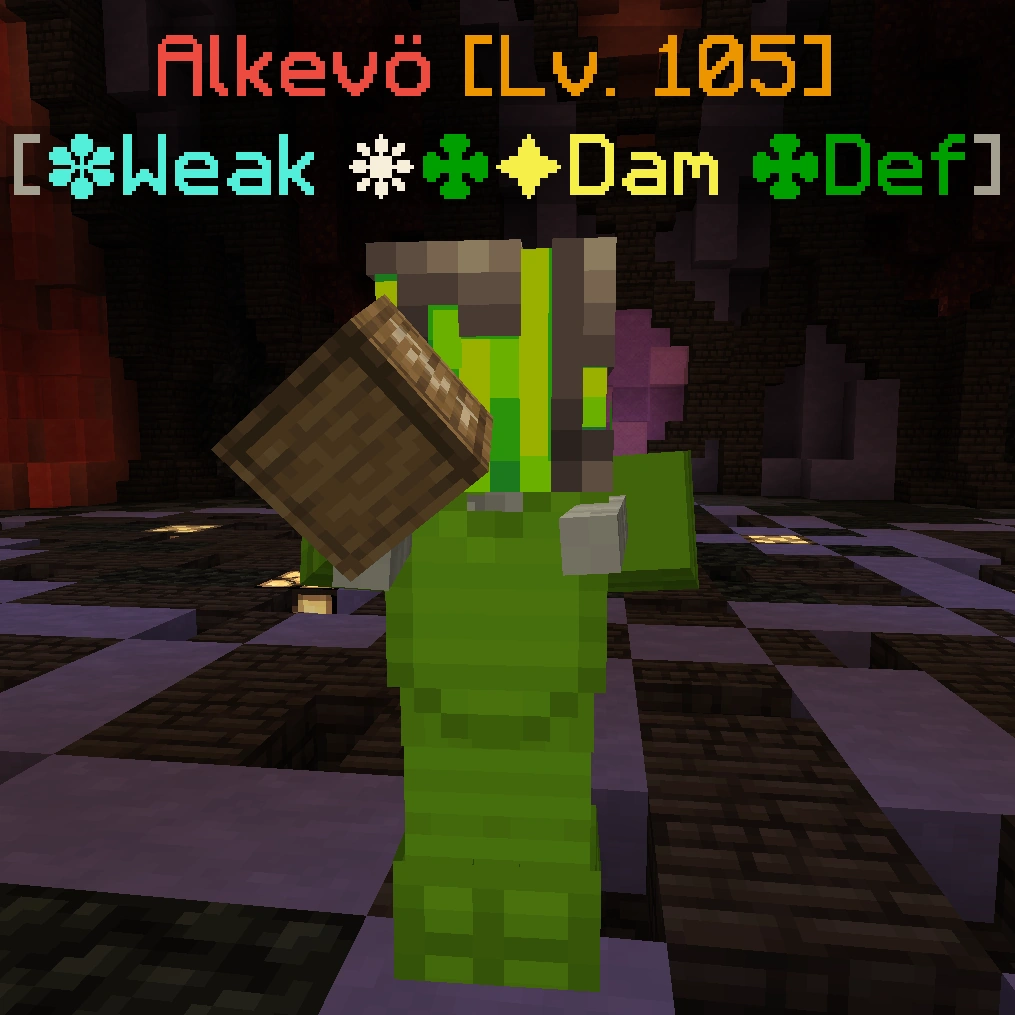
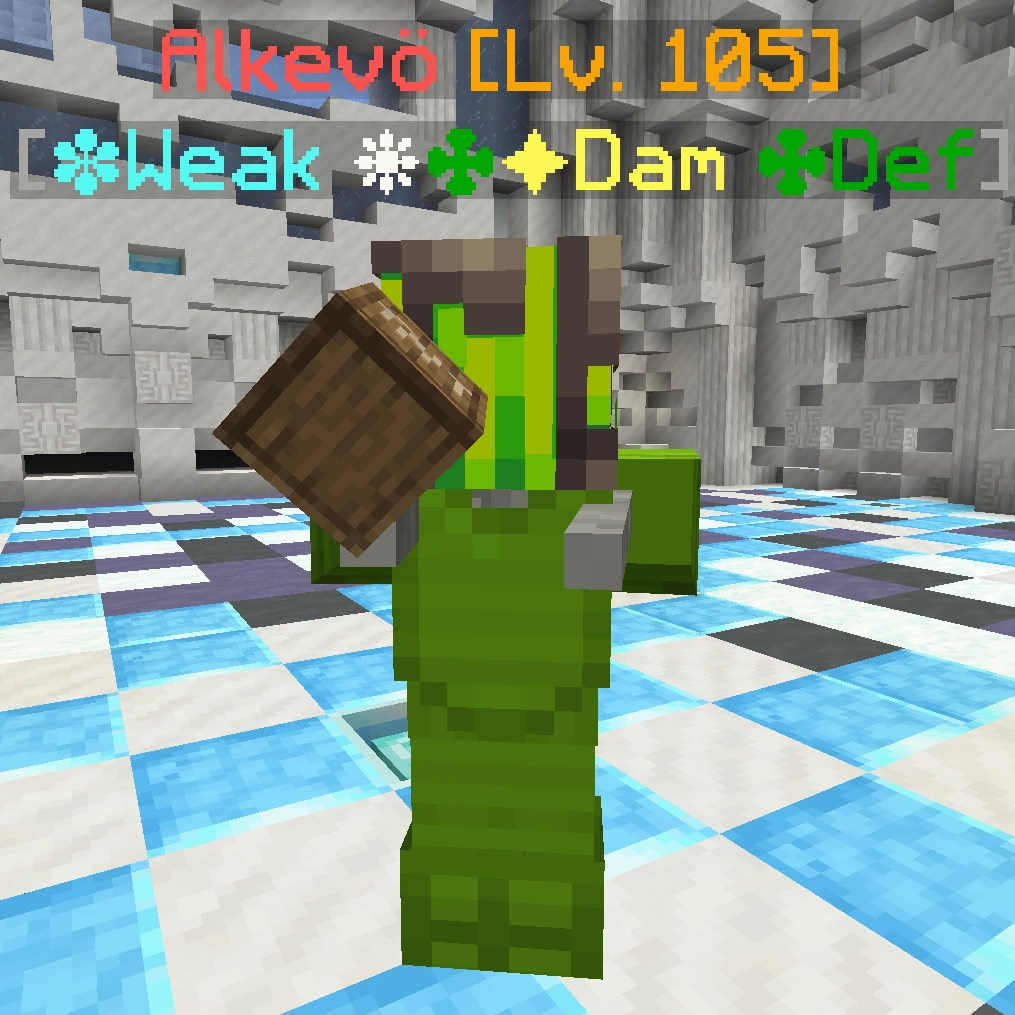
Alkevö | 105 | 120000 | Melee | Self-Destruct | ❉ Weak ❋ ✤ ✦ Dam ✤ Def |
Crystal Shard | Tower of Ascension |
| Image | Name | Level | Health | AI Type | Abilities | Elemental Stats | Drops | Location |
|---|---|---|---|---|---|---|---|---|
|
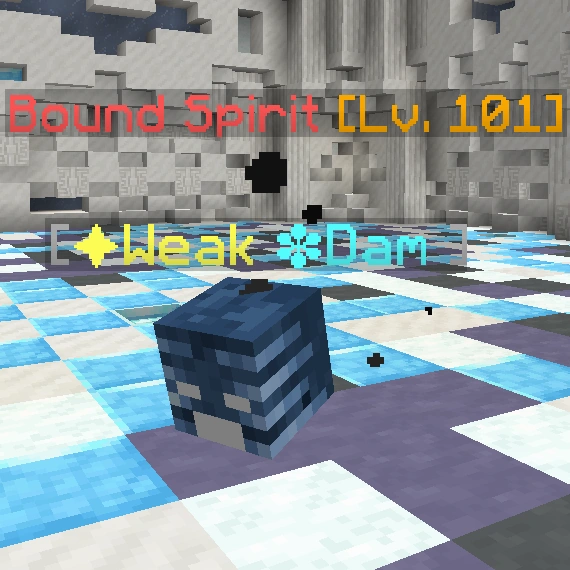
Bound Spirit | 101 | 11675 | Melee | - | ✦ Weak ❉ Dam |
Mist Shard | Tower of Ascension |
|
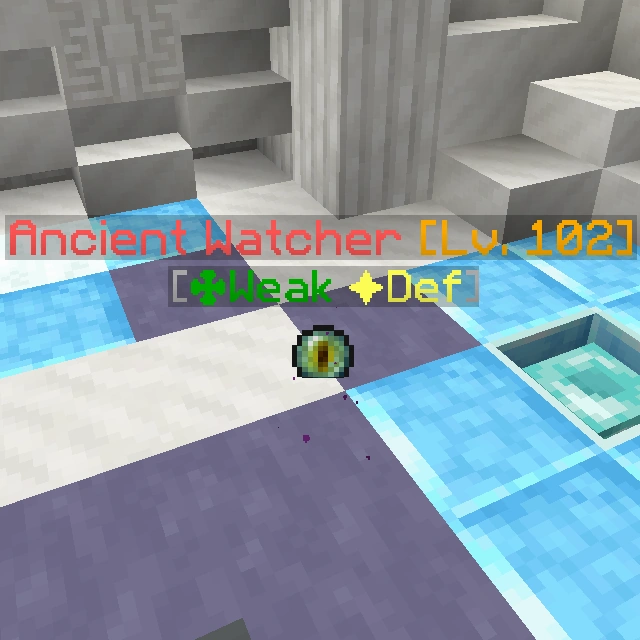
Ancient Watcher | 102 | 12000 | Melee | Charge | ✤ Weak ✦ Def |
Runic Shard | Tower of Ascension |
|
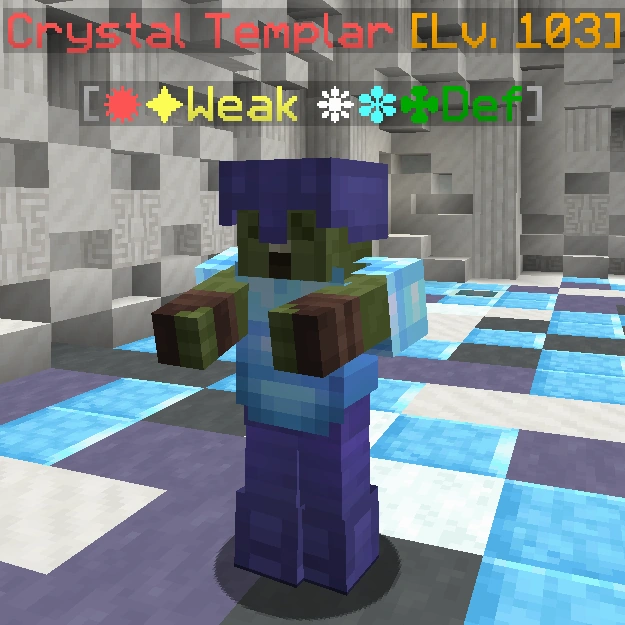
Crystal Templar | 103 | 12400 | Melee | - | ✹ ✦ Weak ❋ ❉ ✤ Def |
Spellbound Shard | Tower of Ascension |
|
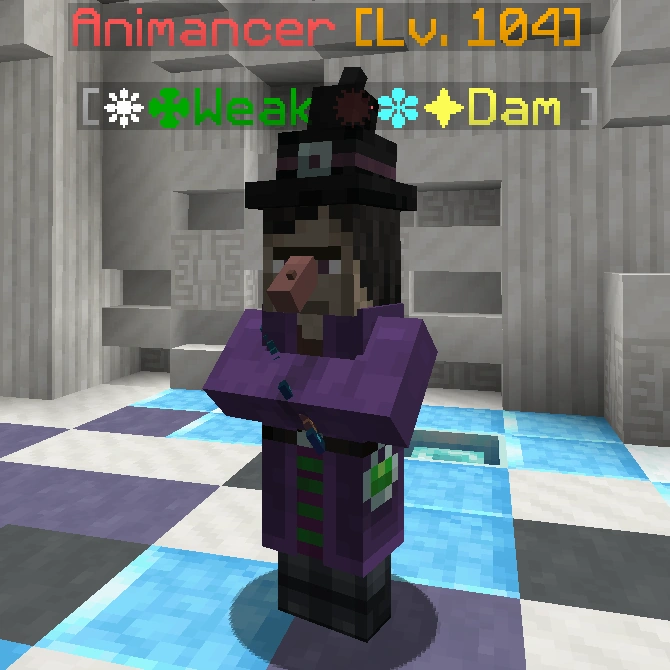
Animancer | 104 | 12775 | Ranged | Heal | ❋ ✤ Weak ❉ ✦ Dam |
Spirit Shard | Tower of Ascension |

|
Fragmented Soul | 105 | 13125 | Melee | Charge | ❋ ❉ ✦ Weak | Starry Shard | Tower of Ascension |
|
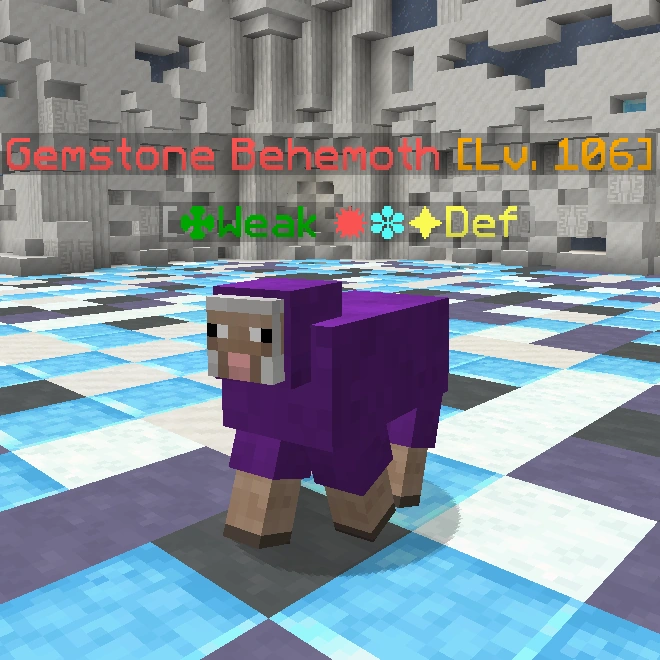
Gemstone Behemoth | 106 | 13525 | Ranged | - | ✤ Weak ✹ ❉ ✦ Def |
Diamond Shard | Tower of Ascension |
|
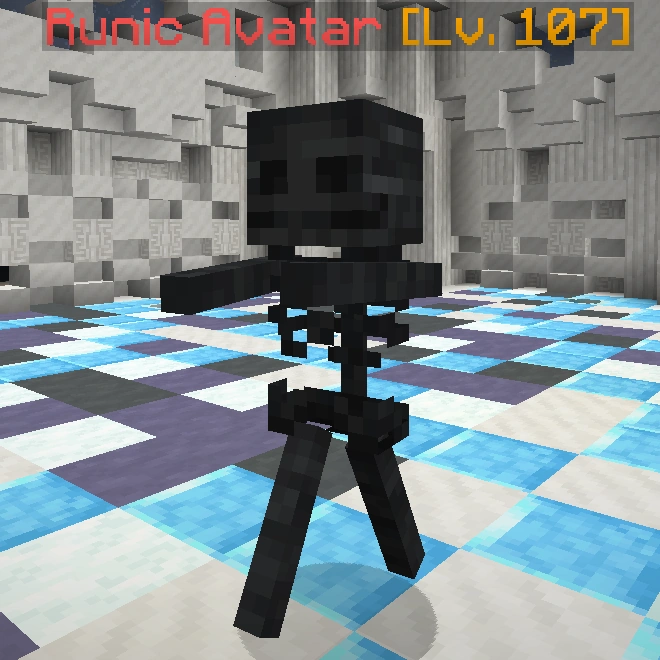
Runic Avatar | 107 | 13925 | Melee | Vanish | - | Void Shard | Tower of Ascension |
|
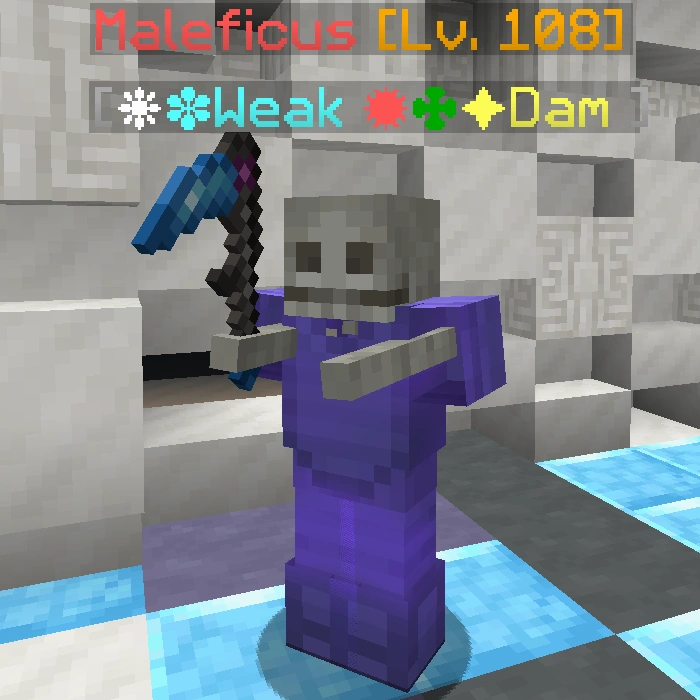
Maleficus | 108 | 14325 | Ranged | - | ❋ ❉ Weak ✹ ✤ ✦ Dam |
Sky Shard | Tower of Ascension |
|
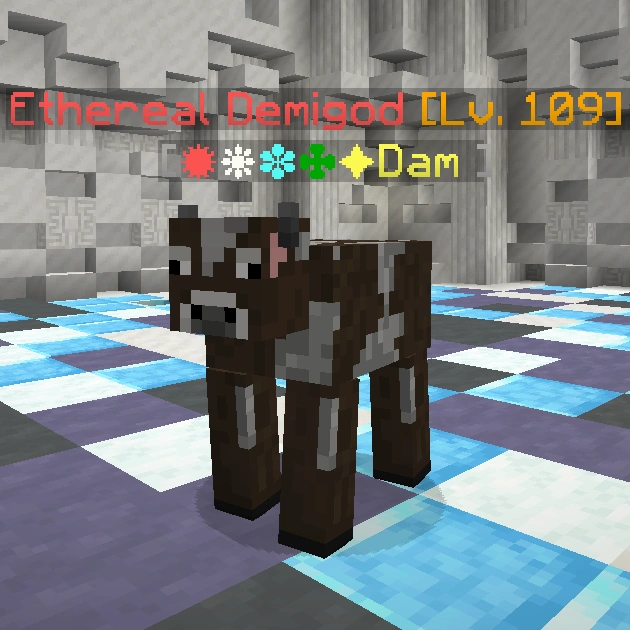
Ethereal Demigod | 109 | 35350 | Melee | Multihit | ✹ ❋ ❉ ✤ ✦ Dam | Cosmic Shard | Tower of Ascension |
|
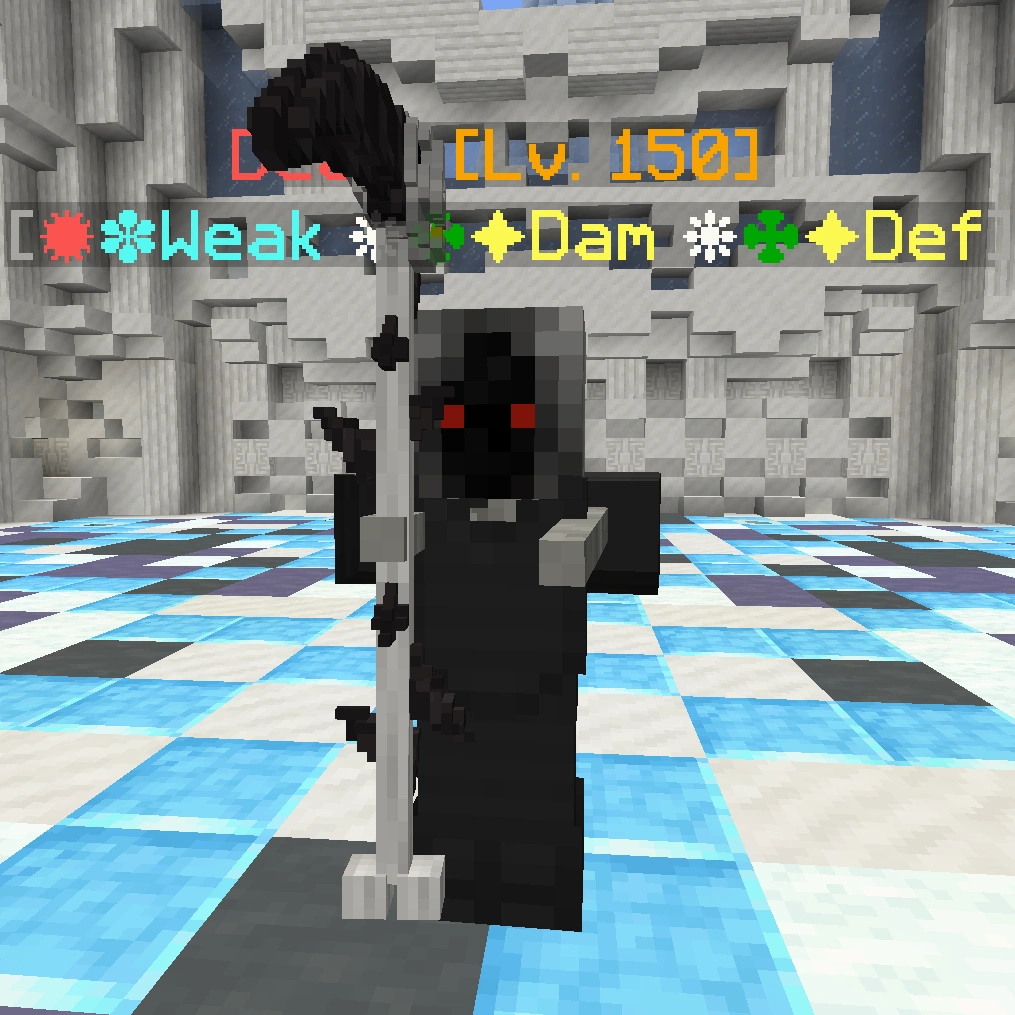
Death | 150 | 500000 | Ranged | Multihit, Summon ToA bosses | ✹ ❉ Weak ❋ ✤ ✦ Dam ❋ ✤ ✦ Def |
Crystal Shard | Tower of Ascension |
|
Snow Bear | 55 | 18500 | Ranged | Slowness | ✦ Weak ❋ ❉ Dam ❋ ❉ Def |
Crystal Shard | Tower of Ascension |
|
Argaddon | 65 | 30000 | Melee | Meteor | ❋ ❉ Weak ✹ ✤ Dam ✹ ✤ ✦ Def |
Crystal Shard | Tower of Ascension |
|
Witch-Doctor | 75 | 54,000 | Ranged | Weakness II | ❋ Weak ✤ ✦ Dam ✤ Def |
Crystal Shard | Tower of Ascension |
|
Guardian | 85 | 128000 | Melee | Charge | ✦ Weak ❉ Dam ✹ ❉ Def |
Crystal Shard | Tower of Ascension |
|
Chained Beast | 95 | 100000 | Melee | Charge | ❋ Weak | Crystal Shard | Tower of Ascension |
|
Alkevö | 105 | 120000 | Melee | Self-Destruct | ❉ Weak ❋ ✤ ✦ Dam ✤ Def |
Crystal Shard | Tower of Ascension |
Tips[]
- The XP reward of the Tower of Ascension quest scales with your level and is supposed to be finished at around level 70-75. You will get significantly less XP if you finish it at level 40.
- Floors 1's Boss, Snow Bear, is extremely easy. Simply corner it and spam.
- Floor 2's boss, Argaddon, is almost just as weak, except that it has a massive amount of Health, unlike Snow Bear. Be more cautious and try to deal as much damage as possible. If you are a level 45, you should try to do Sunrise Canyon until you get a Deadeye to easily beat this boss and a few of the bosses to come.
- Floor 3's boss, Witch Doctor, is a little harder than the two previous bosses. Try to avoid its hits before closing in for damage.
- Floor 4's boss, Guardian, is a boss who has good Charge. This means you should strafe around when Guardian has their white particles up. If you are at least level 60, it is recommended you use Dragon's Eye Bracelet, regardless of class.
- Floor 5's boss, Chained Beast, is perhaps one of the hardest bosses in the Tower of Ascension. Its charge ability can one-shot the unwary, and is surprisingly accurate. You should run away when you see the white particles. If you are over level 65, you should use Ultramarine Set with Millenium chestplate. You should get 105 Intelligence if you're any class but Shaman, but if you're Shaman you could keep 94 intelligence. All of your remaining skill points should go into defense.
- There are cobwebs in the boss room, and some are on the floor. It is possible to knock the boss into the cobweb and then do ranged attacks before the boss charges again. This is possible with all classes, but ranged attacks (specifically from Archer) benefit the most from this strategy.
- Floor 6's boss, Alkevo, is a damage test. You have some time to kill them before they self-destructs.
- Floor 7's last normal enemy, Ethereal Demigod, uses an extremely strong Multihit. Watch out!
- Floor 7's boss, Death, is not that hard. Bring a good water weapon for maximum damage. If you wish to solo her, attack like crazy during the first stages of the battle to lower Death as much as possible before all the other bosses spawn. Snow Bear will spawn first, then Argaddon/Guardian, then Chained Beast/Witch Doctor/Alkevö will spawn, making the battle even harder. At level 75, you should use as your gear in order from helmet to necklace, Blue Mask/Adamantite/Crystal/Sodeta/Detective's Ring/Detective's Ring/Dragon's Eye Bracelet/Royal Stormy Amulet. If you can't afford another Detective's ring, you can put a random ring in that doesn't have any strength/dexterity requirements (if you're an Archer, make it doesn't have a Defense requirement). For your weapon, you should follow this: Mage - Ethereal, Shaman - Thousand Waves, Warrior = Virtue, Assassin = Amadeus, Archer = Maelstrom. For Archer, cycle Arrow Storm and Arrow Bomb; for Assassin, cycle Vanish Smoke Bomb Spin Multihit; for Warrior, cycle Uppercut Bash; for Shaman, cycle Aura Haul; for Mage, cycle Meteor Heal.
- Floor 4 and floor 5's boss, Guardian and Chained Beast, can be defeated through luring them into where you enter the room and getting the wall between you and the boss. This allows you to attack it through the wall without taking any damage yourself. The Assassin class is particularly well-suited to the tactic due to its ability to, after luring the boss into position, cast a vanish spell and quickly run behind the wall. Warriors can use uppercut to attack through the wall, Mages main attack, Assassins smoke bomb, Archers bomb arrow, and Shamans aura.
Trivia[]
- KEE-L Tron, the mob of Floor 5 Level 9, comes from a former Wynncraft builder called Kealtron.
- Death, the last boss of the tower, isn't the actual spirit of Death, but an impostor, according to Doctor Legendary and the real Death himself.
- Ankou is a reference to Ankou in Celtic folklore, who is Death's henchmen and collects souls on Death's behalf.
- This quest has a total of 79 stages, making it the longest quest in the game.
Bugs[]
- Though the Champion Armour set is received upon completion of the quest, the rewards display doesn't include it.